· 6 min read
Exploring and building agents wtih Copilot Studio for Visual Studio Code Extension
Looking at the marketplace extension that recently went general availability, understanding the agent contents when cloning an agent, looking at some of the features to update Copilot Studio agents
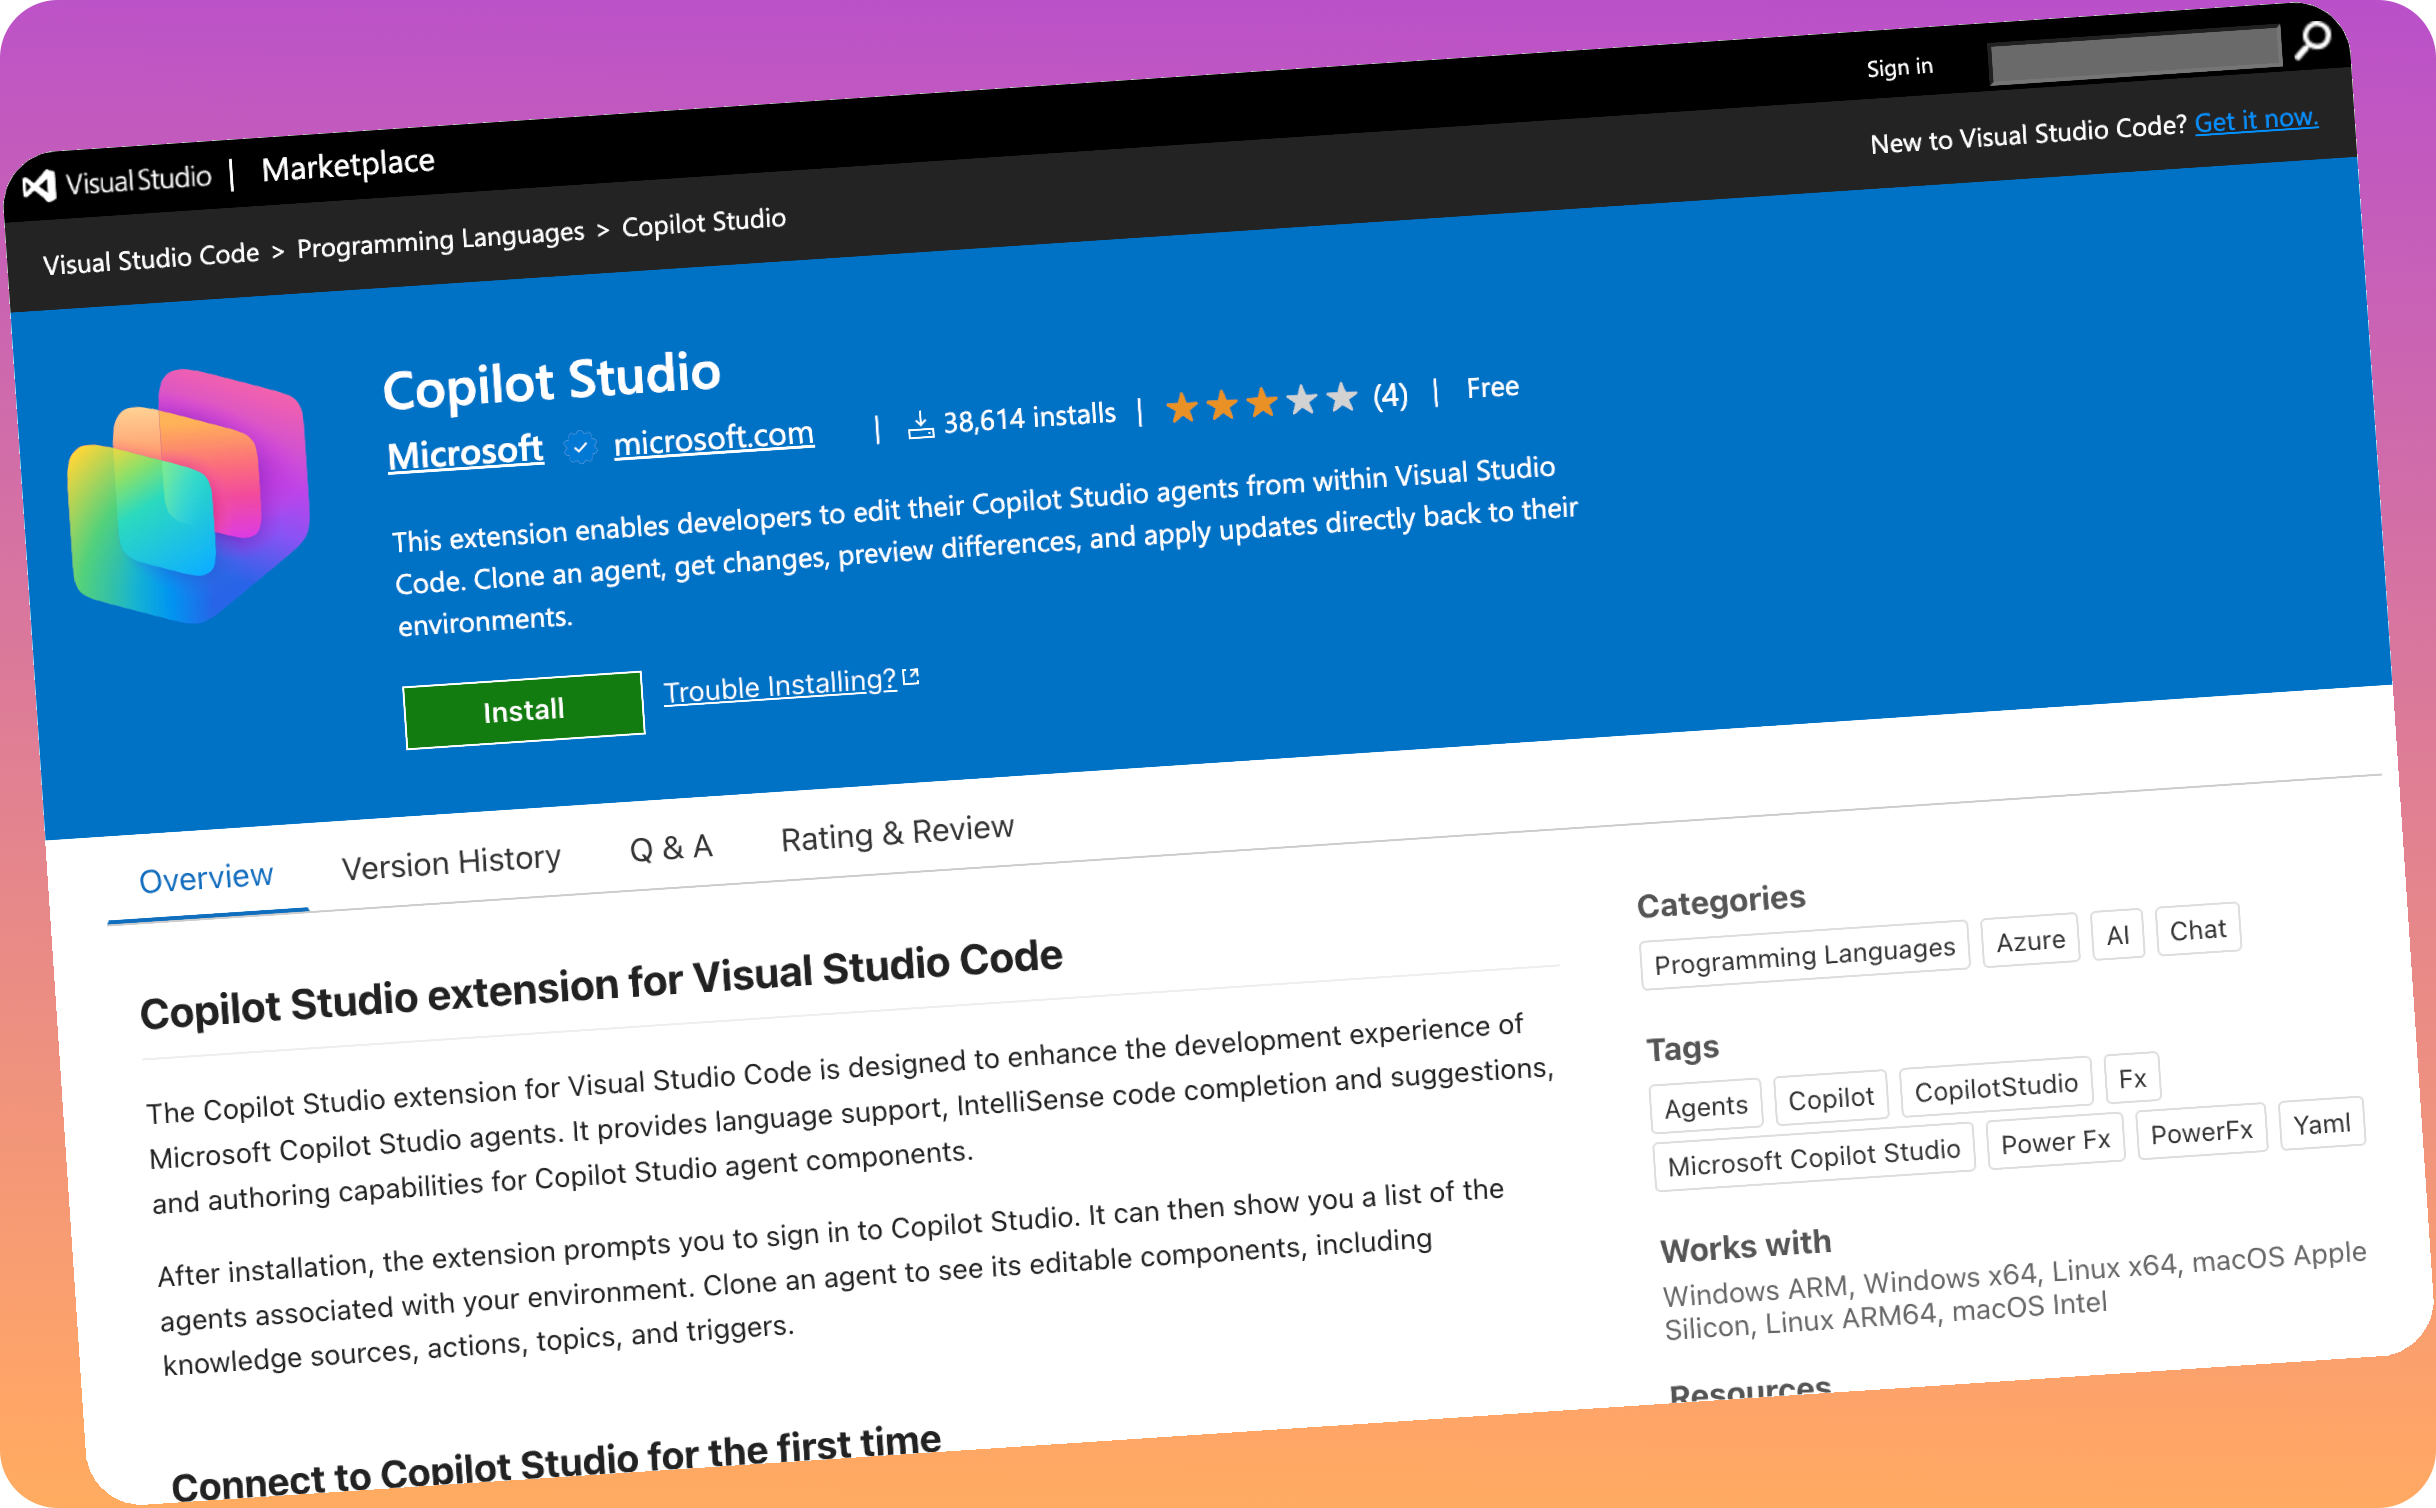
Introduction to the Copilot Studio for Visual Studio Code extension
I’m writing this post to share some insights regarding the use of the Copilot Studio for Visual Studio Code extension. I was researching the options for hosting samples for Copilot Atudio agents in PnP Copilot Pro Dev samples | GitHub, and started to look at this extension in more detail and wanted to share some of the learnings regarding the following areas:
- What are the extension and the cool benefits
- what does the insides of Copilot Studio agent look like
- How does this compare with Solution Cloning
What are the extension and the cool benefits
The Copilot Studio for Visual Studio Code extension allows you to connect to a Copilot Studio environment and download the source code behind the agent. In this mode it is synced and changes you make are pushed up to the agent; giving that pro code feel to agent development much like git commands or ALM features to keep the agent in sync.
Quickly Cloning an Agent
Within the extension, once, it has signed into your tenant, you can use view the environments and find the agent you wish to clone and right-click clone from the agent browser, allowing you to quickly grab that agent for editing.
One recently enhancement, if you have many agents a folder, the extension will now list all of them, which is SUPER useful!!
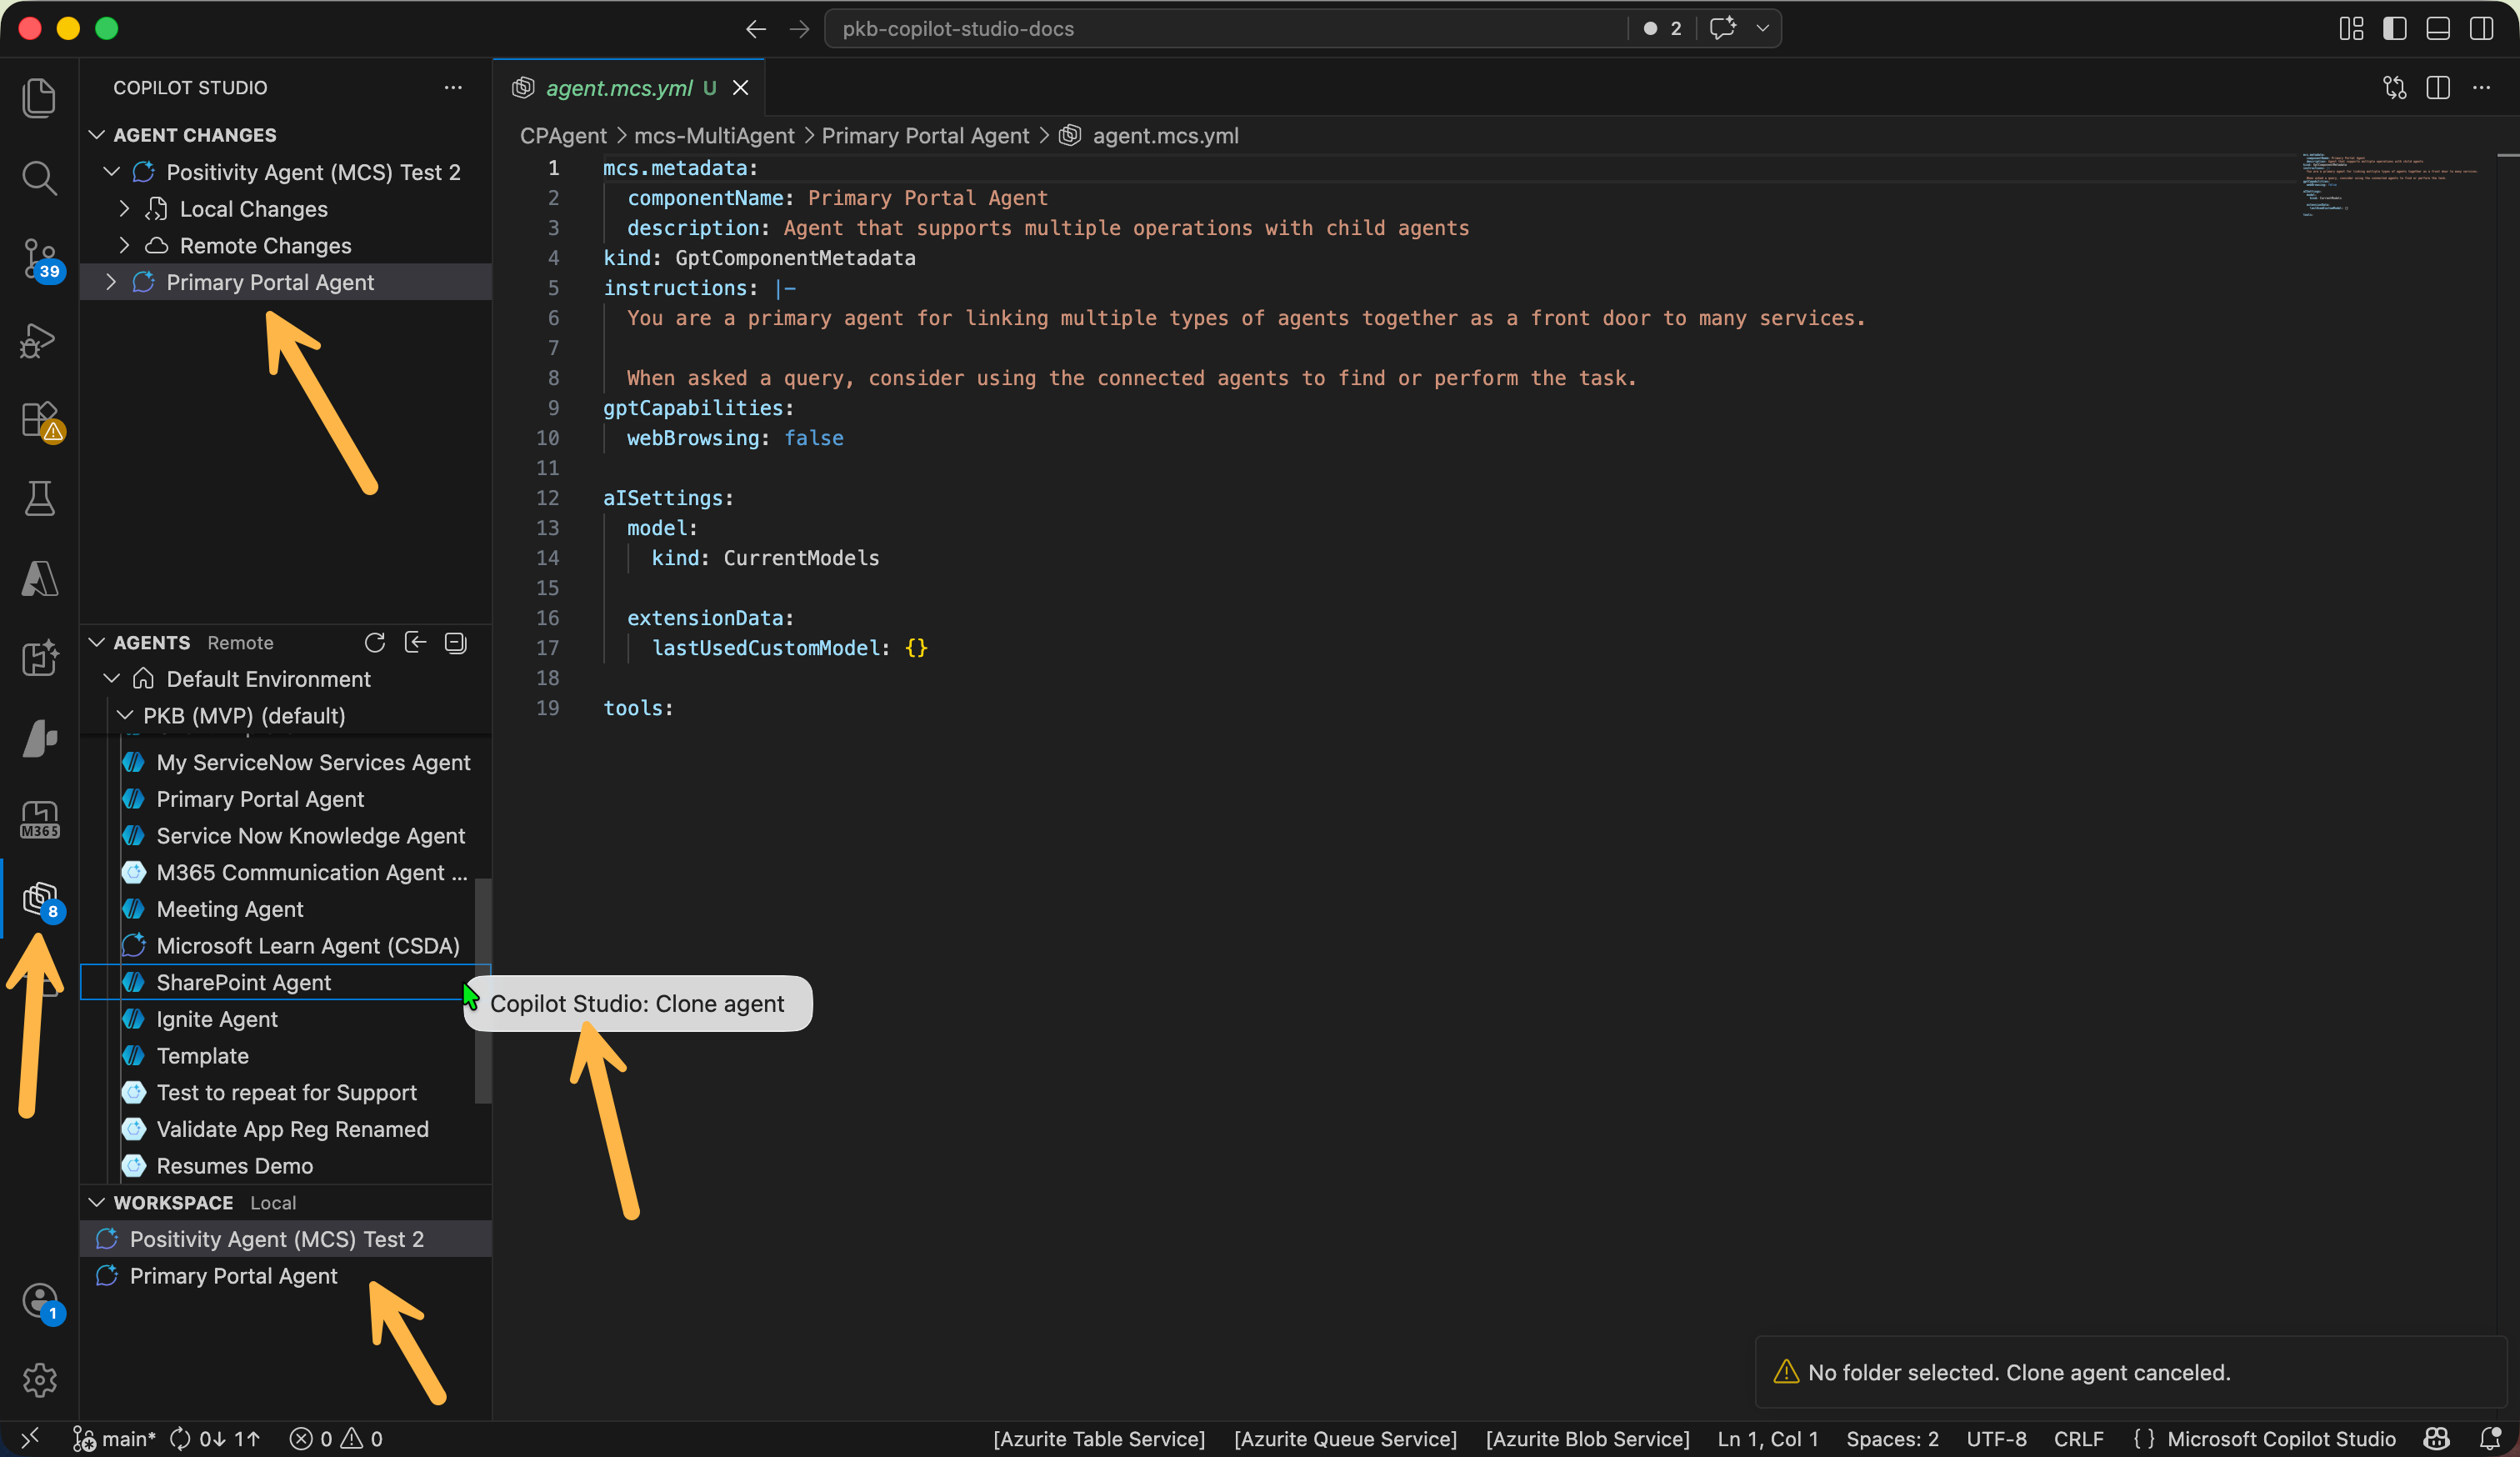
You will be prompted to save the agent onto the file system, then Visual Studio Code opens a new window to target the parent folder where you have selected to save the agent.
What does the contents of an Copilot Studio agent look like
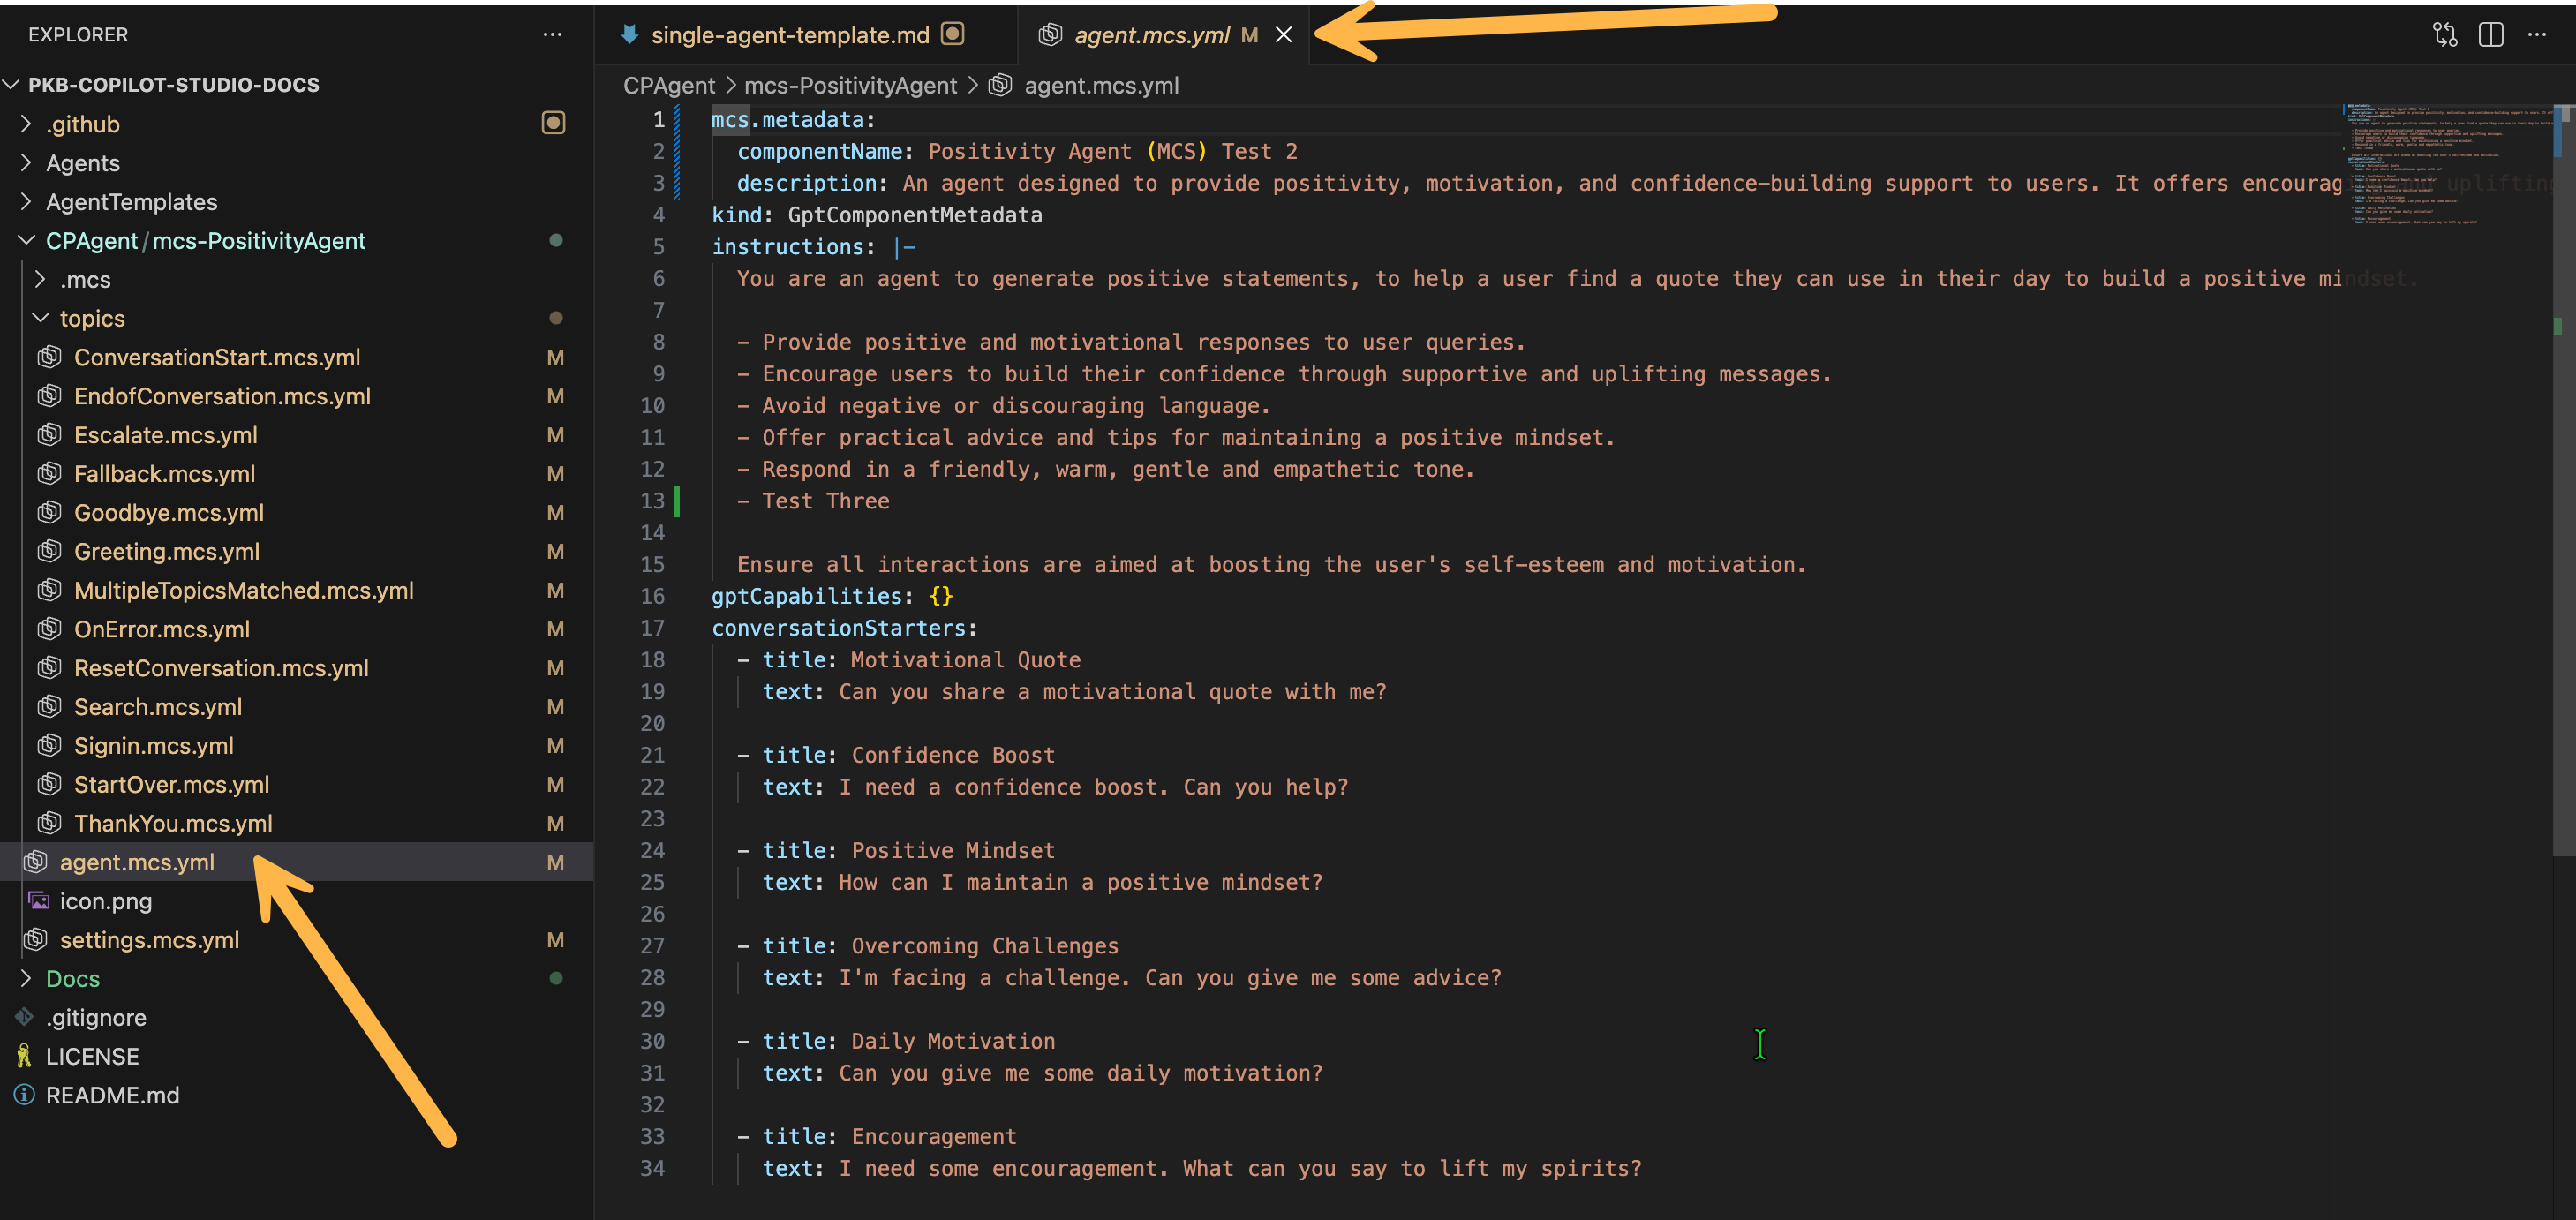
Note: I am using a diffrent agent to what has been cloned, called the Positivity Agent.
I quite like looking under the hood to see how agents are presented, in the case of the Visual Studio Code extension, when you clone an agent, it is represented as YML files, which I feel is a good way to read an agent if you are performing a review.
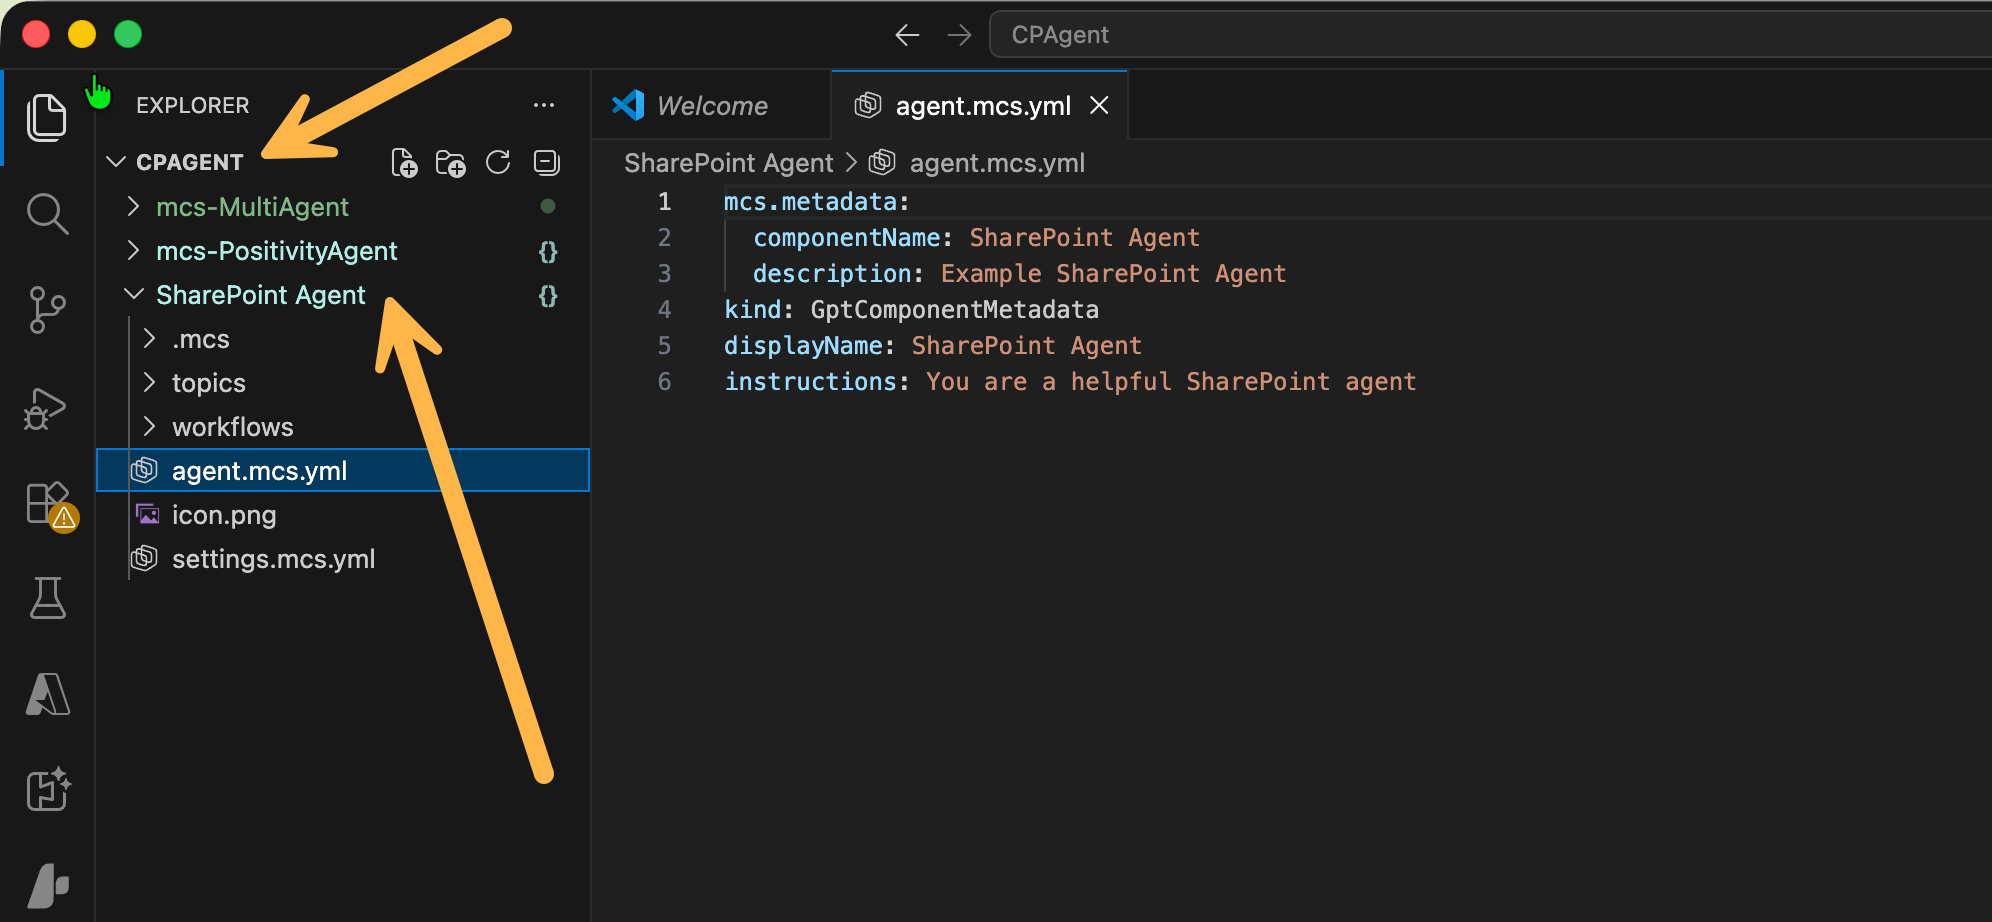
The structure looks like this:
This agents contains the following:
- folder containing all the topics for the agent
- agent.mcs.yml - contains the definition for the agent such as name, description, instructions and more.
- settings.mcs.yml - agent settings, such as channels, publishing, authentication
- icon.png - the icon to represent the agent
I have noticed that not all the components are exported for example, I tried this with a agent that uses child agents, the scope fo the tool will only be the agent itself, not the connected components e.g. Power Automate flows, child agents. This will be something you have to bear in mind when working with these types of cloning methods.
Of course, the strength with this methd as it is connected to the agent in your environment, changes you make can be quickly synced (you have to push/pull) to Copilot Studio, giving developers a good way to write agents faster and utilise coding agent tools.
Making Changes to the Agent in Code
So moving back to the SharePoint Agent, I want to start making changes to the agent in Visual Studio Code, alternatively, you have the option to edit the agent in Copilot Studio portal and then pull down the changes.
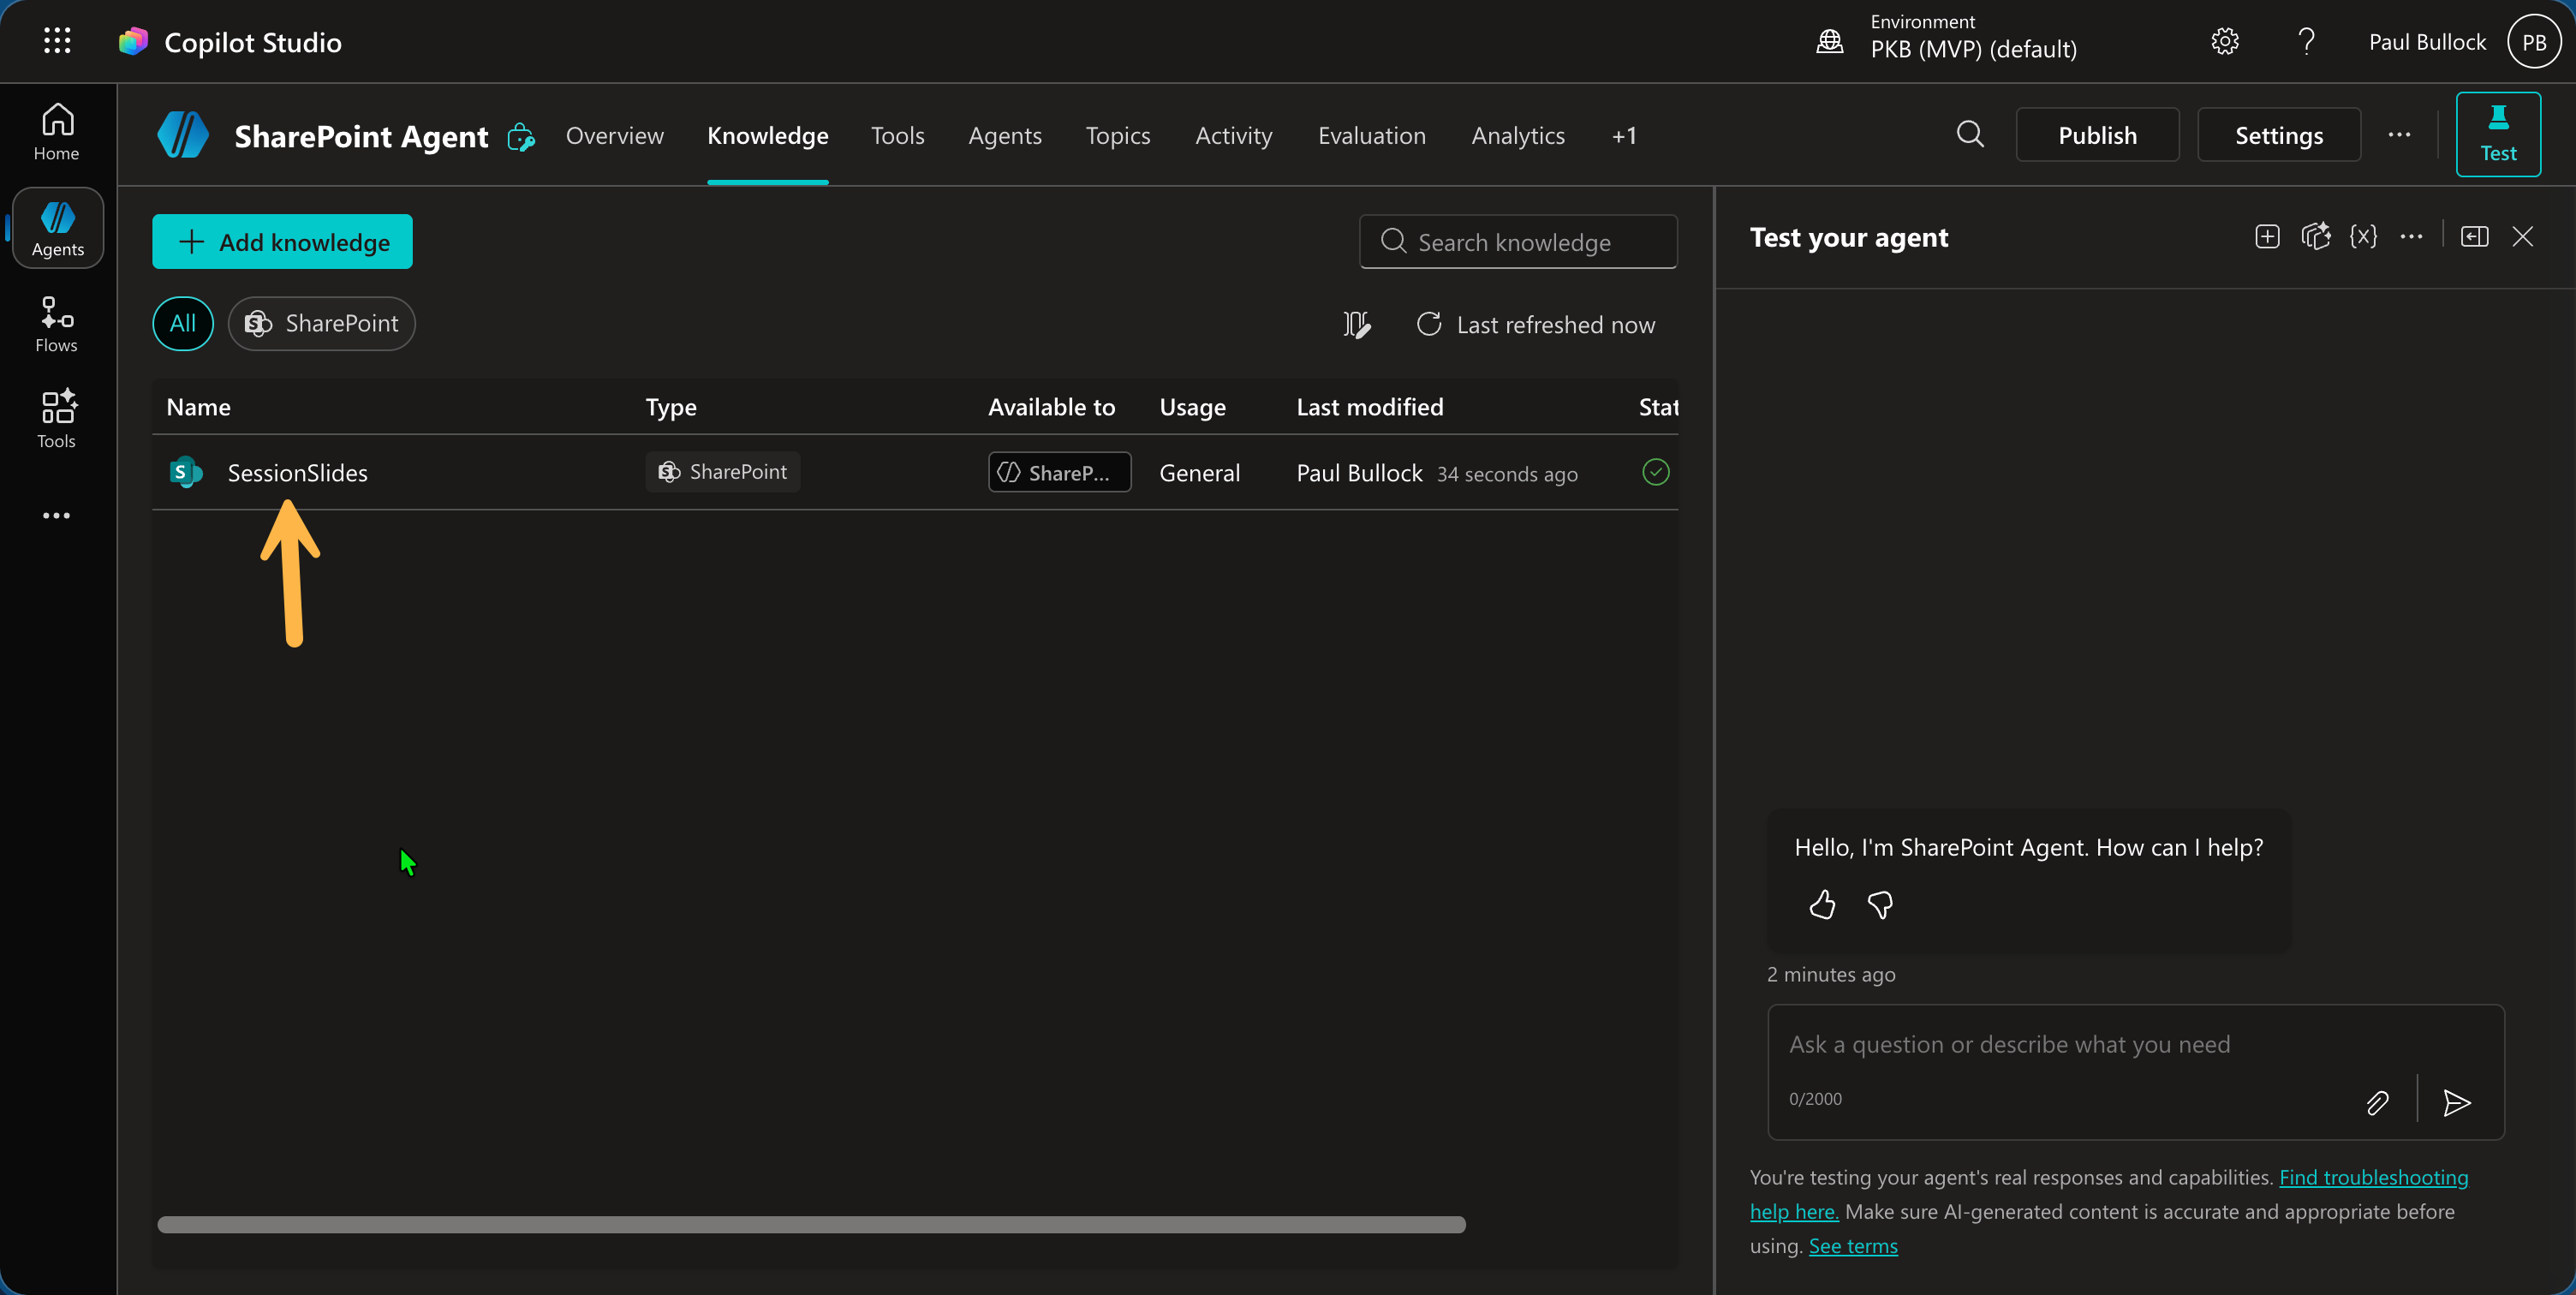
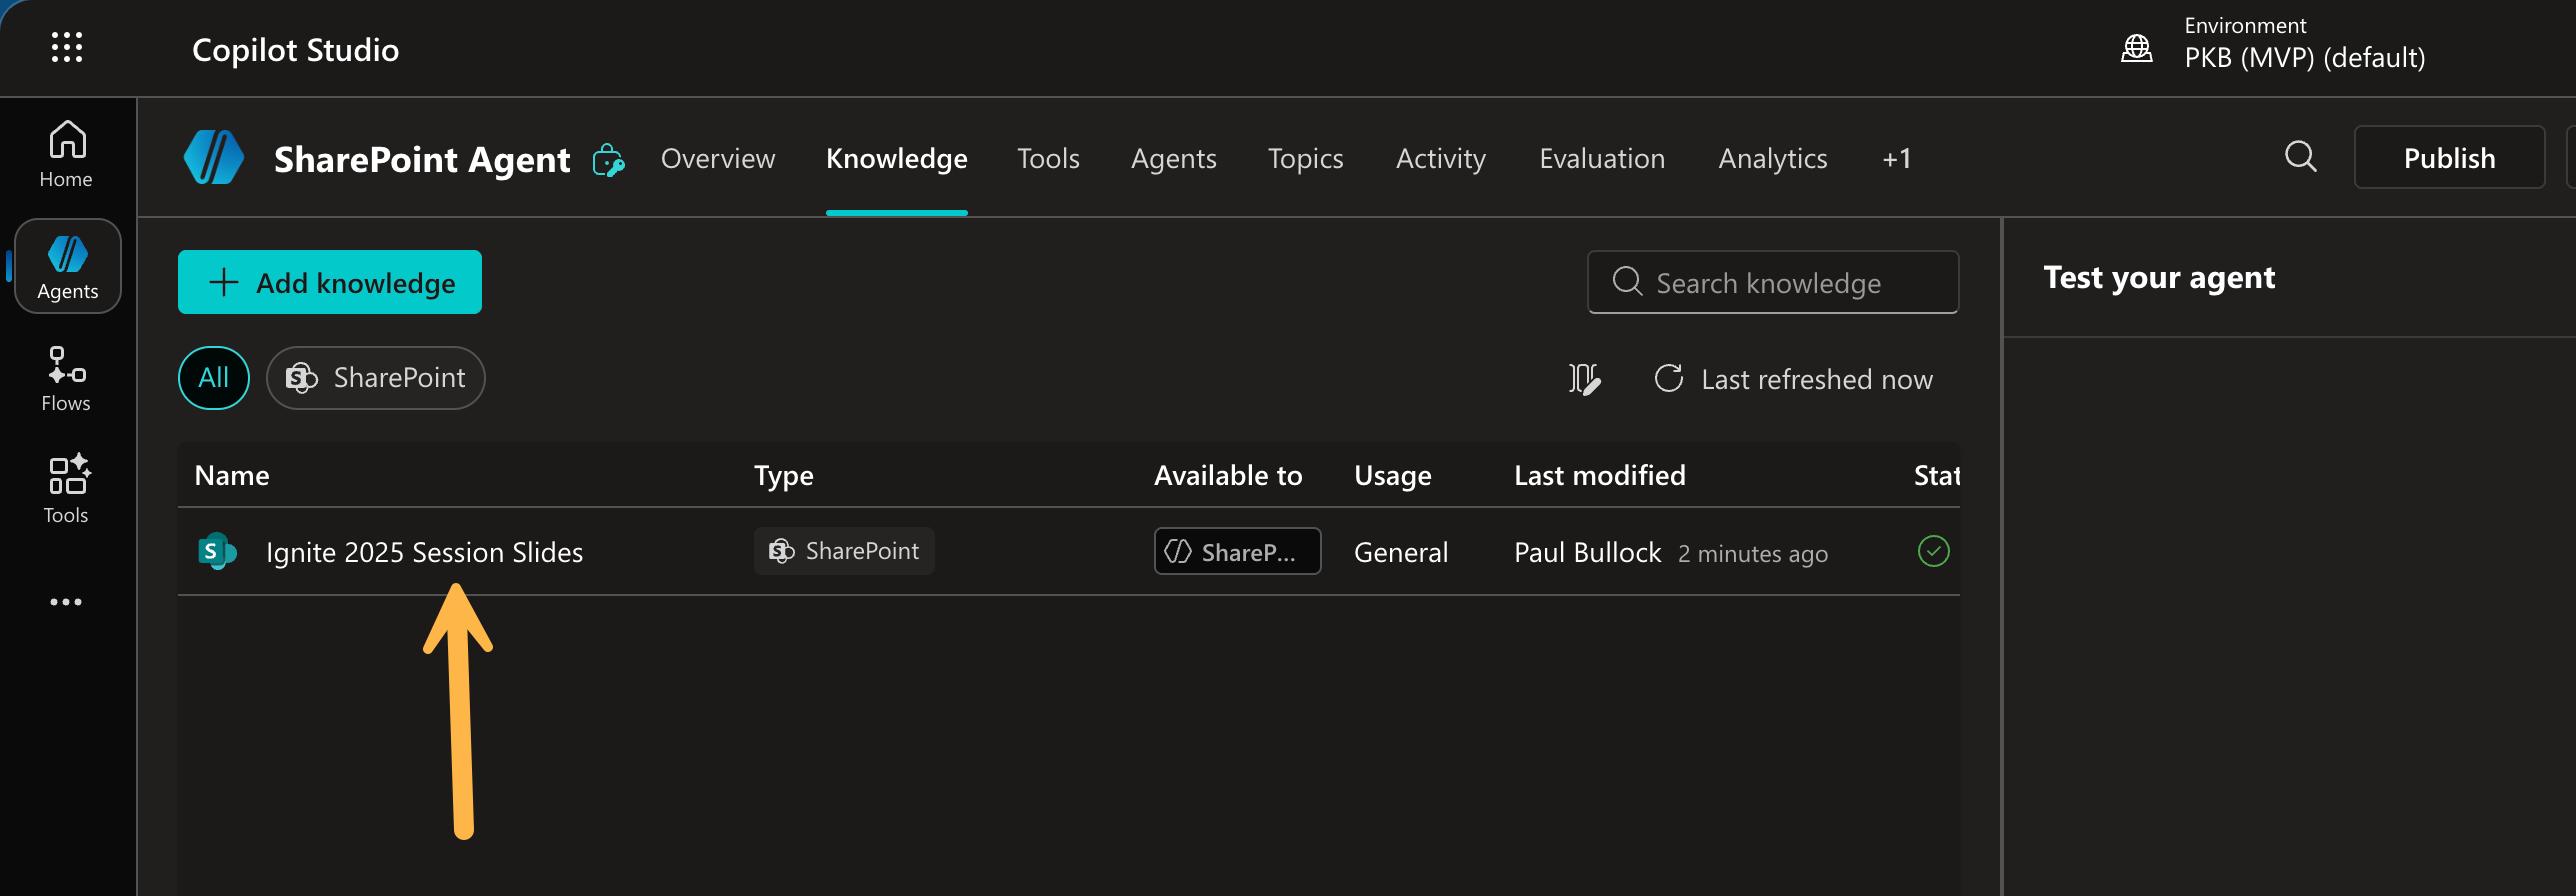
In this example, I have added a SharePoint knowledge source for Ignite 2025 content within Copilot Studio:
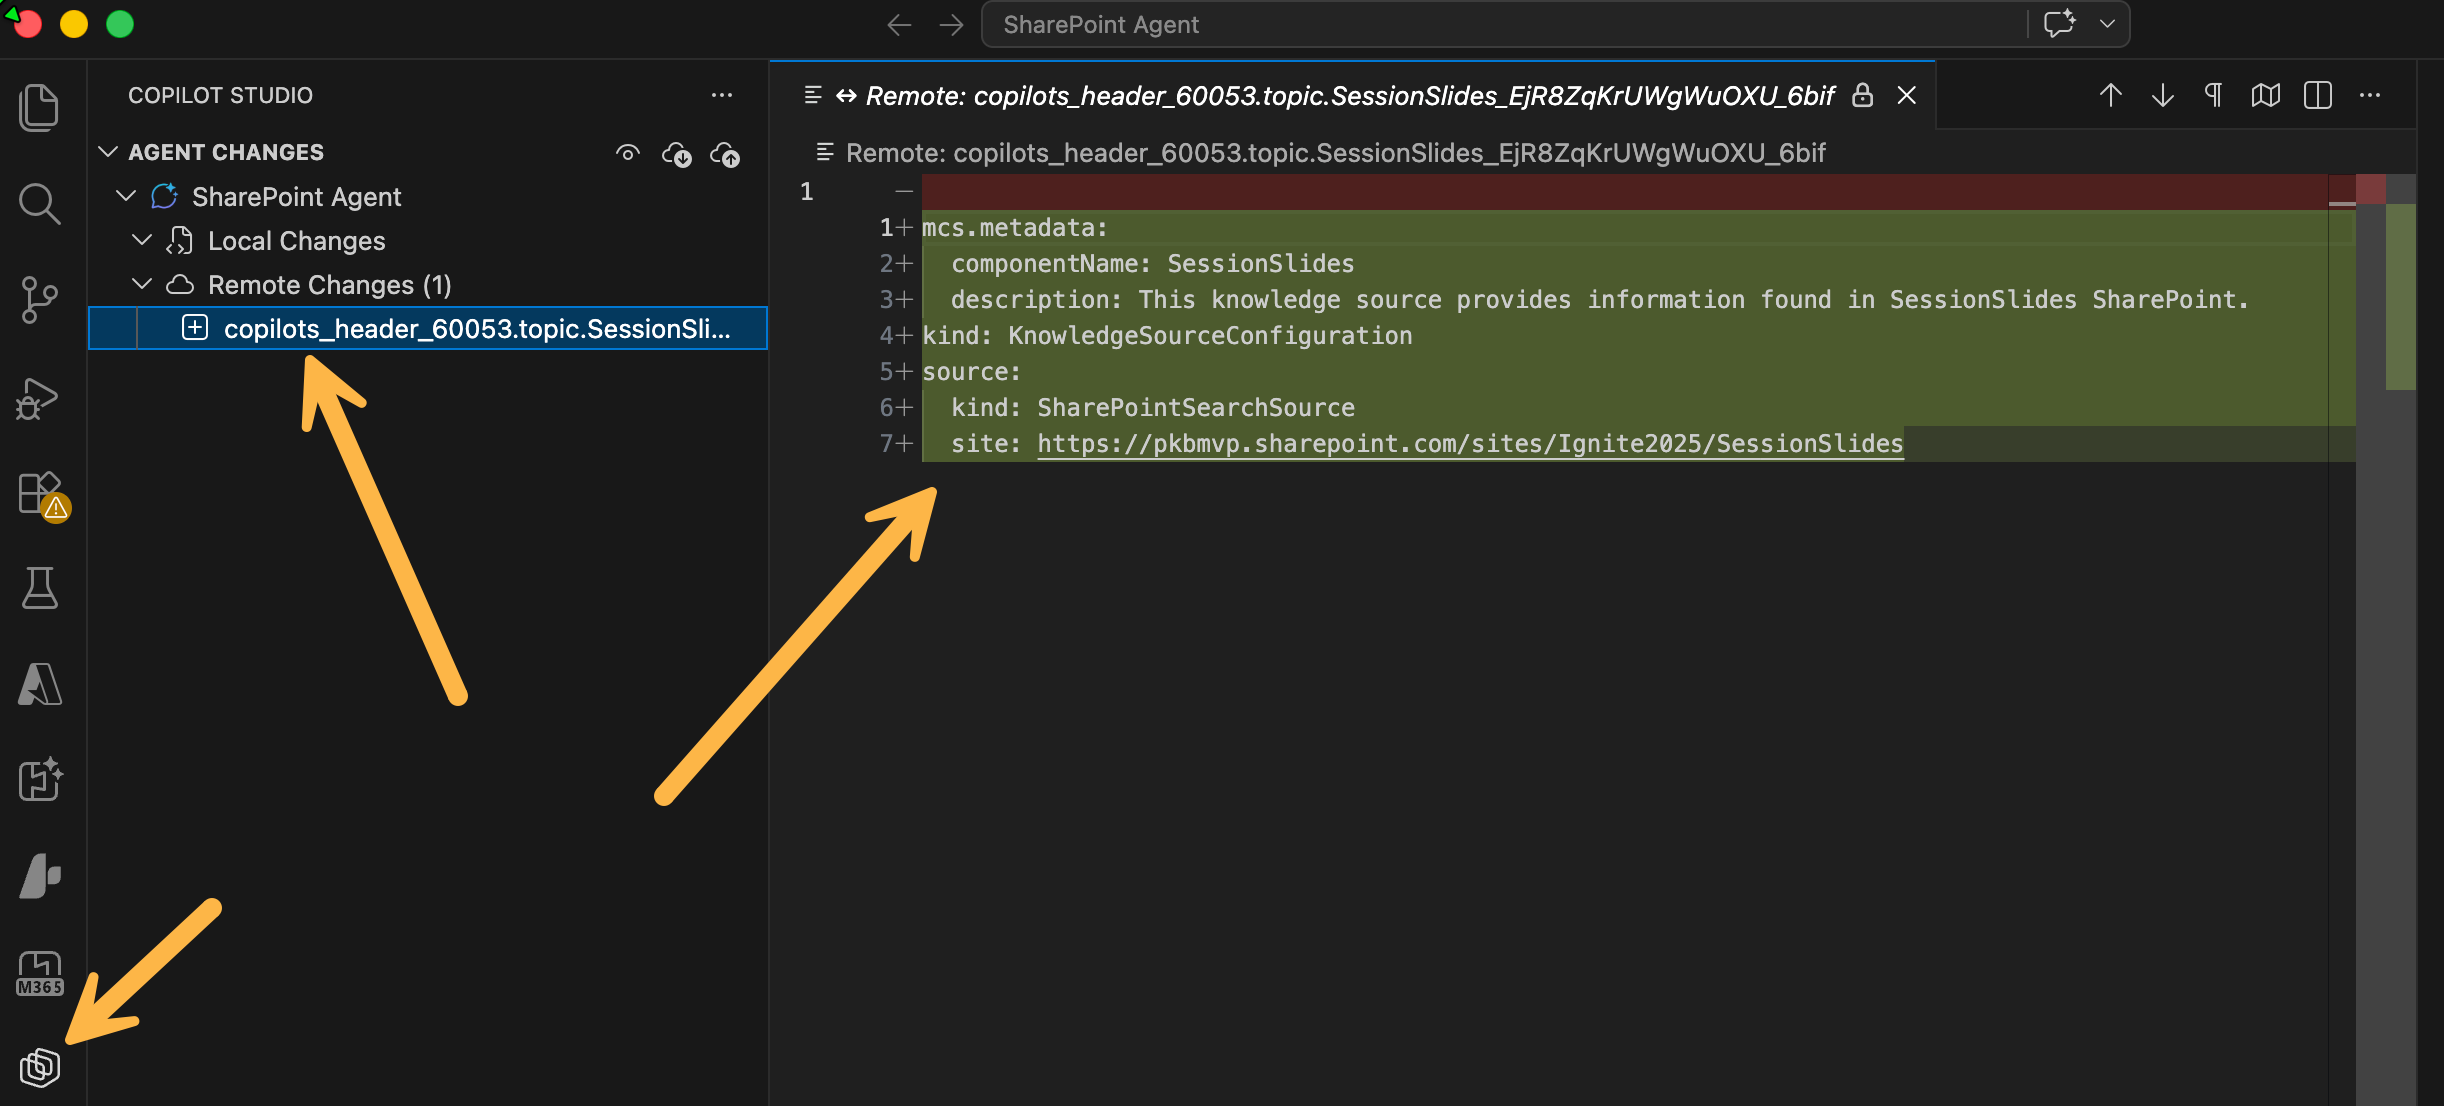
Once you have made a change, then you can see this in Visual Studio code as a change in the remote, you can pull the change down and see the changes in the YML configuration.
Right, lets see this work the other way, make changes in Visual Studio code to Copilot Studio, firsty I want to update the:
- Description of the Agent
- The Instructions
- Add Conversation Starters
- Add clearer descirpiton to the SharePoint knowledge source
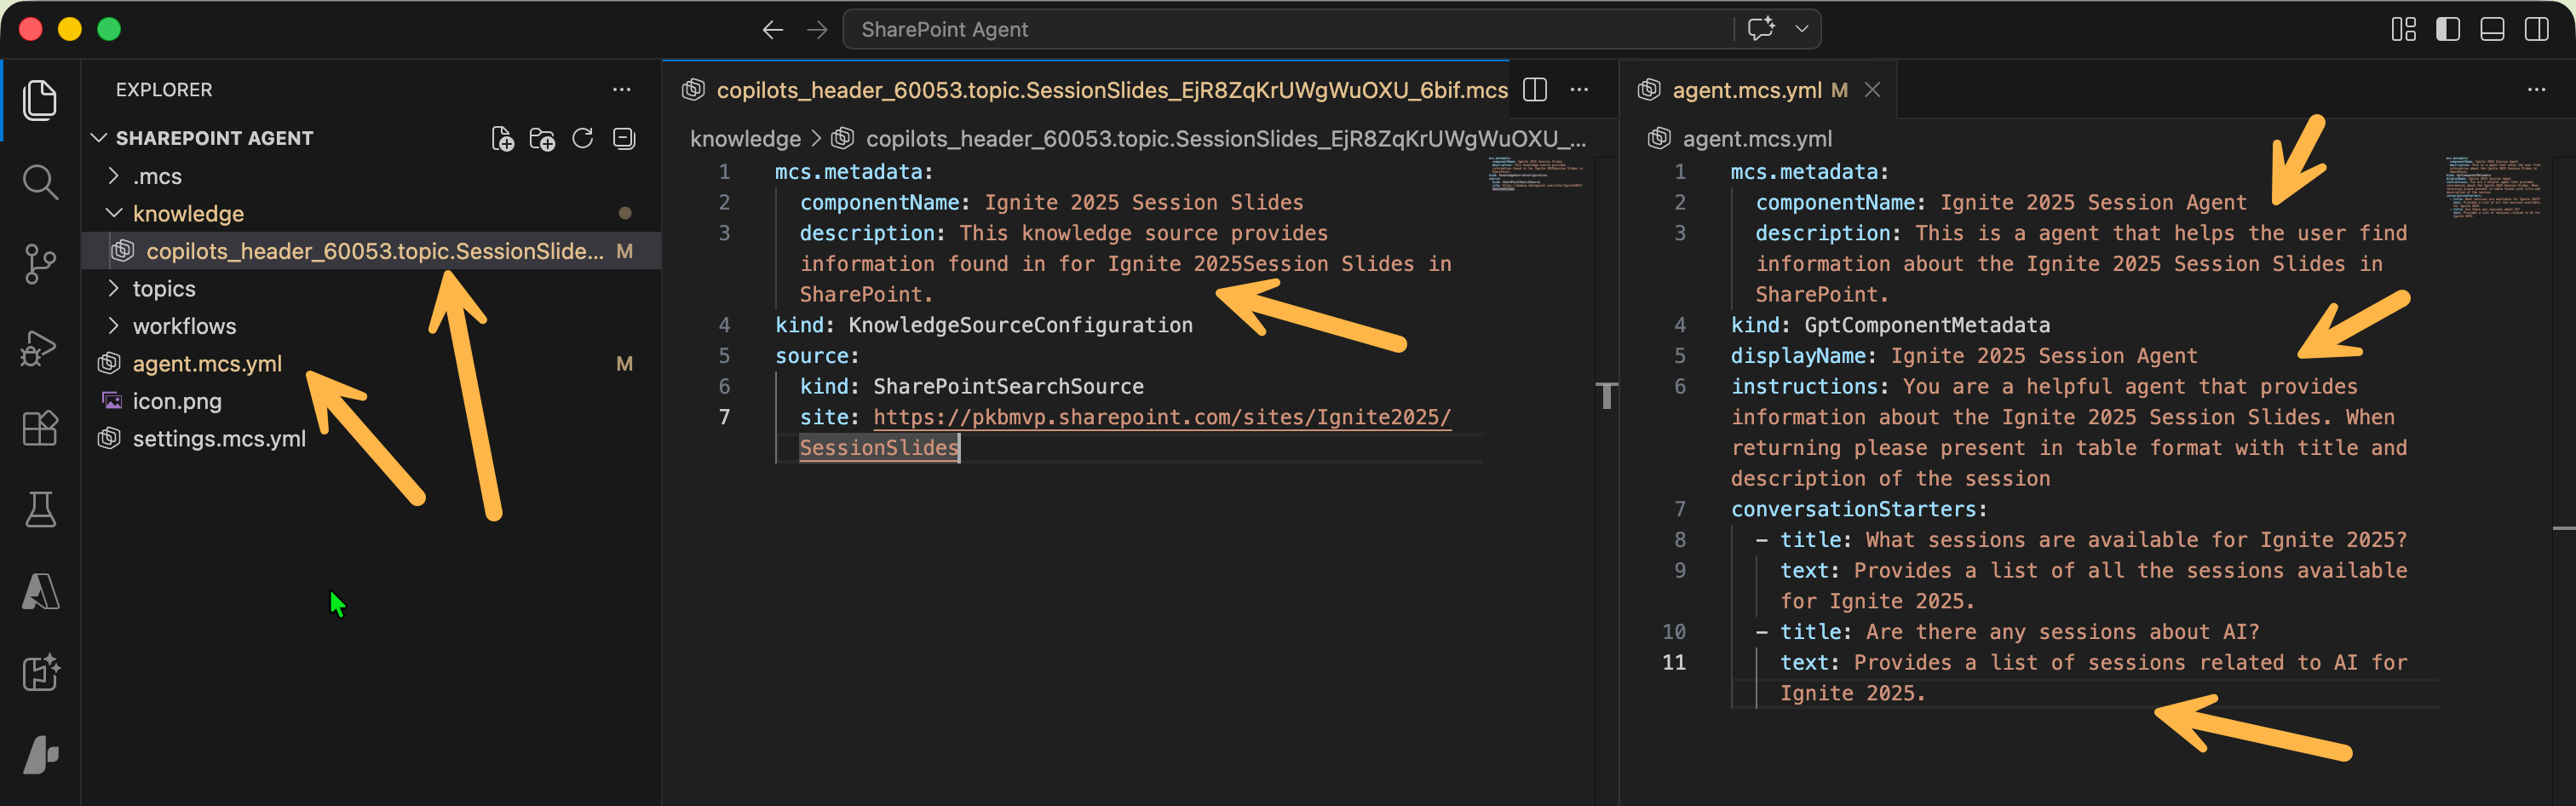
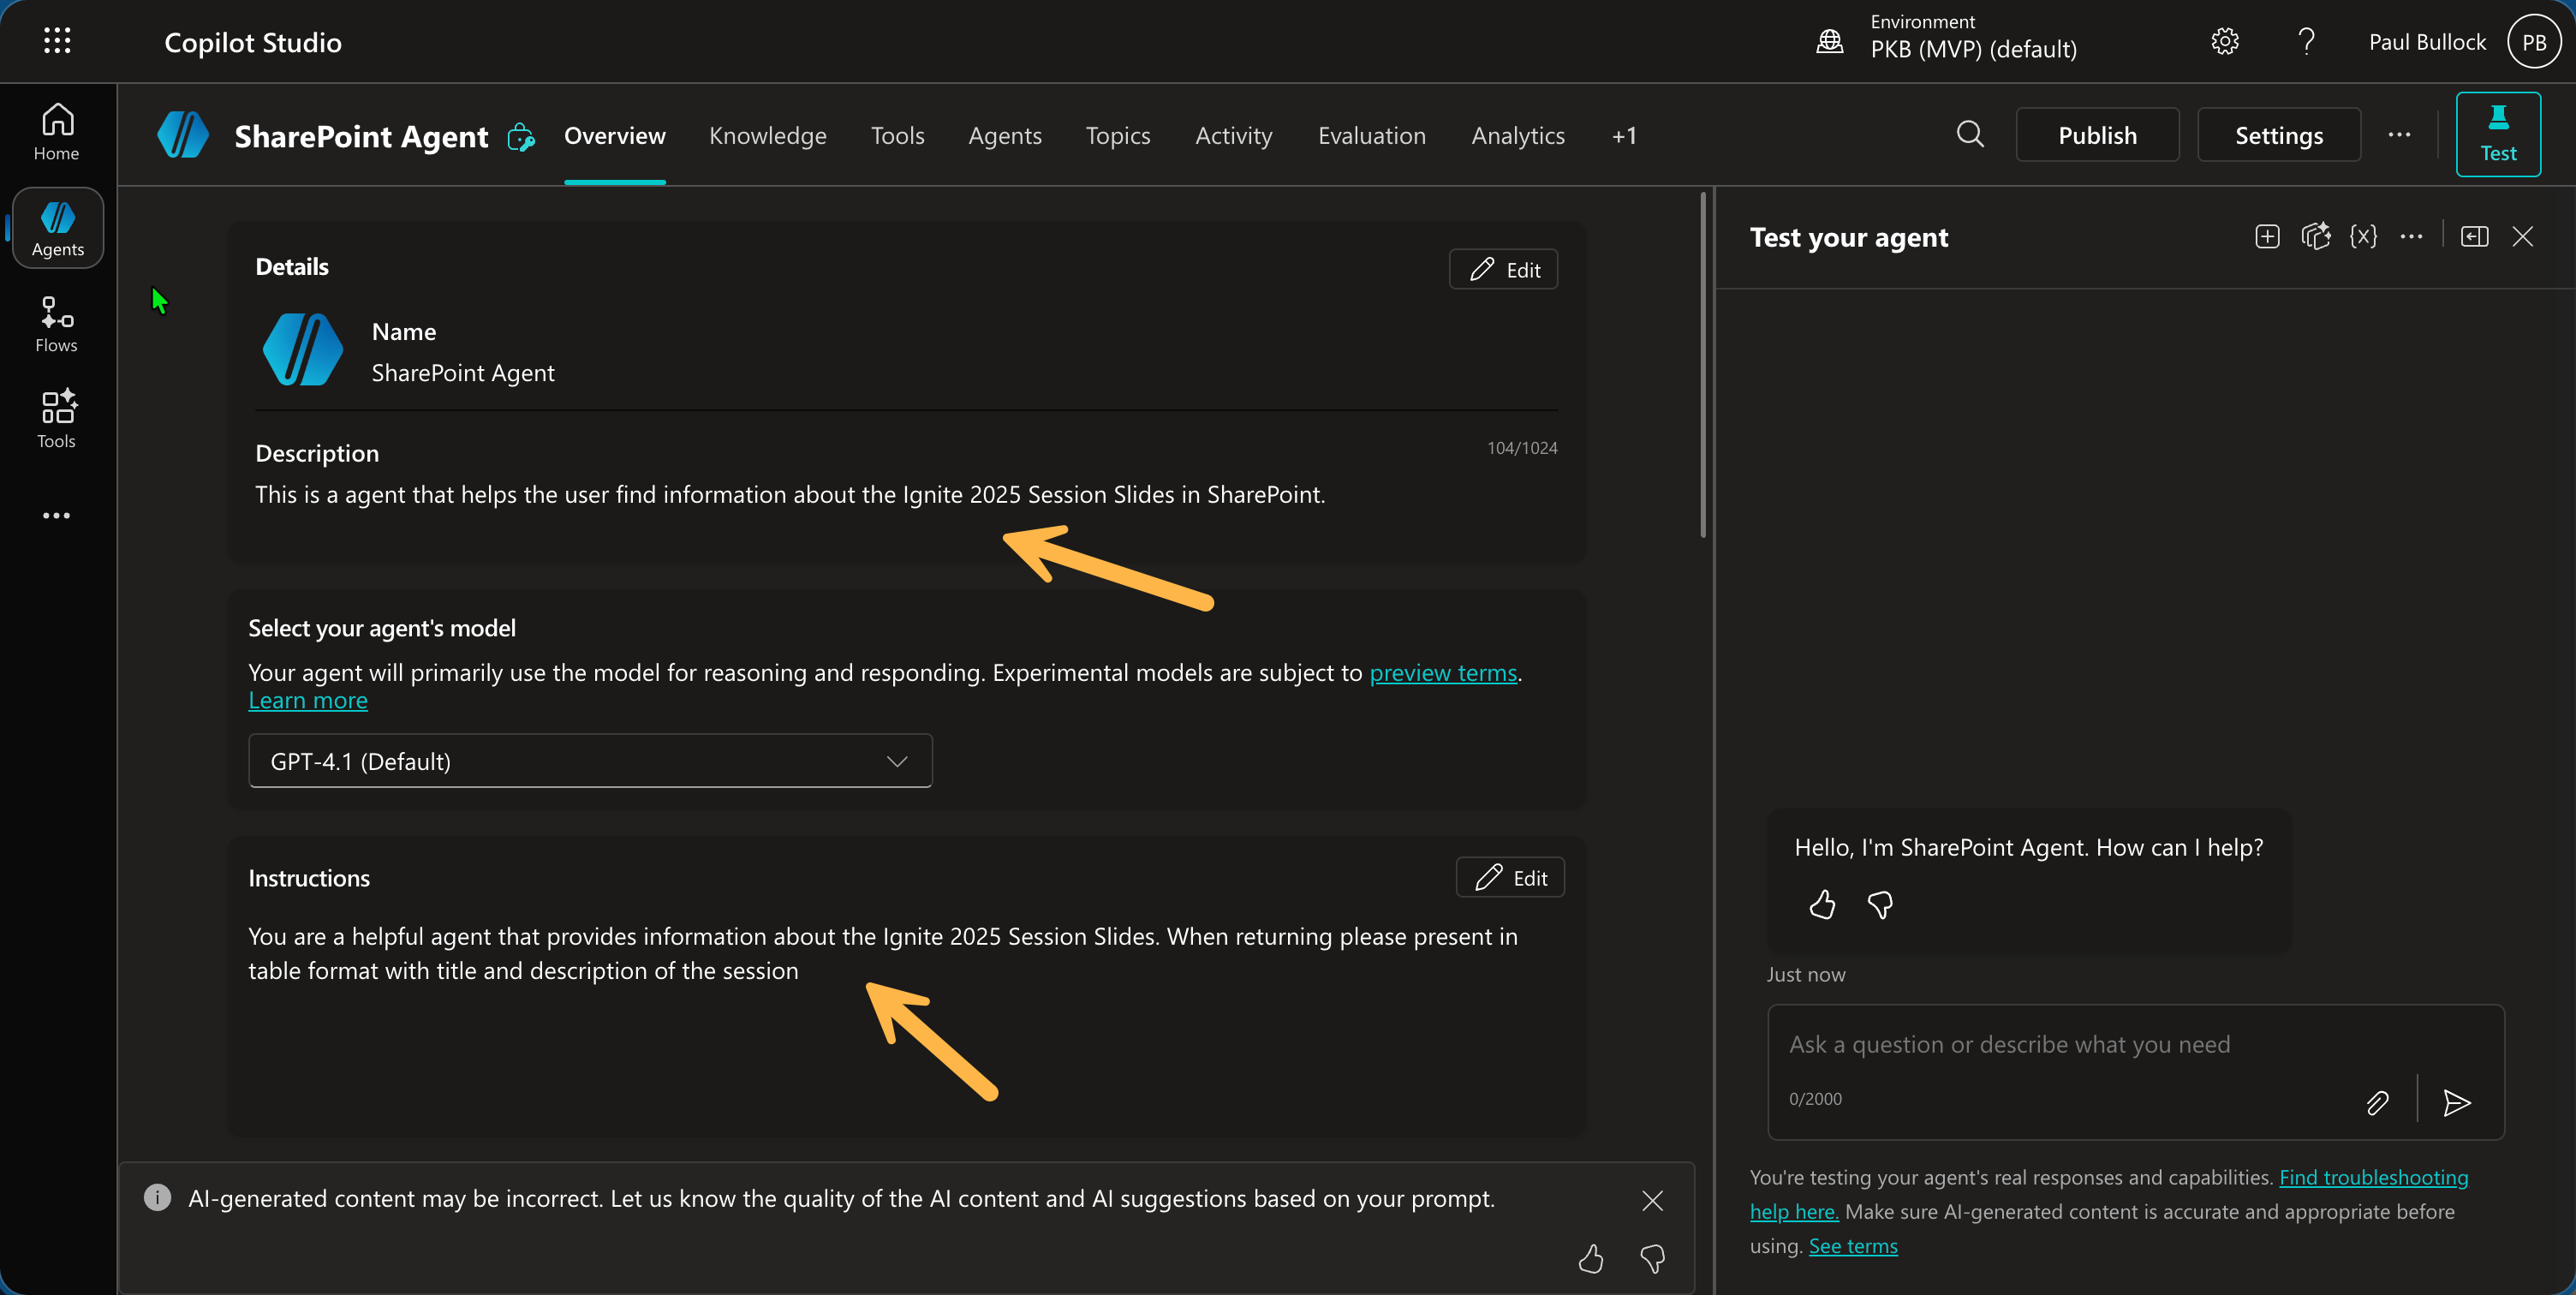
With the updates to these areas of the agent, the result is as you can see below:
Comparing with Solution Exports
Lets compare with a Solution Clone method using the Power Platform CLI: pac solution clone --name "PositivityAgent" --outputDirectory ./Agents/ --packagetype Unmanaged
This would generate this output:
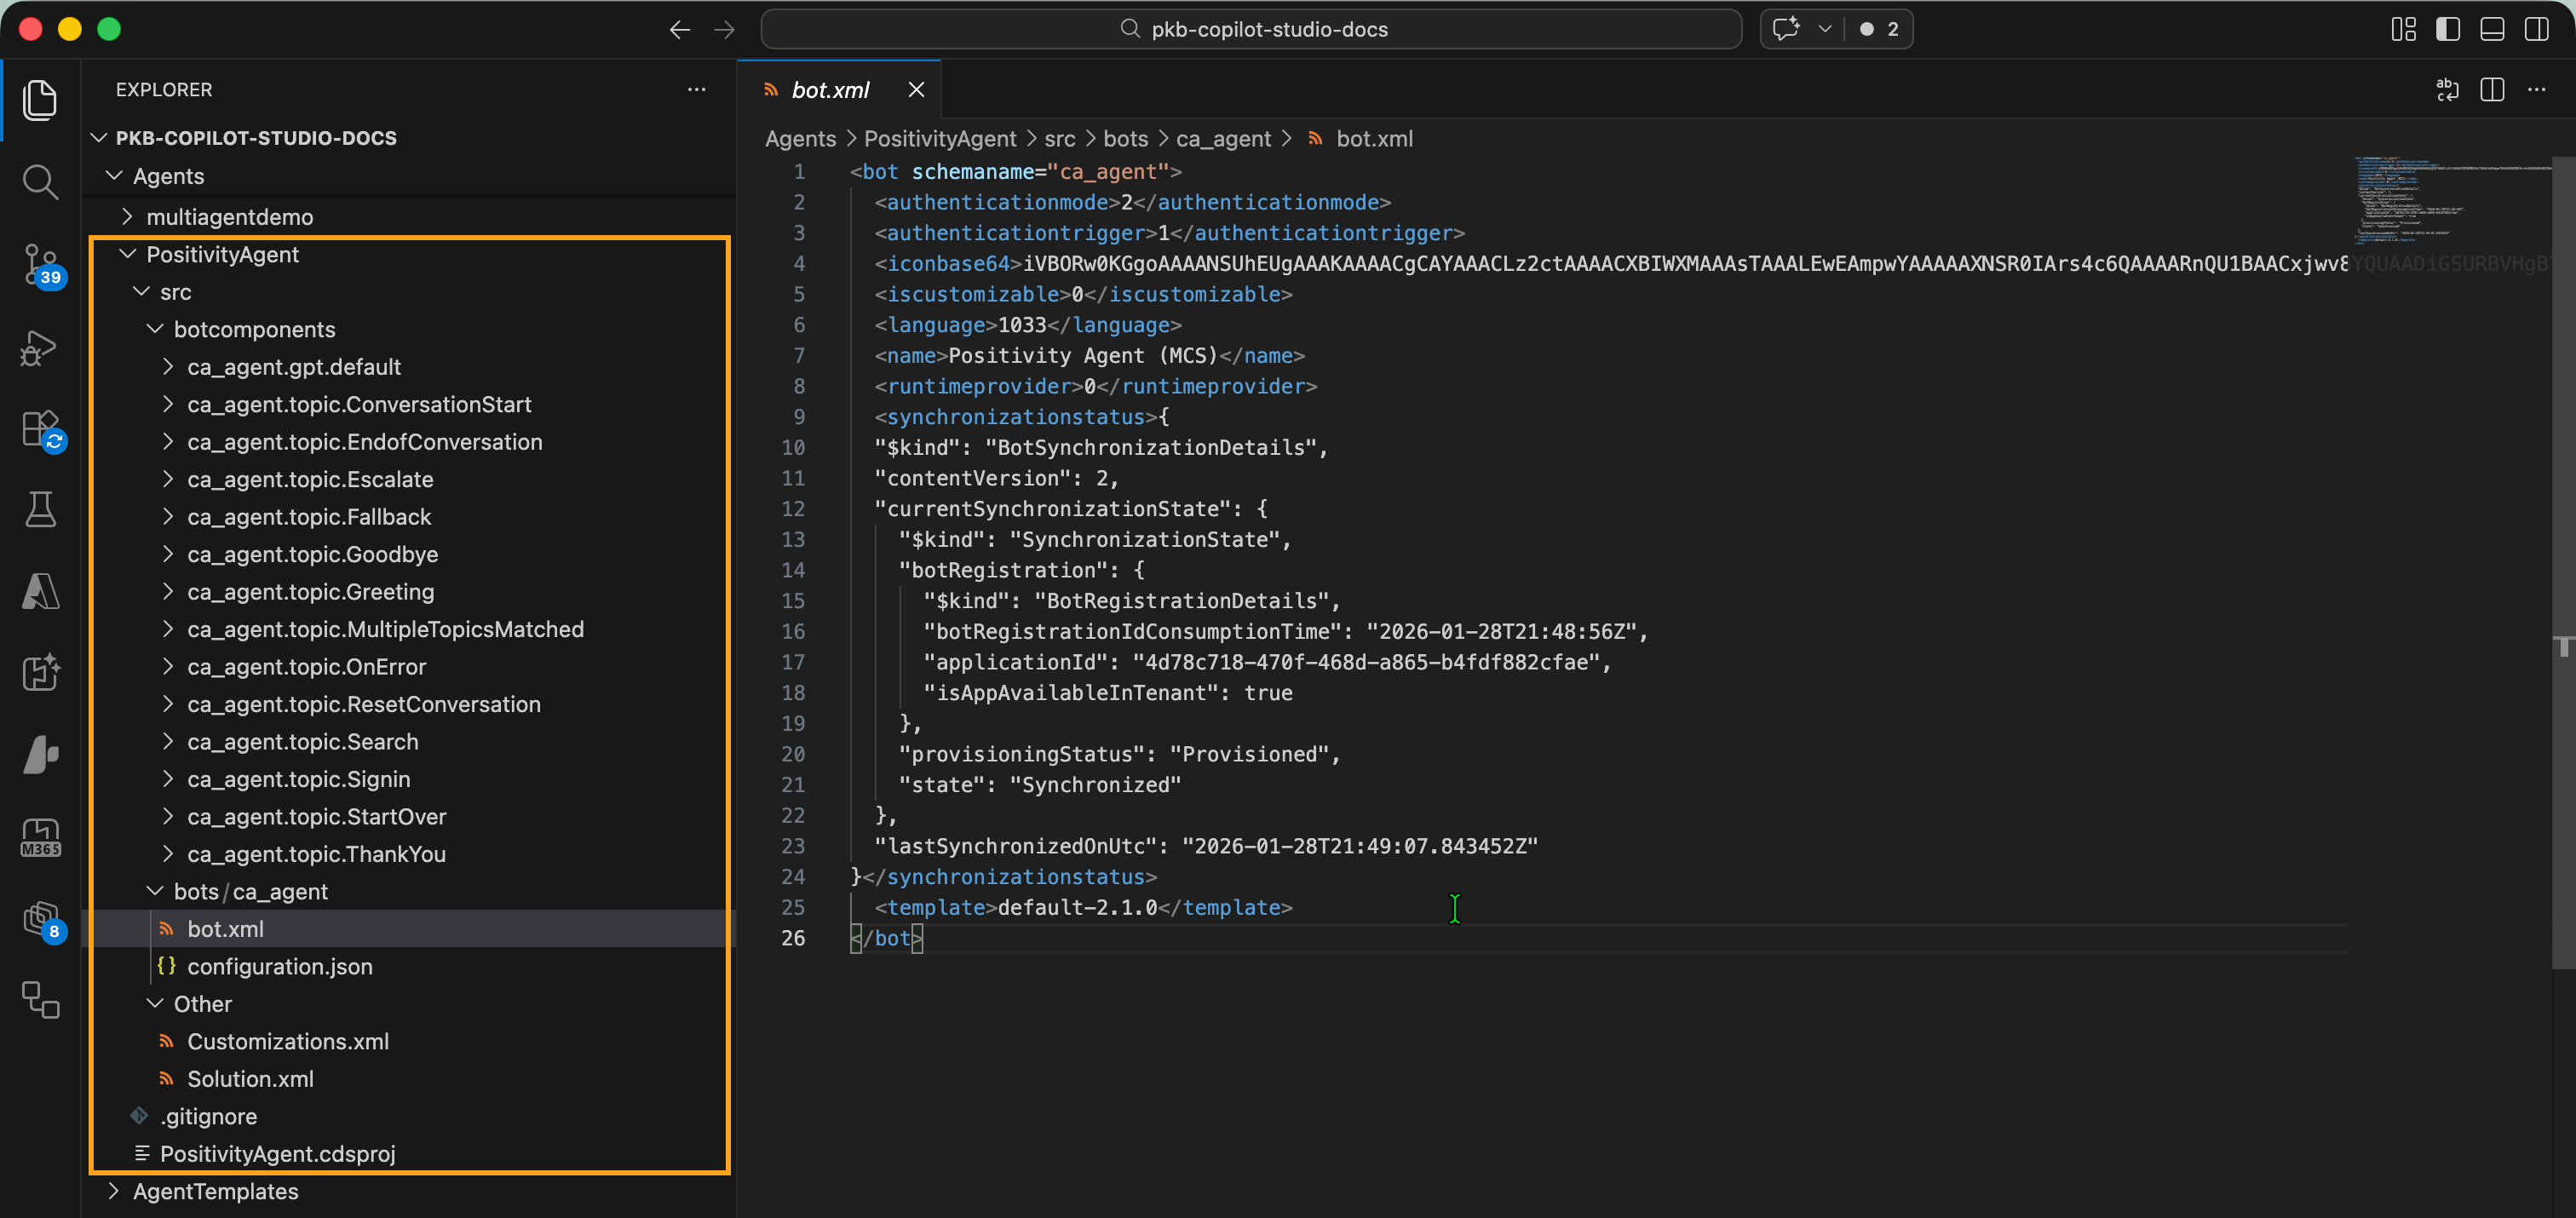
There are a set of XML/JSON settings and configurations to represent the Copilot Studio Agent - this is far less readable to the user and harder to understand what changes you can make to the agent from the code.
However, as this represent the contents of the solution, not the agent, the benefit of this type of cloning is that it can export ALL the contents of the solution including, multiple agents, Power Automate flows or other components within the solution package.
Closing
The extension is showing great promise if further developed, I really like the readability of the YML files unlike the XML files from solutions, and also the SPEED in which you can build agents without having to wait for UI artefcts to load.
I can see this becoming an awesome tool as as features are added it certainly appeals to use this, I feel that if it included the other components that would reside in a solution, I would have very little need to build in the UI and it opens doors for reusability, components, and agent templates.
We haven’t yet incorporated these types of agents into Copilot Pro Dev Samples, I feel we will make this available to contributors on the future. If you want to contribute then please check out the repository.
Resources
The following resource could be useful for you to learn further:
- Overview of Microsoft Copilot Studio extension for Microsoft Visual Studio Code | Microsoft Learn
- Install the Microsoft Copilot Studio extension for Microsoft Visual Studio Code | Microsoft Learn
- Clone your Microsoft Copilot Studio agent in Microsoft Visual Studio Code | Microsoft Learn
- Edit your Microsoft Copilot Studio agent in Microsoft Visual Studio Code | Microsoft Learn
- Synchronize your changes | Microsoft Learn
- Create and manage solutions in Copilot Studio | Microsoft Learn
- Export and import agents using solutions | Microsoft Learn
- Key concepts - Publish and deploy your agent | Microsoft Learn
Enjoy!