· 6 min read
Getting Started with GitHub Models
First experiences with using GitHub Models developer experiences, with quick select, to model, to code, in a few clicks, which is refreshingly simple to get going FAST with LLM models.

Introduction
GitHub Models is a new service where developers can explore different LLMs within a simplified experience to allow you to build non-production applications, to get started using the LLMs and then port over to a production LLM service such as OpenAI or Azure Open AI for full use in your application.
My first impressions are this is one of the simpliest experiences I have seen so far using LLM models. Within 4 clicks, you can select a model, read the description, click to the playground and you can either start chatting or click to code view to get a sample code in Python, JavaScript, C# and Rest (at time of writing this).
THIS IS SO COOL!!!
Note: This is a limited preview and I have been lucky enough to be accepted and use the service, provide feedback. It also means that some of the info may need to change if GitHub change the service.
Click through experience to the LLM
I want to share with you, the simplicity of the interface to get started, (of course I’ve provided some feedback in some tweaks, reusability etc). GitHub Models starts at GitHub Models in Marketplace
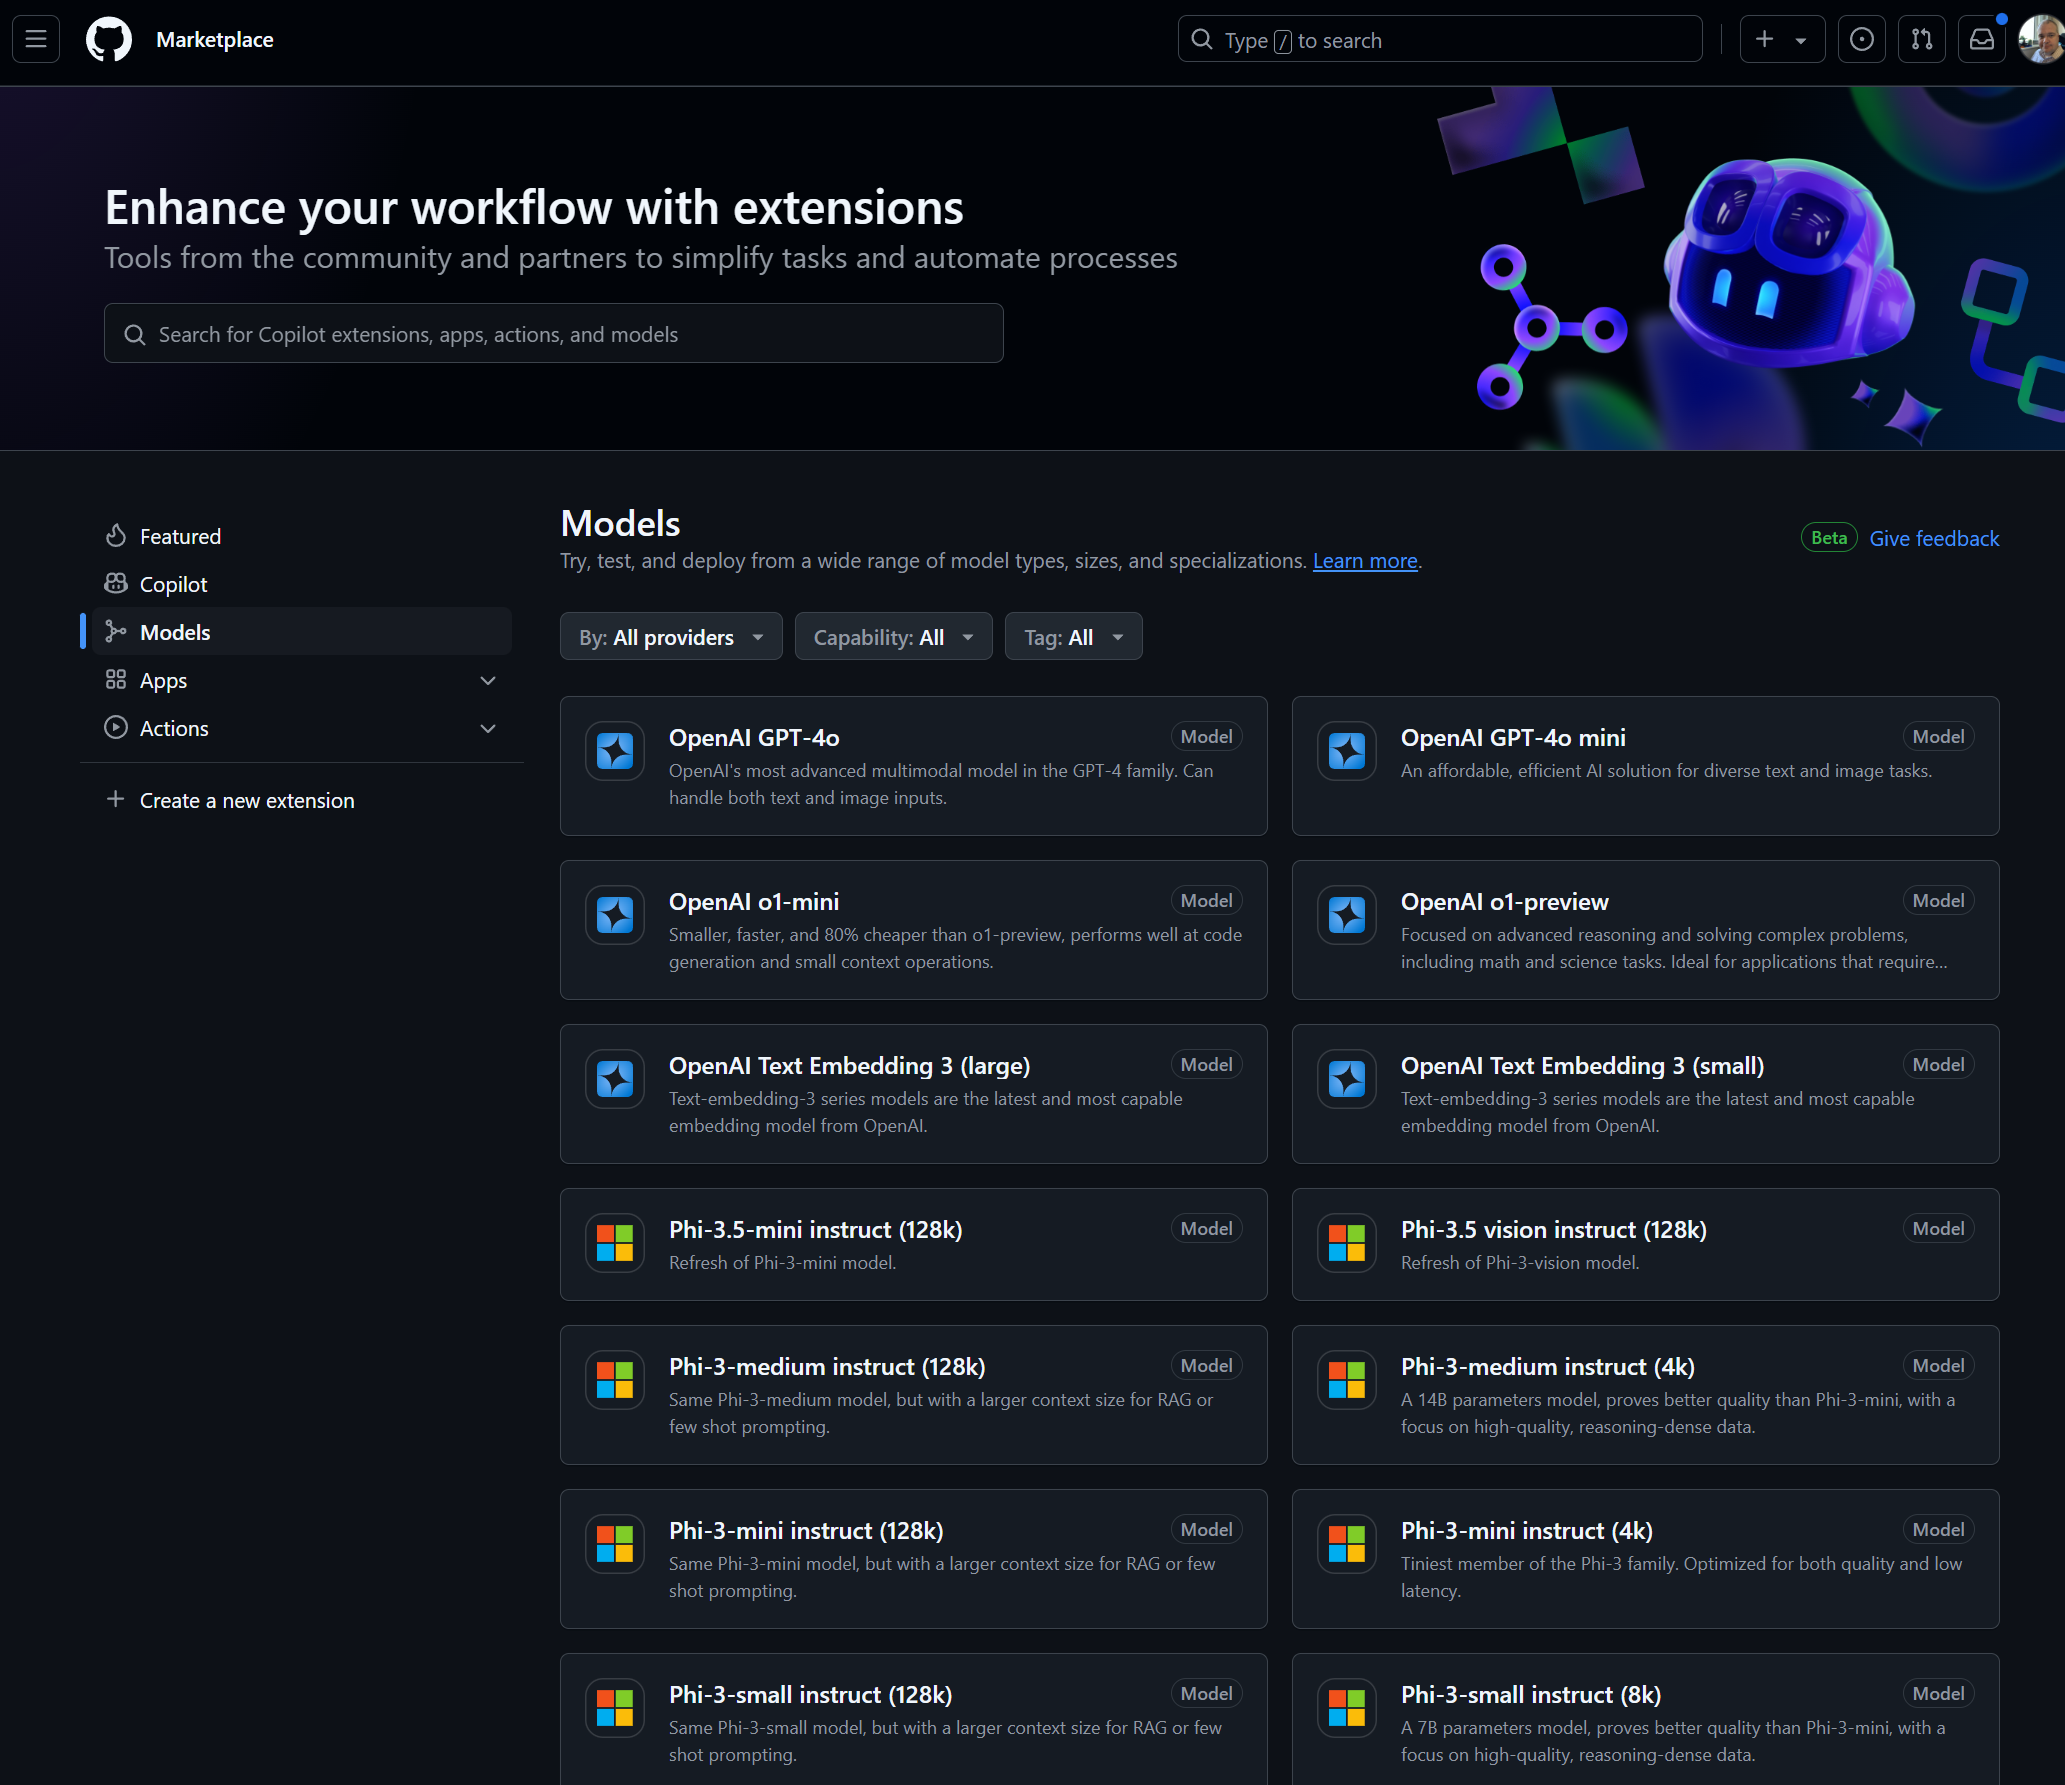
The market place has a large variety of LLM models to choose from, you can quickly see what is available and to choose what model you want to epxlore for you application. For this example, I used “OpenAI GPT-4o mini”:
Note: OpenAI o1 models have started to appear, however these sections are not operational, and do not yet lead to a playground.
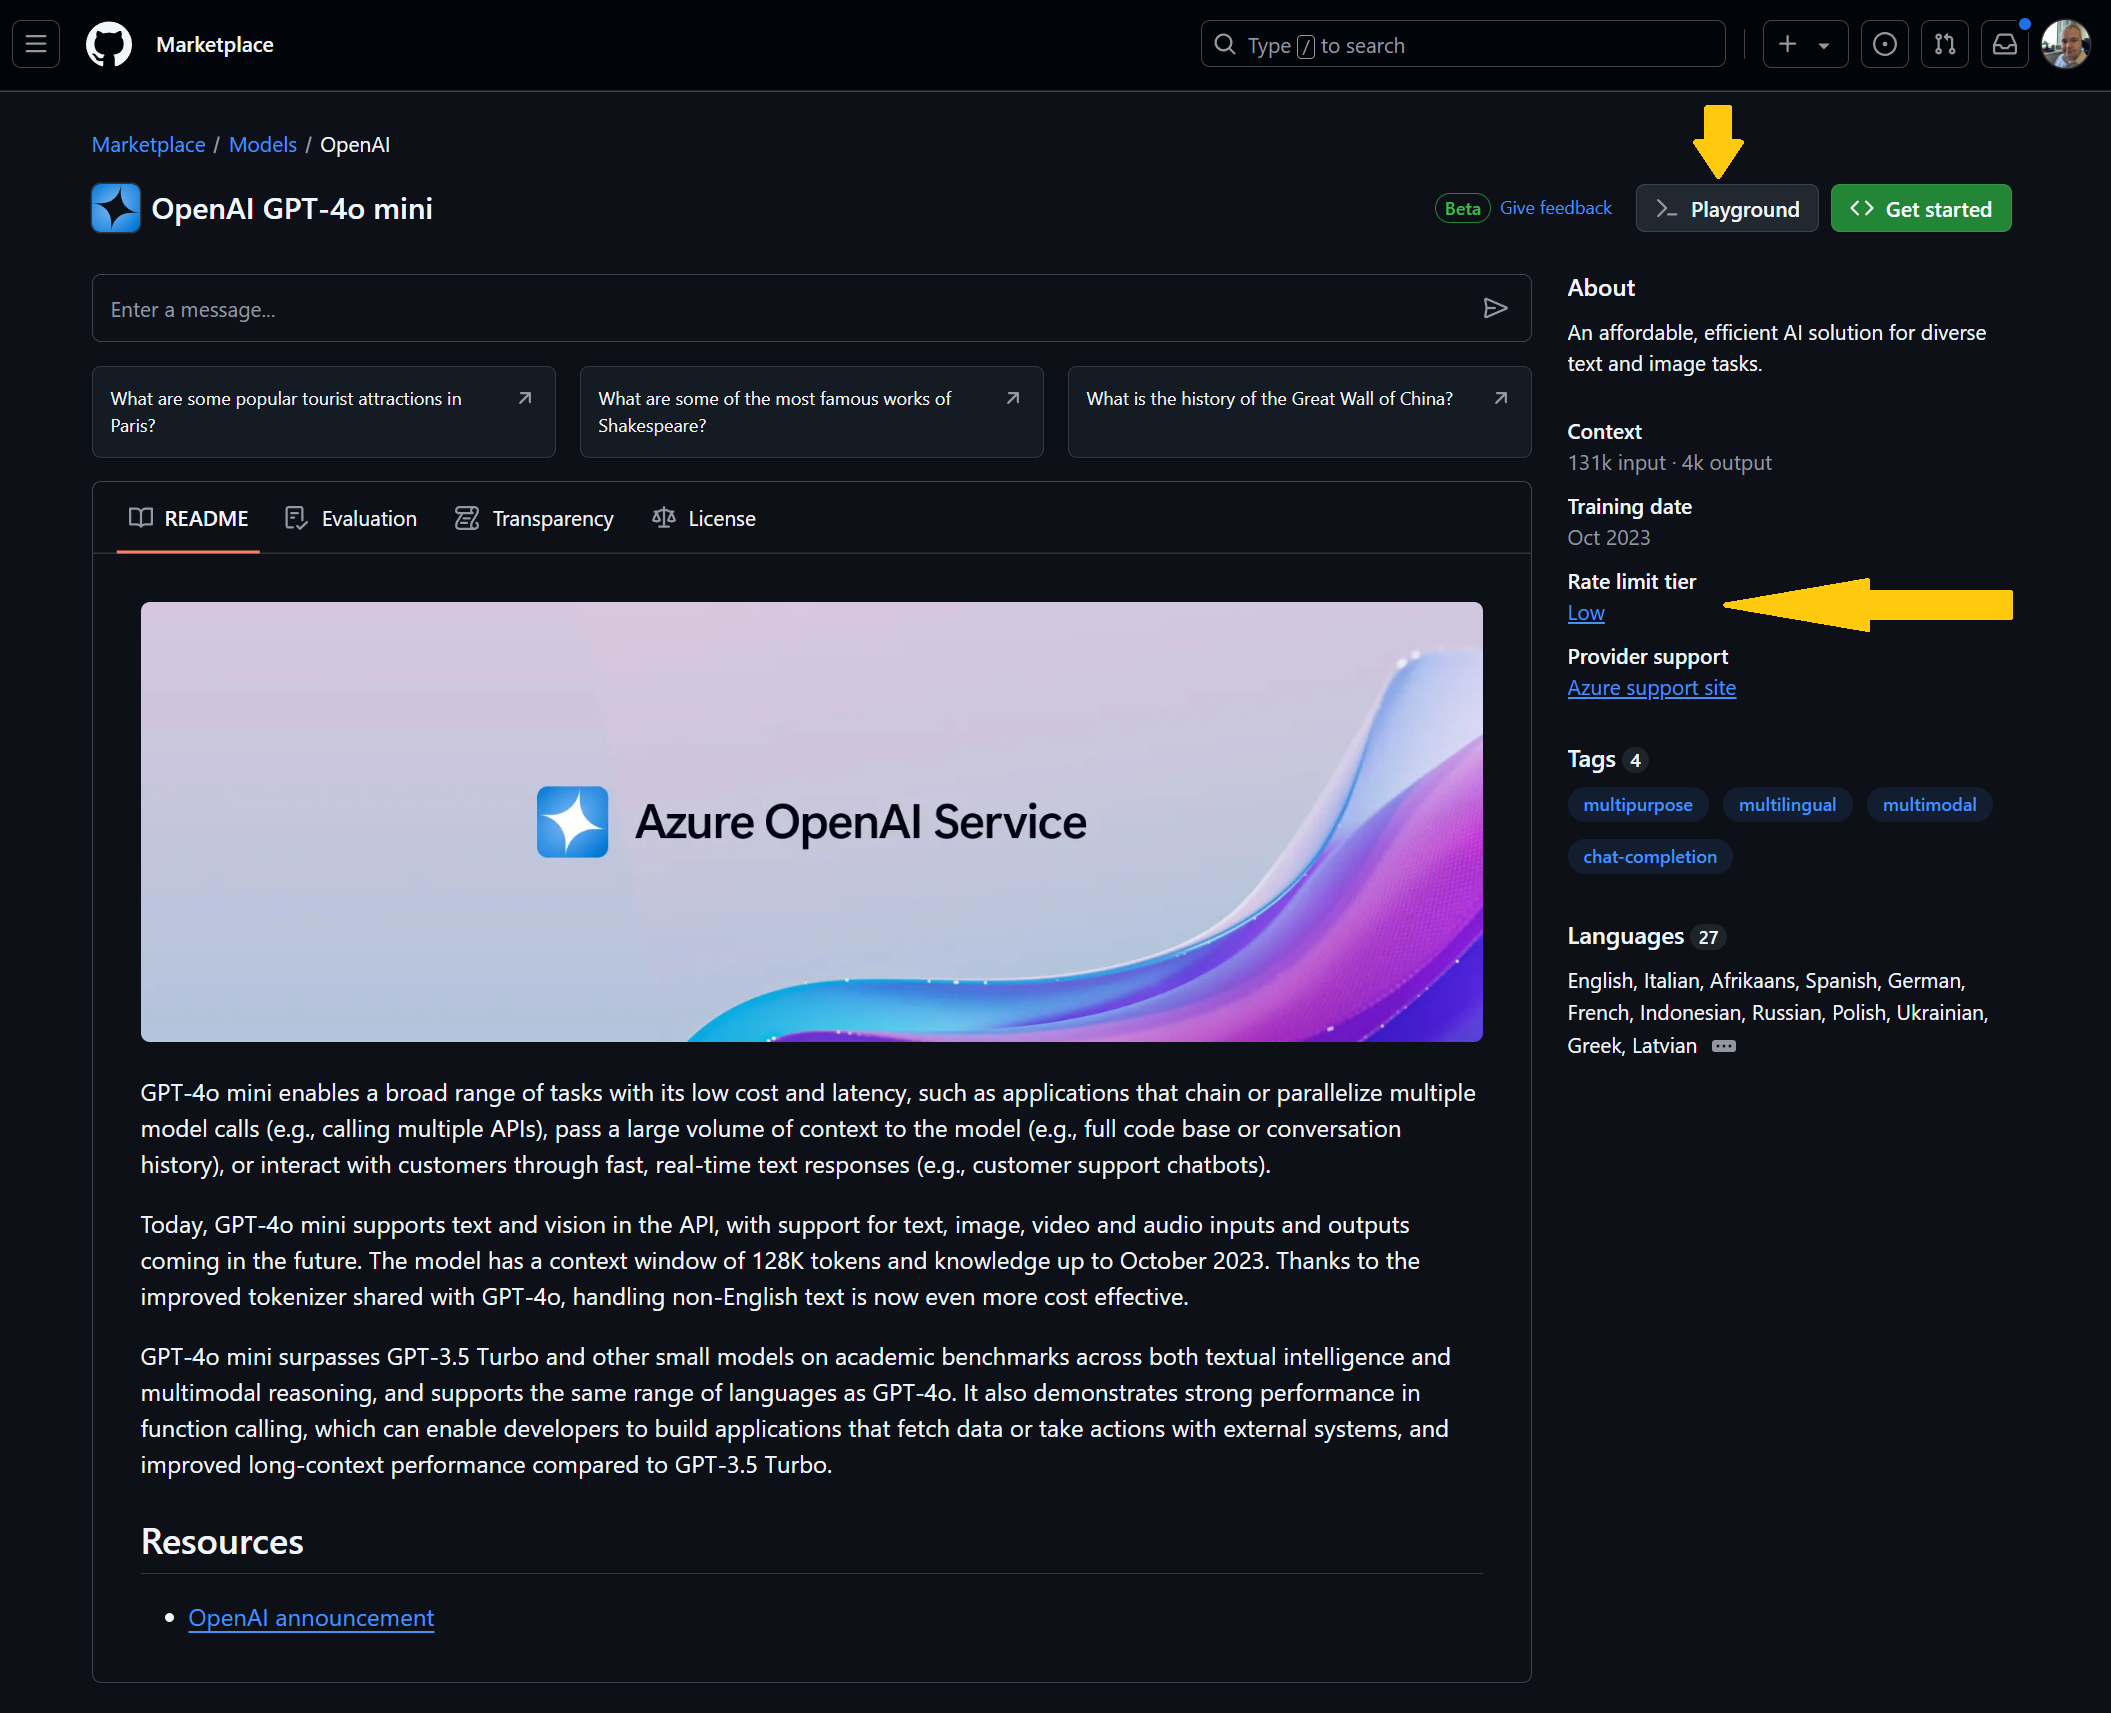
When you have selected a mode (if you are either accepted for the limited preview OR this has gone GA) then you have the option for a “Playground” button. Of course, there is plenty of information about the model to help you decide if its suitable for your application and recommend you read through it so you understand how it works, the purpose, how the model is built and the safety features.
A section to be aware of that affects your development is the “Rate limit tier”, this is a service protection features as there are running in the background, to quote the docs: “The playground and free API usage are rate limited by requests per minute, requests per day, tokens per request, and concurrent requests”
Different models have different rates accordingly.
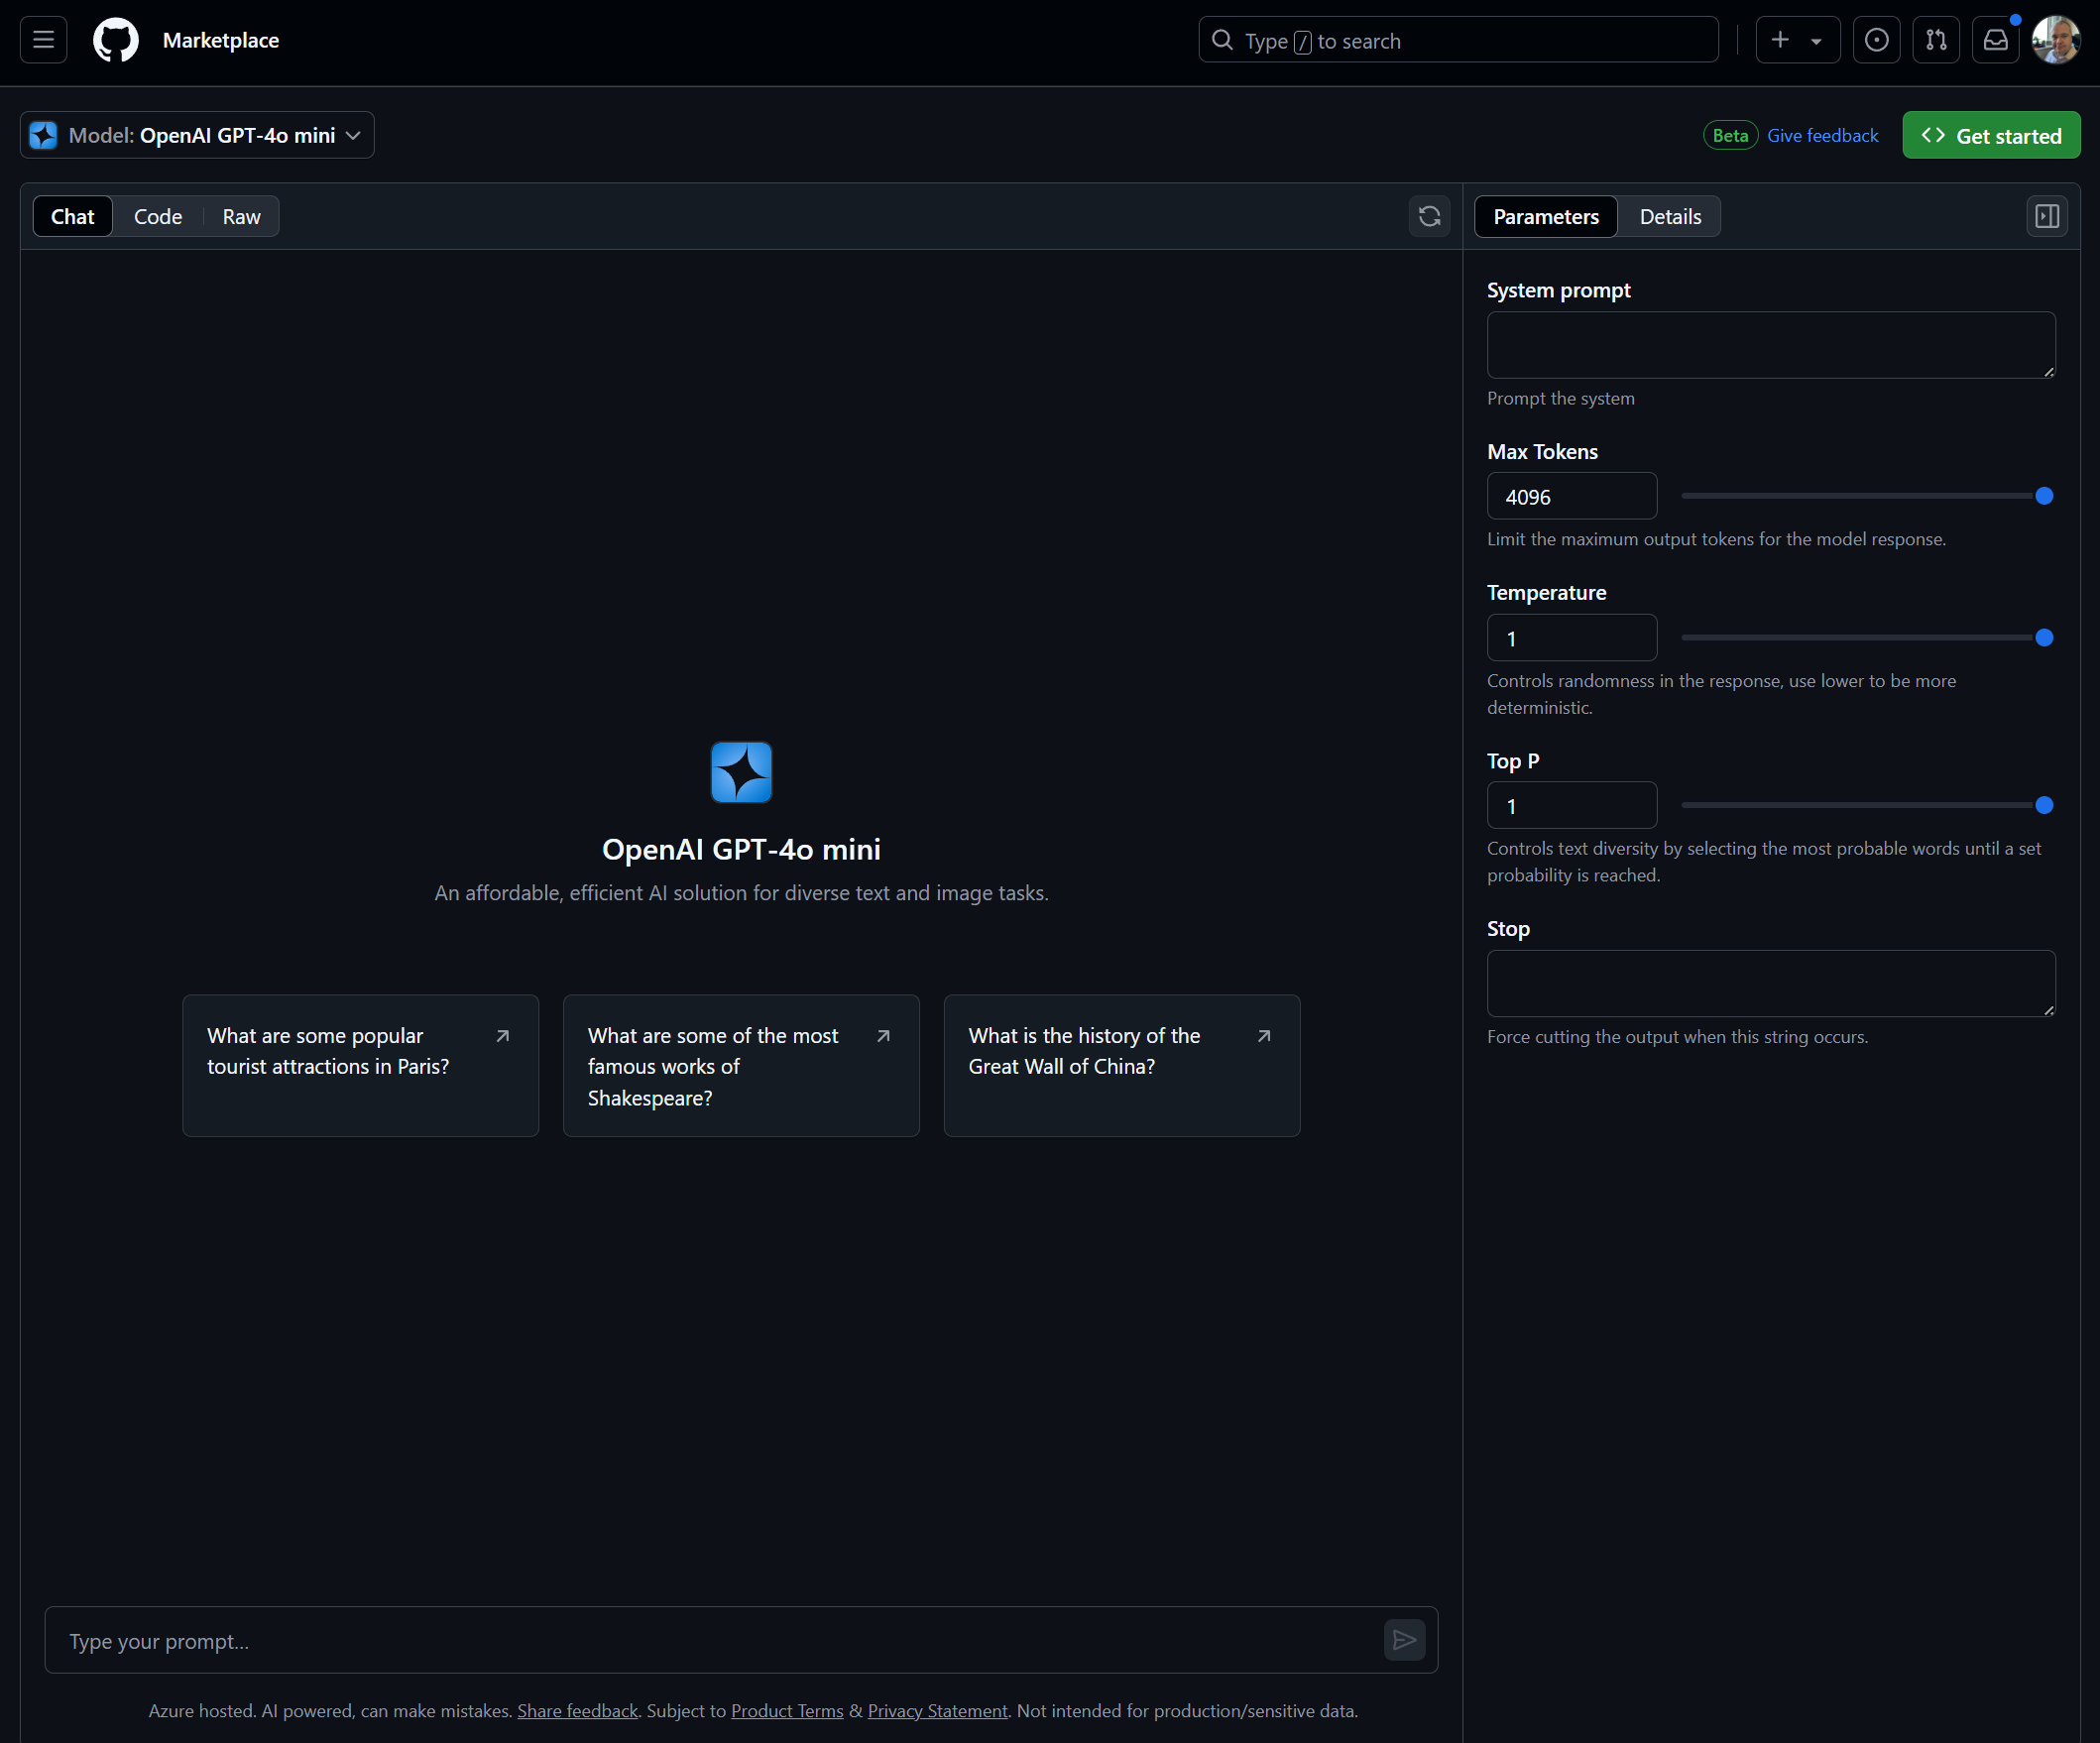
After clicking into the playground you see a few optons:
- The chat experience in the middle, by this point im sure that many will be familar with this chat style interface to speak to the LLM.
- The right hand pain controls basic settings to your LLM model:
- System Prompt - describe what you want the model to do, to ground it and describe the context for the messages.
- Max tokens - control the response limit, you will need to think about this when writing applications after all, in production tokens count towards the cost of the service
- Temperature - creativity control, the higher, the more freedom the LLM will use in the response on the topics dicussed. Lower to make the response more precise.
- Top P - Diversity of topic
- Stop words - when a stop word is reach response will end.
The details tab will describe the model much like the right hand pane in the model selction screen.
At this point, you can have a chat to the service to allow you to understand straight away how the model “feels” when you are interacting with it, what kinds of outputs it provides.
Note: none of the chat or prompts are preserved in this version, therefore keep a note of what you asked the LLM model. OR use code hereon.
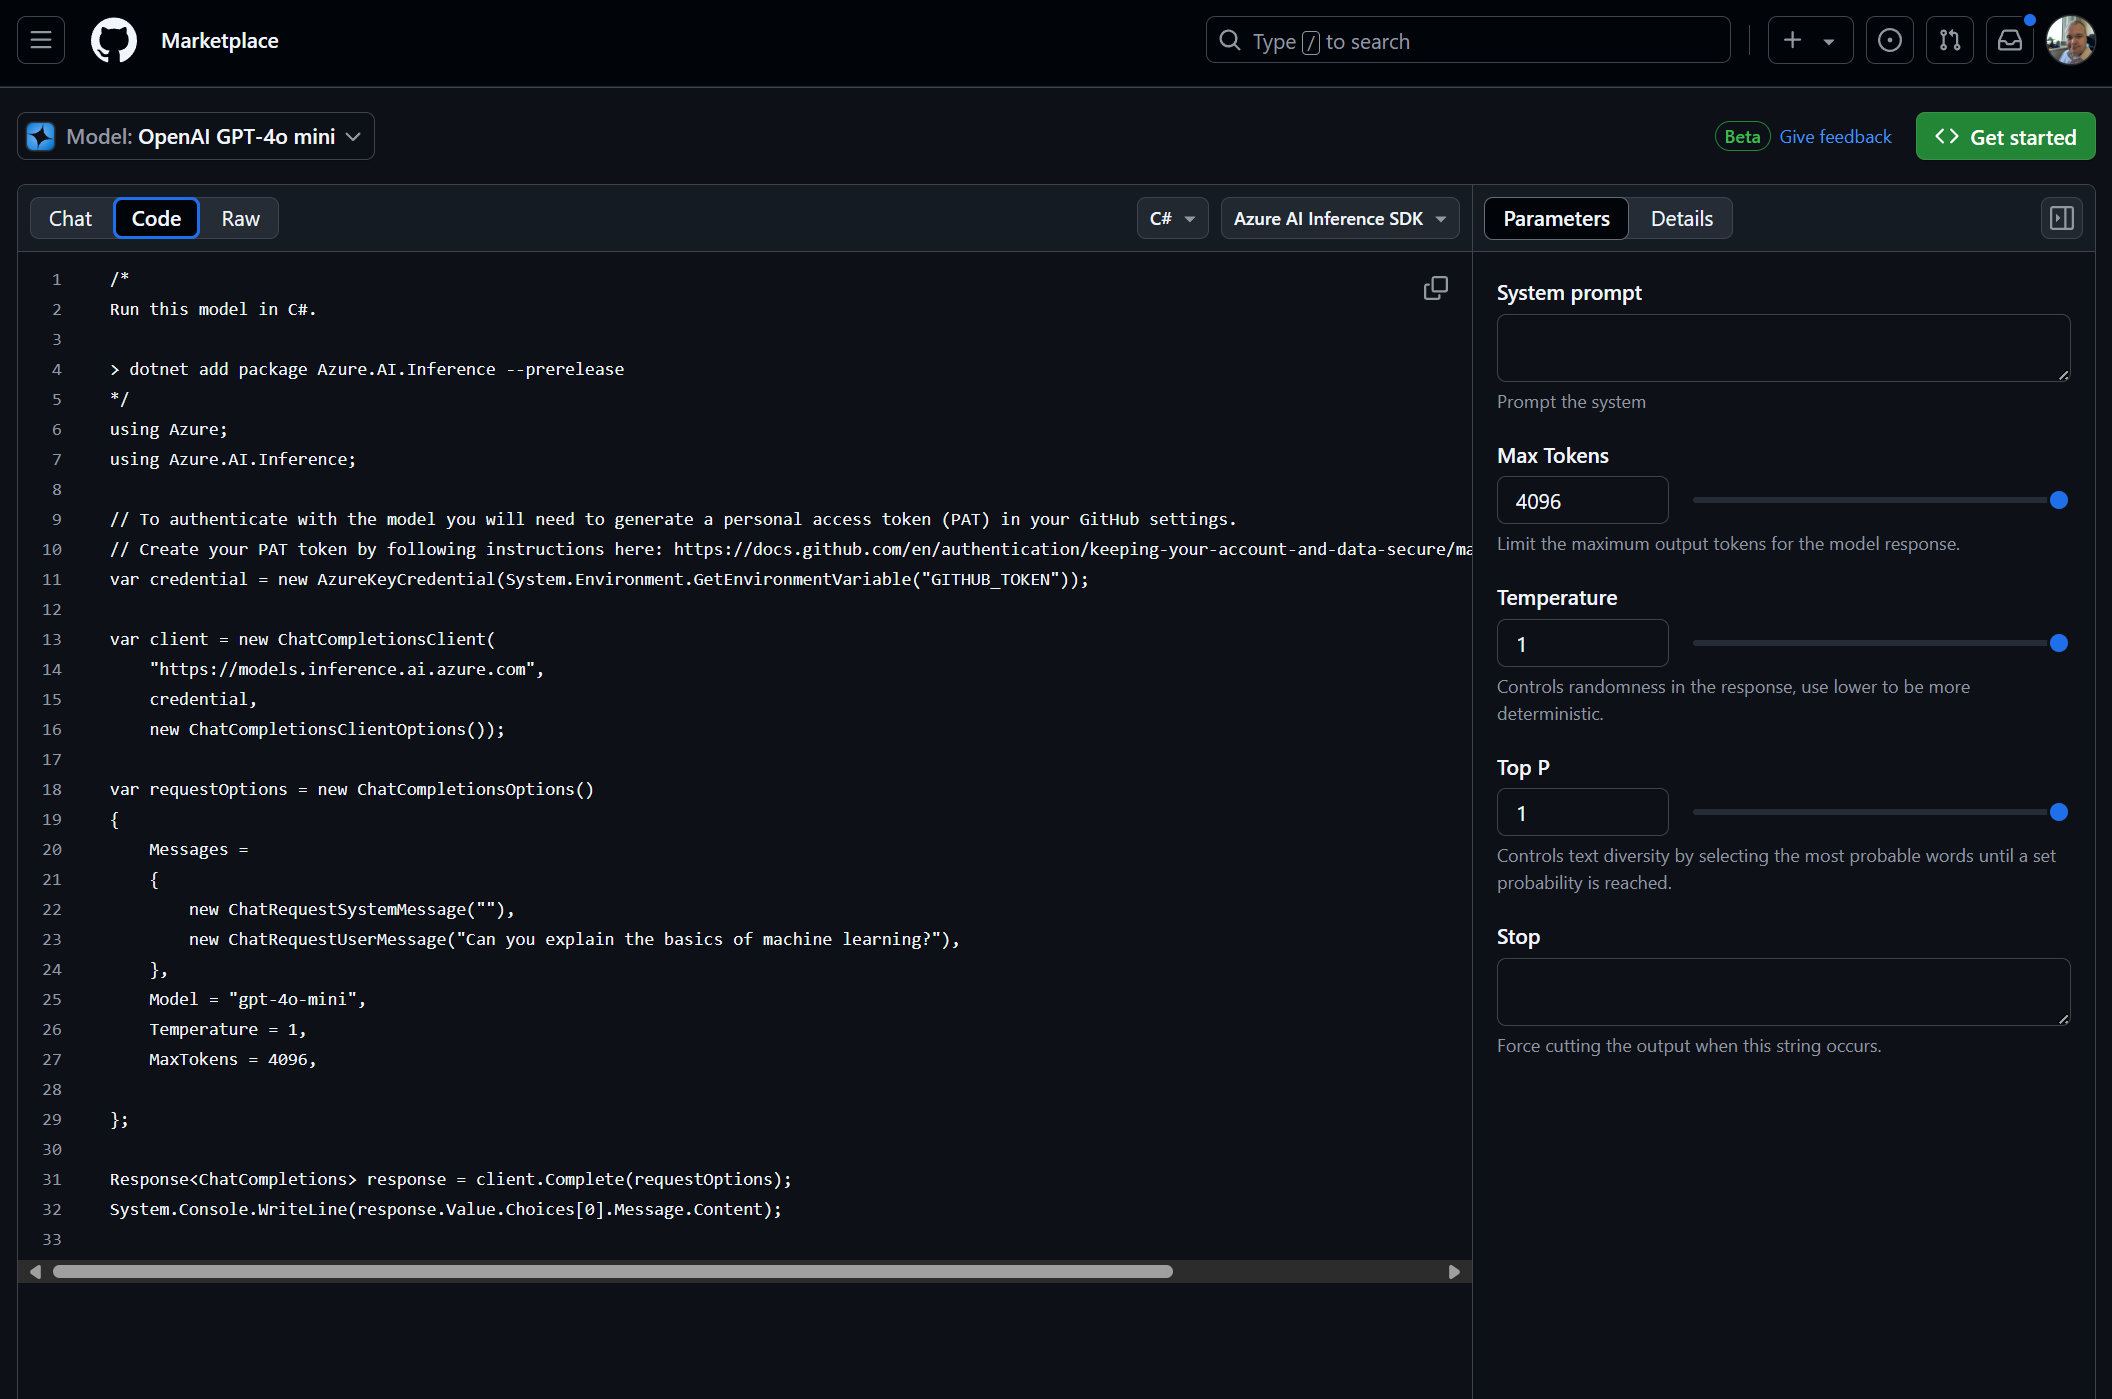
I absolutely love this view, simply clicking the “Code” button on the top bar, you can quickly get code samples for interacting with the model. My go to (and example here) is C# with the Azure AI Inference SDK, which is very simple to get working in your application, then, switch out the endpoint, and credentials later.
Working with the code sample
After getting the code, in the examples I typically use Polyglot notebooks (similar to Jupiter Notebook for for dotnet apps - very cool!) to run the code in and will continue to show how moving forward. You will need to setup a few things:
- GitHub Token
- Nuget package e.g.
#r "nuget: Azure.AI.Inference, 1.0.0-beta.1" - Minor code correction
- Service endpoint needs to be a URI, not a string
- I added a simple check for credential exists, rather than waste time on further calls
- Write out to a text file any output, it may come in handy later (Optional)
Setting up your GitHub Token
Toi setup, find the feature in GitHub to create the token, from within your account > Settings > Developer settings > Personal access tokens, then expanding to select Fine-grained tokens:
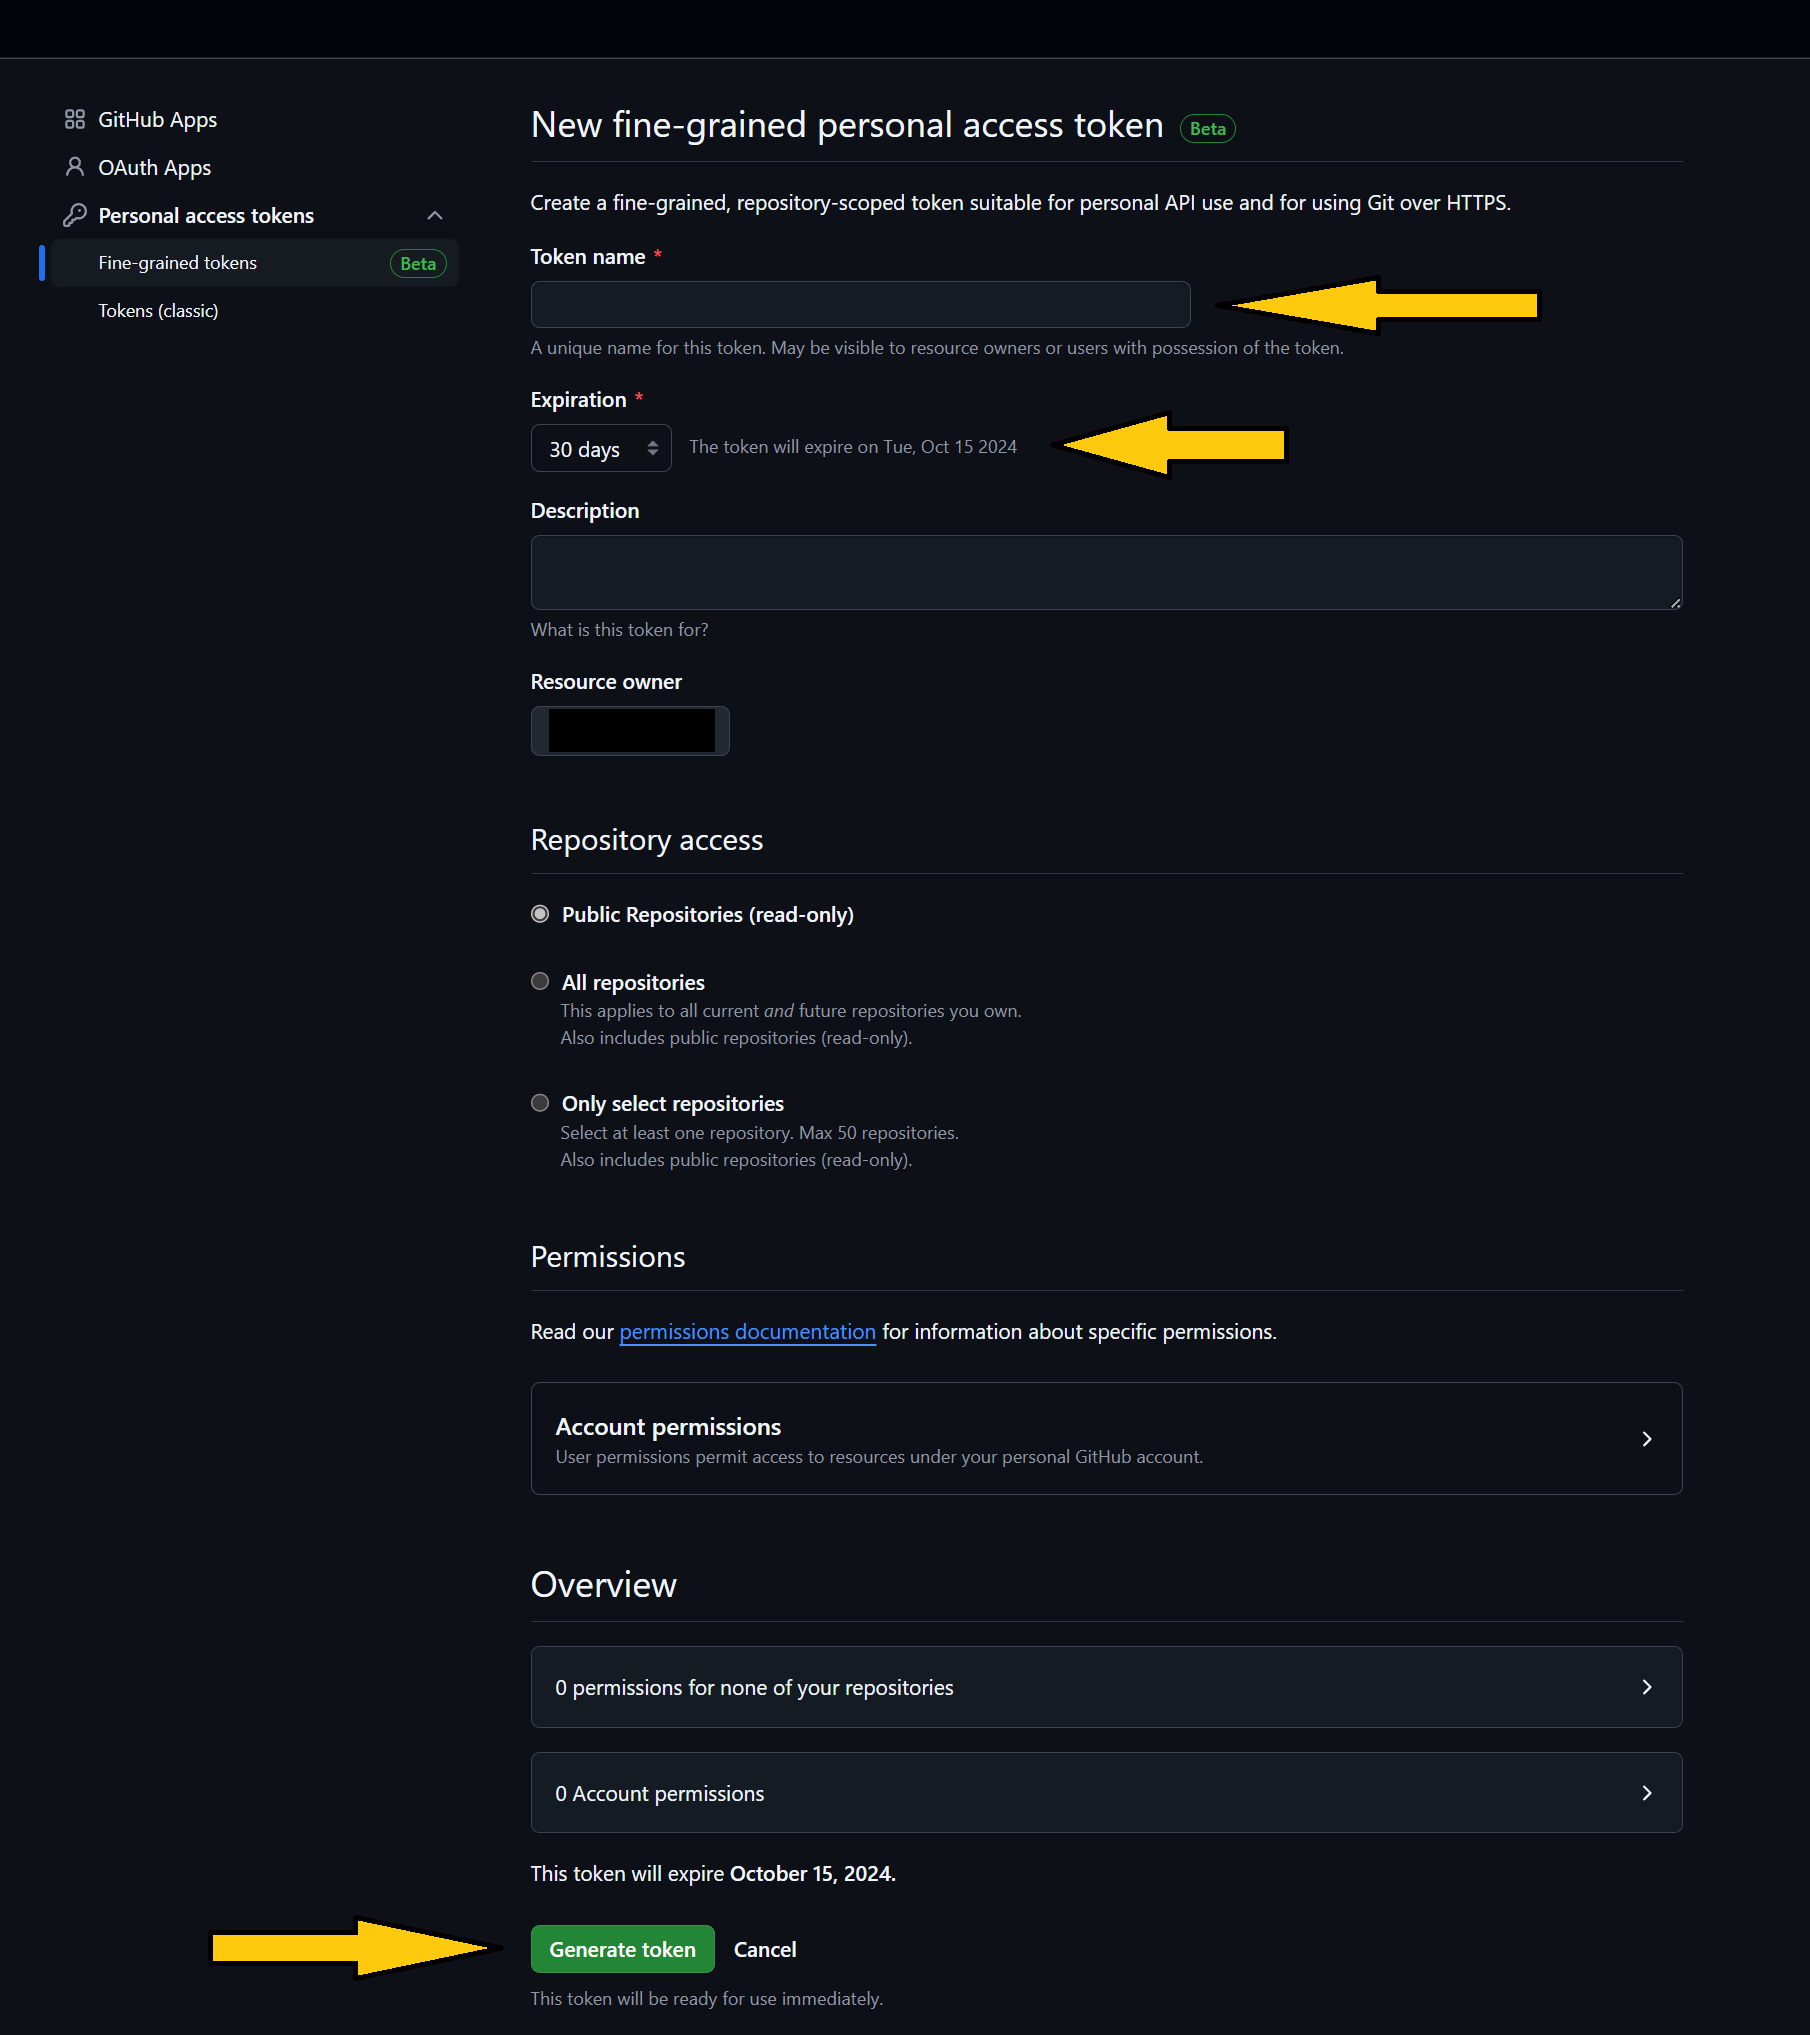
For running the model, you only needed to provide the name, duration of the token and then click Generate
Once you have a token, you can stored this using SetX command - of course, I’m all for security so happy for better location - ping me to recommend, at least this way you are not putting this in your notebook, especially if the notebook is then stored in source control (please DO NOT store credentials in source control - unless you like uninvited guests playing with your stuff, even then… NOPE, DONT).
Updating the code
You can use the code sample (with some small tweaks above) to call the GitHub service:
/*
Run this model in C#.
*/
using Azure;
using Azure.AI.Inference;

// To authenticate with the model you will need to generate a personal access token (PAT) in your GitHub settings.
// Create your PAT token by following instructions here: https://docs.github.com/en/authentication/keeping-your-account-and-data-secure/managing-your-personal-access-tokens
var credential = new AzureKeyCredential(System.Environment.GetEnvironmentVariable("GITHUB_TOKEN_GHMODELS"));
if(credential == null)
{
    System.Console.WriteLine("Please set the GITHUB_TOKEN_GHMODELS environment variable.");
    return;
}

var client = new ChatCompletionsClient(
    new Uri("https://models.inference.ai.azure.com"),
    credential,
    new ChatCompletionsClientOptions());

var requestOptions = new ChatCompletionsOptions()
{
    Messages =
    {
        new ChatRequestSystemMessage(""),
        new ChatRequestUserMessage("Can you explain the basics of machine learning?"),
    },
    Model = "gpt-4o",
    Temperature = 1,
    MaxTokens = 4096,

};

Response<ChatCompletions> response = client.Complete(requestOptions);
System.Console.WriteLine(response.Value.Choices[0].Message.Content);

// Write the full response to a text file
System.IO.File.AppendAllText("response.txt", response.Value.Choices[0].Message.Content);
System.IO.File.AppendAllText("response.txt", "----------------------------------------------END----------------------------------------------");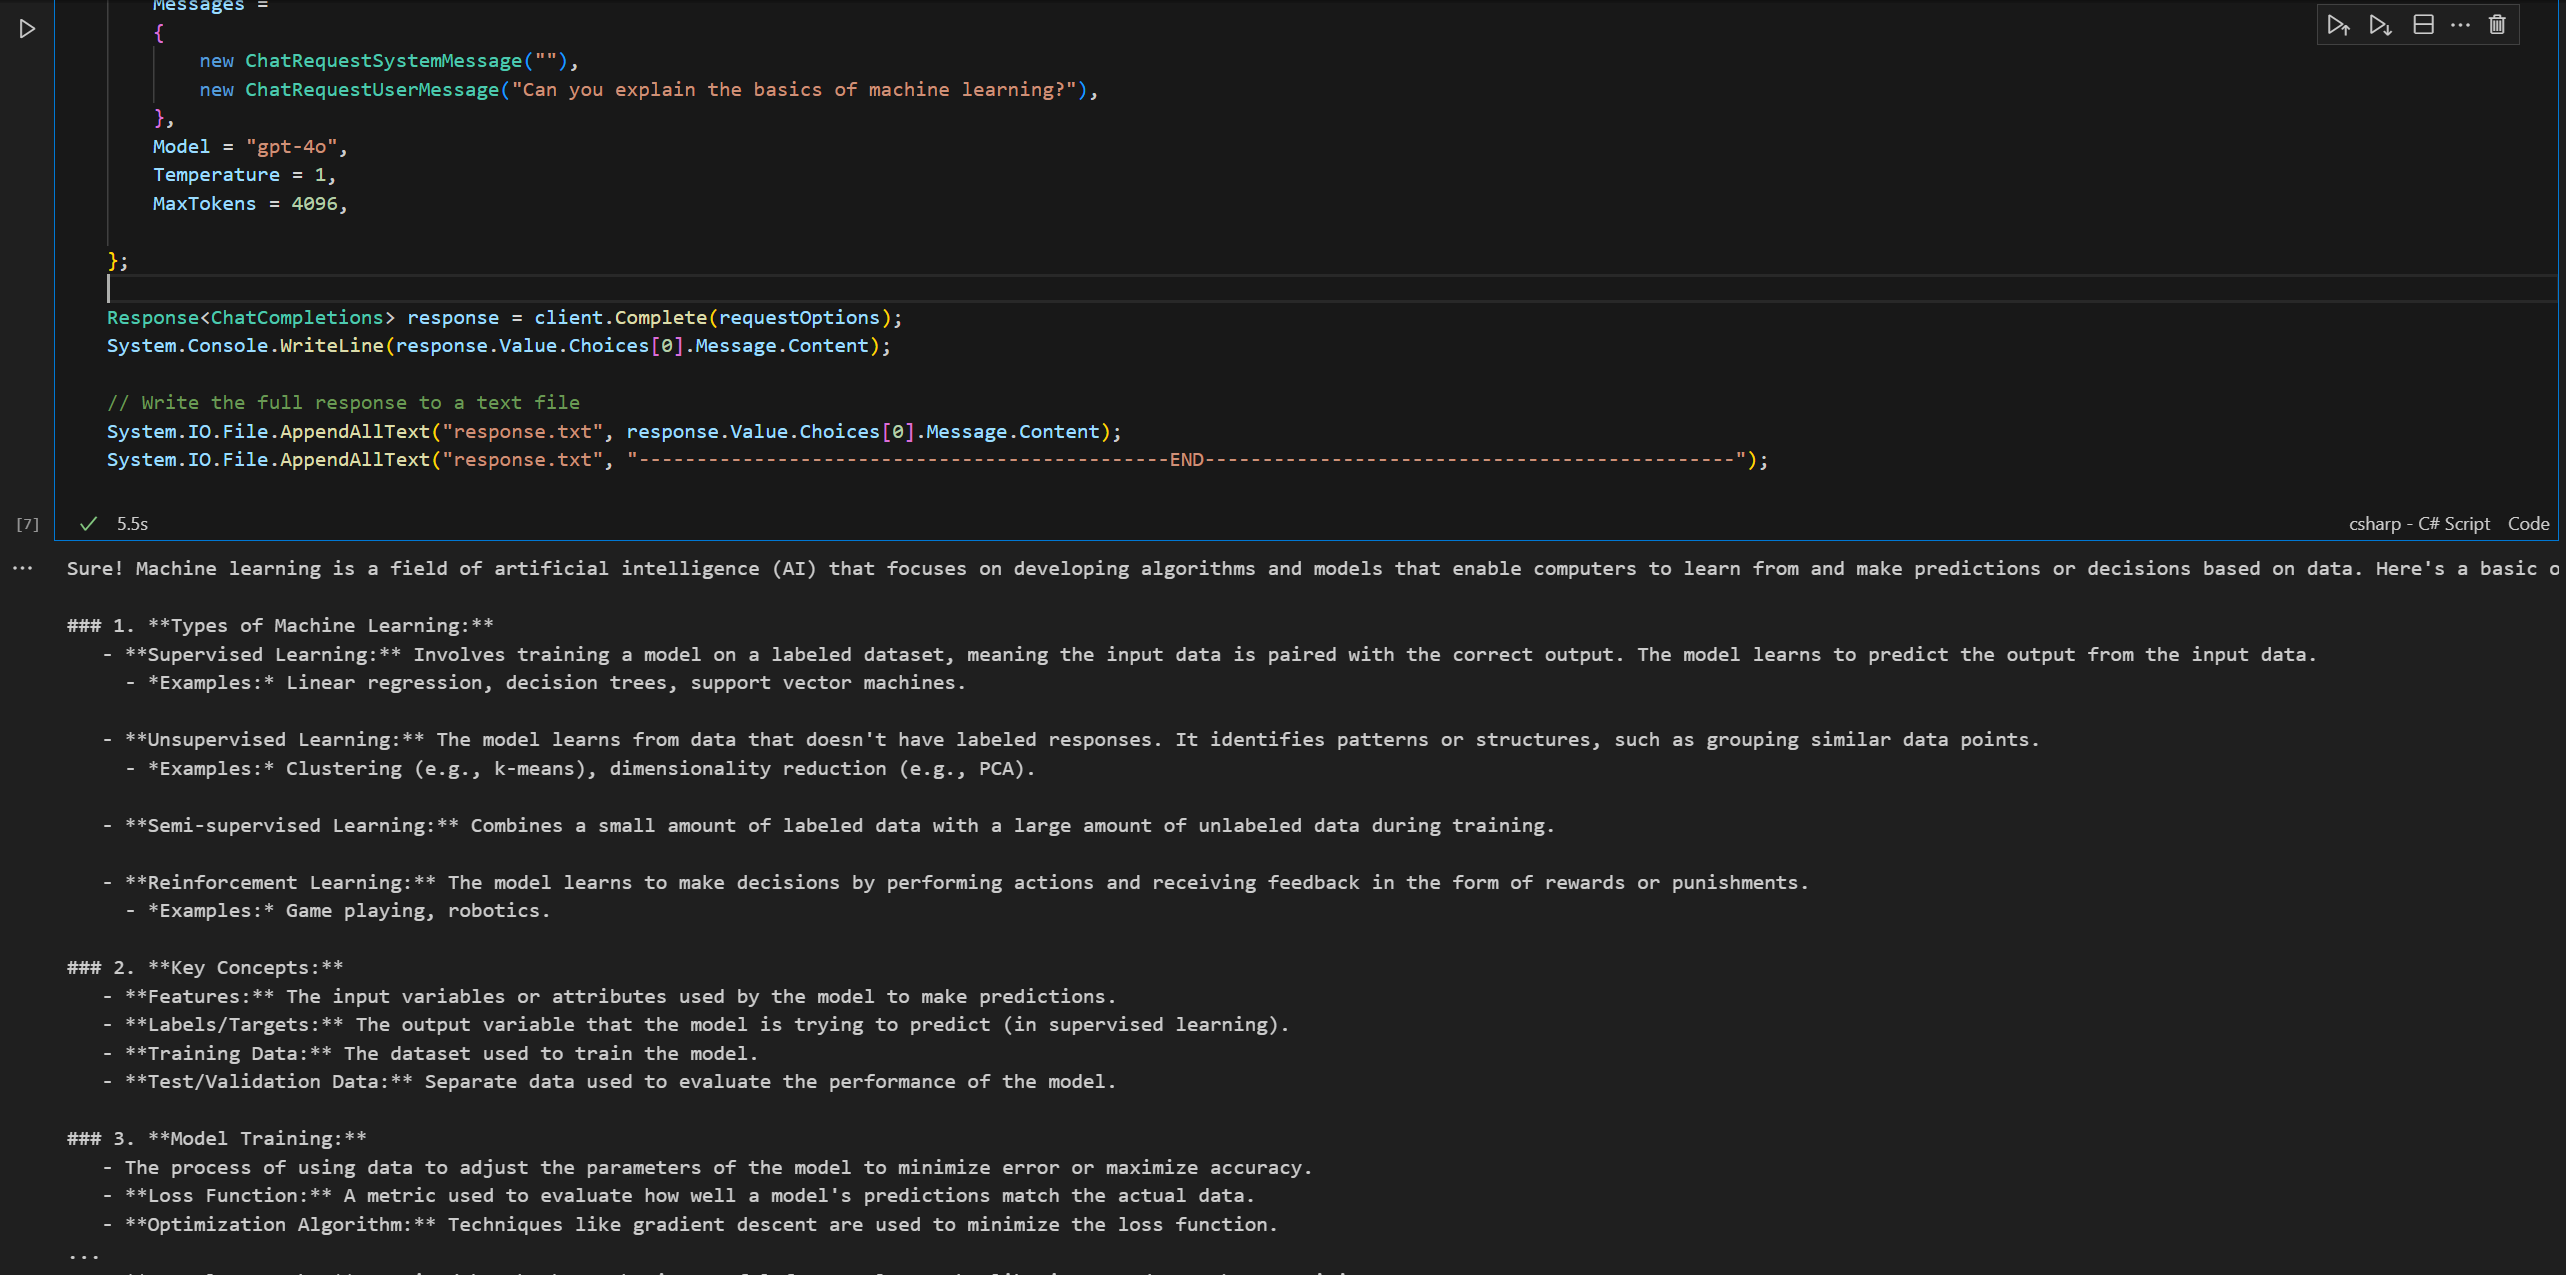
Conclusion
Personally, I love this service, its a no fuss, just give me a LLM model now, with NO setup to get going with development of AI applications. Of course, plan your production environment accordingly. In development applications, you can keep your focus on the code with little distraction of the service configuration itself, although I can see that it may take time for you to find the right model for your use case, so watch for that.
I look forward to when this service goes into General Availability, I think folks will enjoy the experience.
Resources
The following resource could be useful for you to learn further:
Enjoy!