· 3 min read
GitHub Tip: Adding Issue Forms
GitHub Issue Forms are a new way to create issue templates that have customizable web form fields, paving the way for structured issues on submission

Introduction
GitHub Issue Forms are a new way to create issue templates that have customizable web form fields. They allow you to encourage contributors to include specific, structured information in their issues, making it easier for you to manage and resolve them. In this blog post, I will show you how to create your own issue forms and use them in your repository based on example of using these for blog templates in my own website repository.
Example Yaml for my website blog post
Issue Forms are written in YAML using the GitHub form schema, which lets you define different input types, validations, default assignees, and default labels for your issue forms.
This is super cool because you can apply structure to how the issues raised by users can have structure and request a predefined set of information when raising issues.
name: Blog Idea
description: Submit the details for a blog idea to capture as much info as possible, at the time of ideation.
title: "Blog Idea: "
labels: ["blog idea"]
body:
  - type: input
    id: blog-title
    attributes:
      label: Blog Title
      description: Set the title of the blog post
    validations:
      required: false
  - type: input
    id: blog-slug
    attributes:
      label: Blog Slug
      description: The path for the blog post
      placeholder: e.g. title-of-blog-post
    validations:
      required: false
  - type: input
    id: blog-excerpt
    attributes:
      label: Blog Excerpt
      description: Small description of the blog post
    validations:
      required: false

  - type: textarea
    id: blog-topic-notes
    attributes:
      label: Topic Notes
      description: Do you have any notes on the topic? Enter the raw throughts and ideas
      placeholder: Describe the topic
    validations:
      required: false

  - type: textarea
    id: blog-references
    attributes:
      label: Topic References
      description: Do you have any references on the topic? Enter the URLs
    validations:
      required: false

  - type: checkboxes
    id: blog-tags
    attributes:
      label: Tags for the Blog Post
      description: Select the tags for the blog post
      options:
        - label: SharePoint
        - label: Microsoft 365 Copilot
        - label: Custom Copilot
        - label: AI
        - label: Power Platform
        - label: Azure
        - label: Microsoft Teams
        - label: Microsoft Graph
        - label: Microsoft Search
        - label: Microsoft Viva
        - label: Microsoft Lists
        - label: Microsoft OneDrive
        - label: Microsoft 365
        - label: Microsoft 365 for Apps
        - label: Microsoft 365 Adoption
        - label: Microsoft 365 Governance
        - label: Microsoft 365 Security
        - label: Development
        - label: PowerShell

  - type: markdown
    attributes:
      value: |
        Support Tools:
        - [Microsoft Designer](https://designer.microsoft.com/image-creator)
Personally, the idea of using checkboxes appealed but they can trigger a new issue to be created as a task, when presented to the end user. Not the experience I was hoping for.
When you save the YAML file in the repo default branch e.g. main/master, it must follow the path:
.github/ISSUE_TEMPLATES/<your-issue-template>.ymlWhen this is complete, and you navigate to the issues tab, you should now see the option to select a type of issue you wish to raise:

Note: this only works with the web experience, the Github mobile apps (iOS) do not yet support this.
Example Output
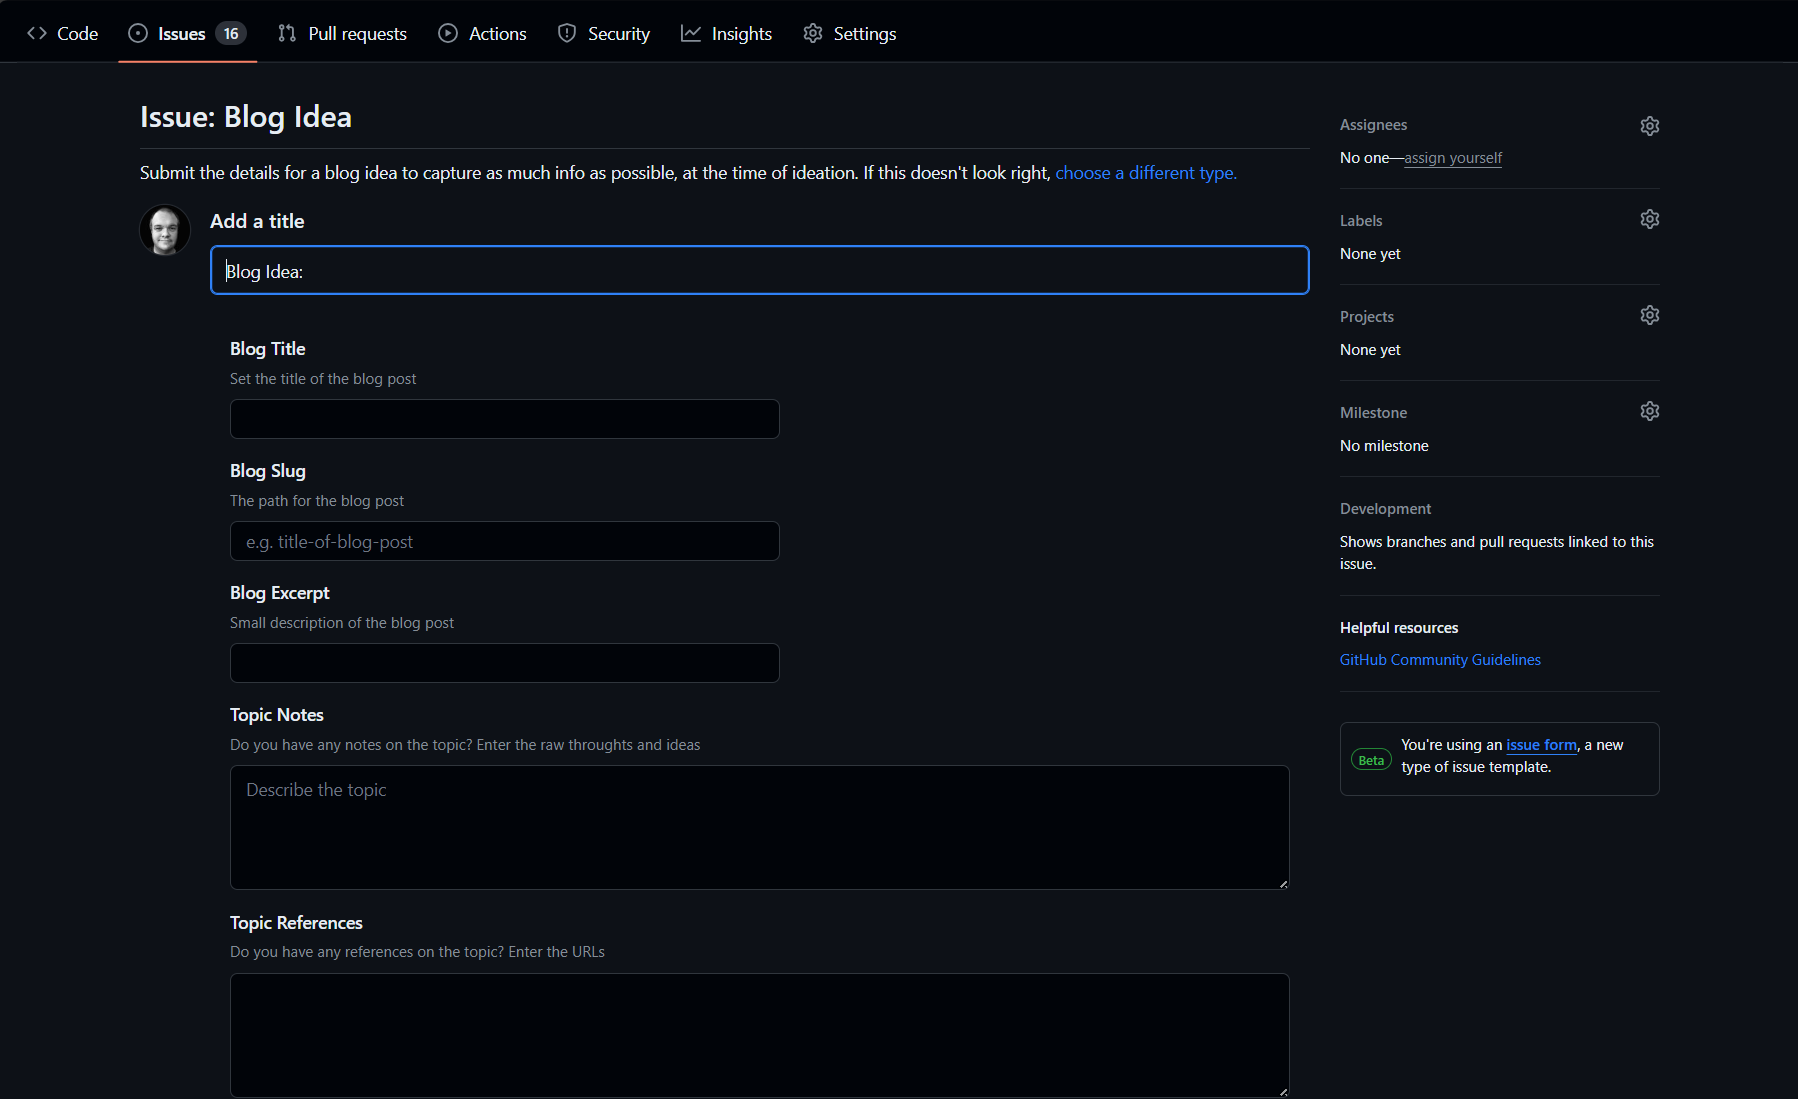
Below is a screenshot illustrating the fields that are created automatically when a contributor submits an issue.

Conclusion
GitHub Forms is a great way of guiding users to entering information you are seeking to collect when they choose to submit an issue - they have a lot of potential in other repositories I own.
YAML is straight forward to learn and easy to find resources to help.
Resources
Here are resources I found when looking into this topic:
- Creating Issue Forms | Github
- Syntax for Github Form Schema | Github
- Syntax for Issue Forms | Github
- About Issue and Pull Request Templates | Github
Enjoy!