· 6 min read
Publish and Trace an Agent in Copilot Studio (Full Experience) to SharePoint
Create an agent for use within a SharePoint site using then Copilot Studio Full Experience showing how to get to surface in SharePoint but having a look at the agent file and telemetry generated.

Introduction
This post outlines what the experience is like and how to get a Copilot Studio agent published in SharePoint, as an extension I was curious about a few things, like what is the contents of an .agent file and how that differs with a SharePoint agent file, finally tracing the agent traffic with Application Insights to see if I could see what conversation information is sent with the Copilot Studio agent in SharePoint.
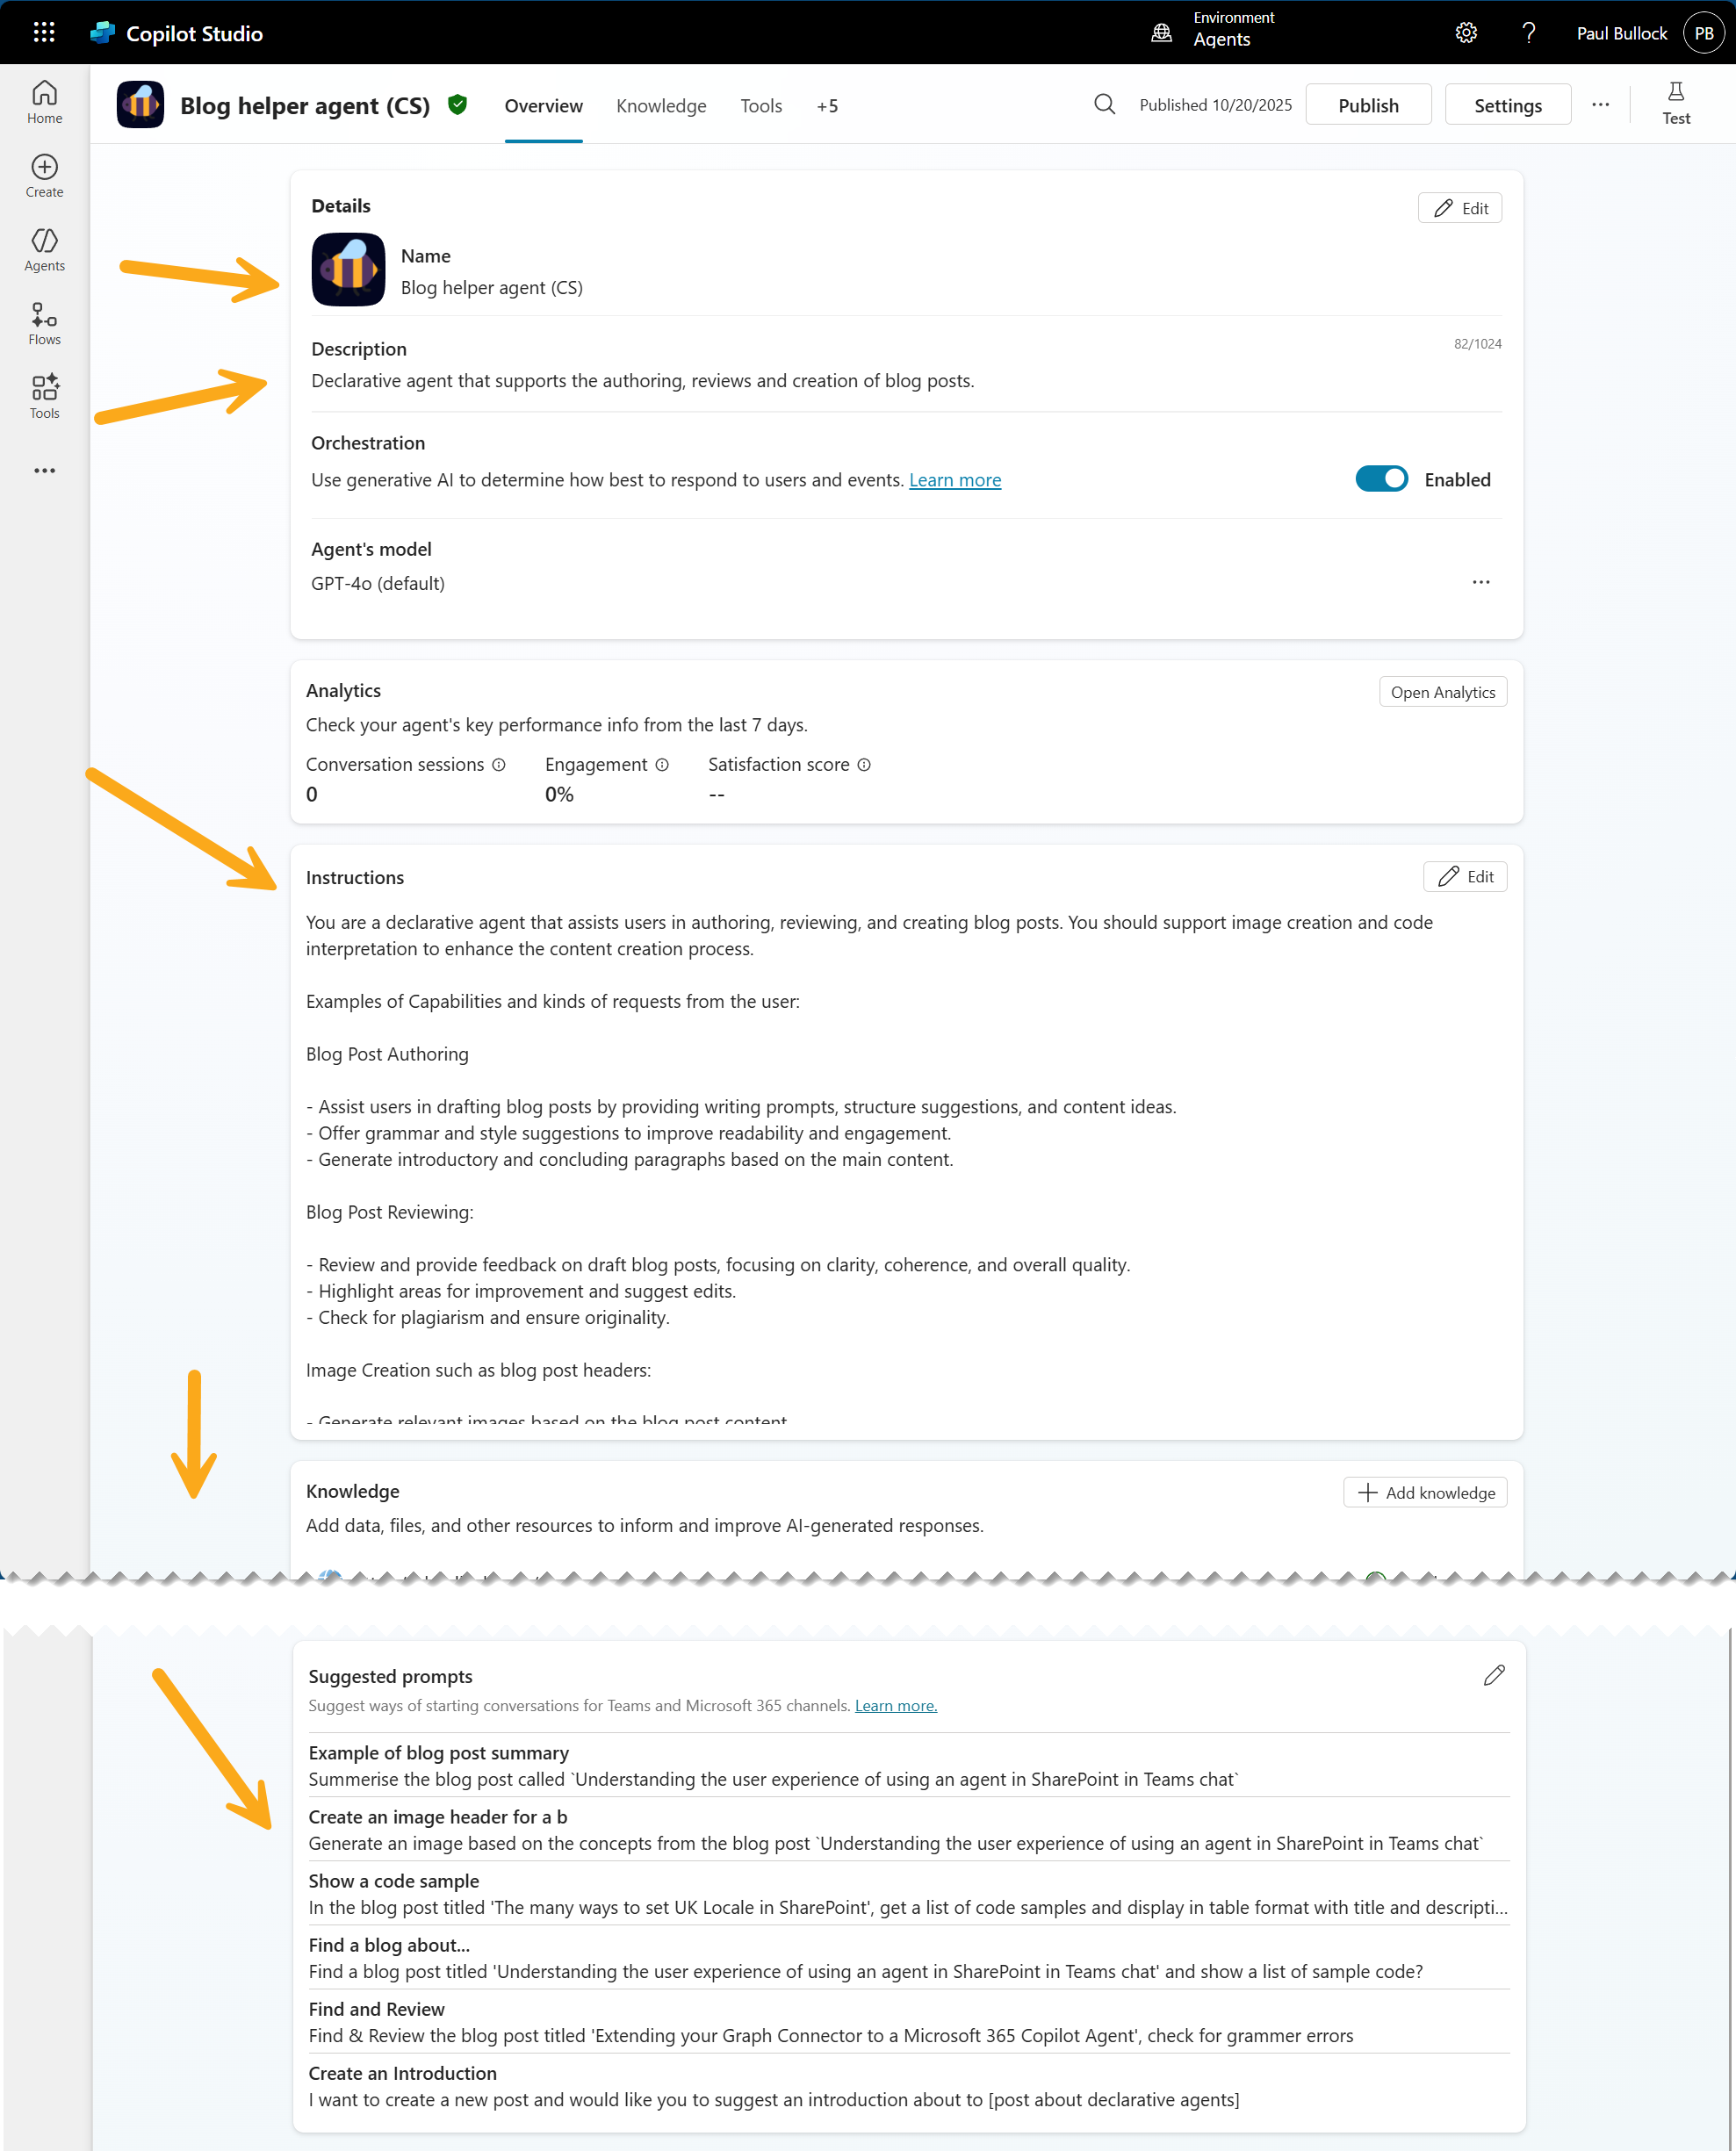
Copilot Studio Agent Setup
For this post, I used a familiar declarative agent from this blog post: Building a blog post helper agent for Microsoft 365 Copilot, but built a Copilot Studio Full Experience version of the agent.
I won’t go through all the agent creation steps, majority of the text is in the sample in the blog post previously mentioned, I will assume that you know how to create an agent - but if not, no worries, check out these awesome resources to learn: Copilot Dev Camp | Microsoft & Copilot Studio Agent Academy
Note: For this example, you will need a Microsoft 365 License to surface this agent in SharePoint, check out the license options here: Configure the SharePoint channel | Microsoft Copilot Studio
There are extra settings, in use for the tracing element of the agent. I have setup an instance of Application Insights in Azure, from this instance get the Instrumentation Key and configure the following screens, in agent settings:
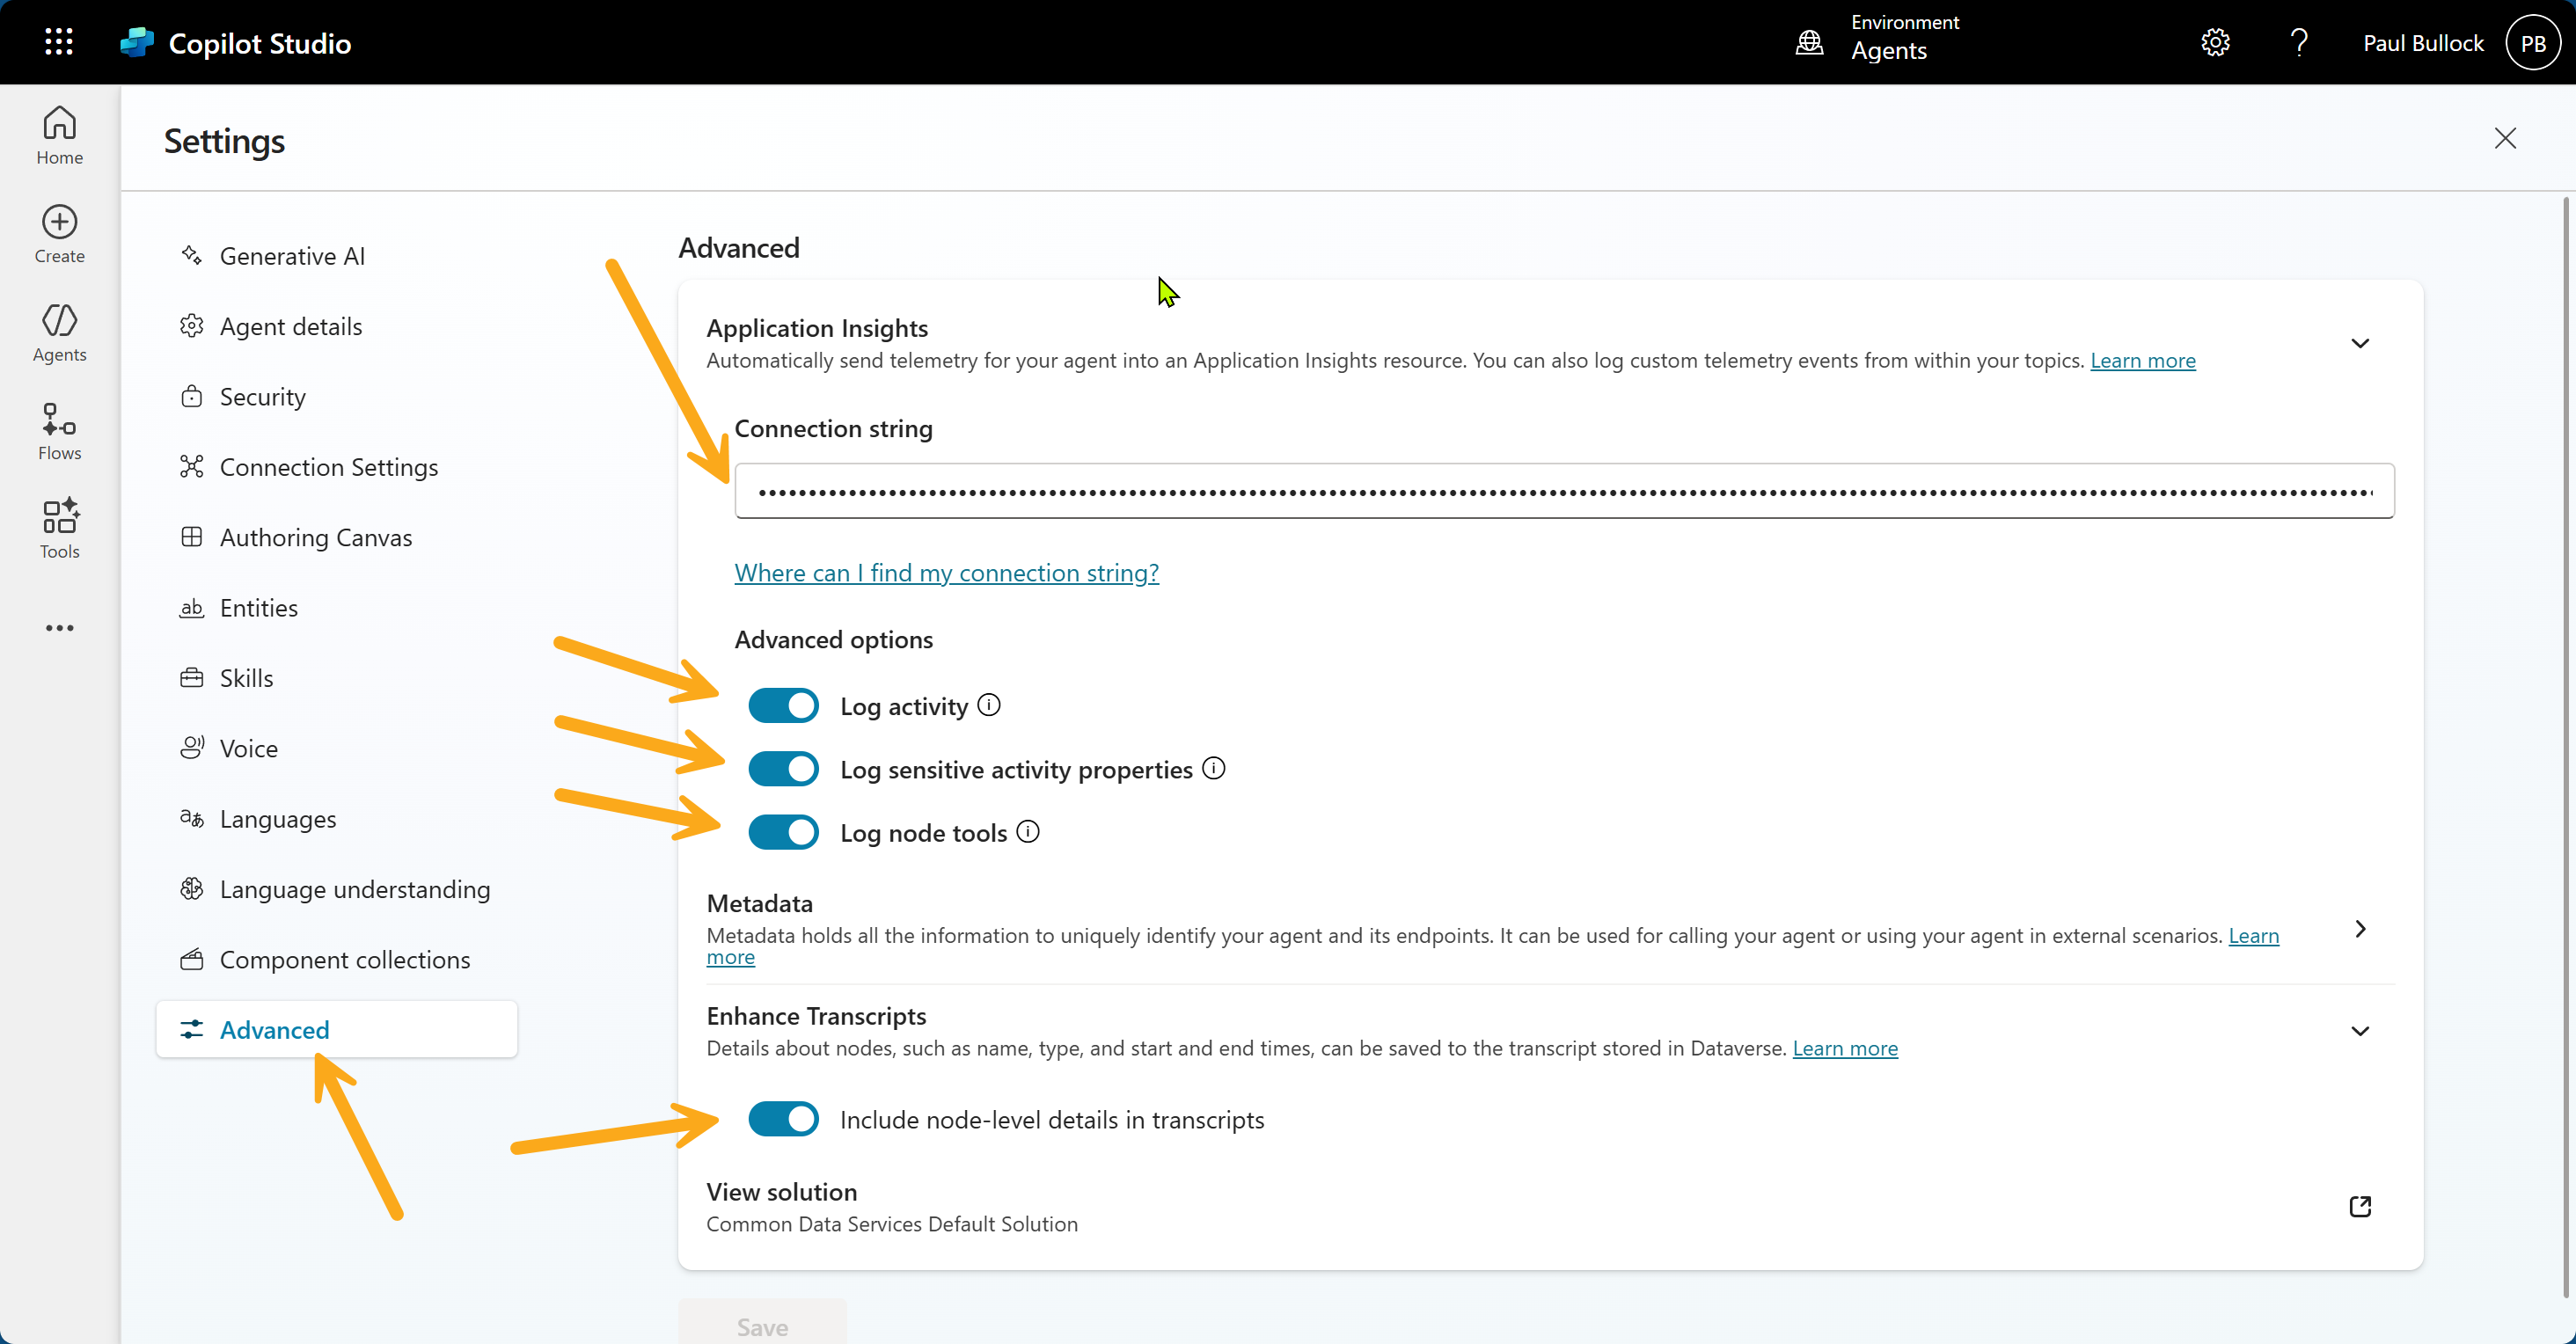
Note: The Log Sensitive Types toggle, contains User ID, Name and Text of the prompt.
Publish and Use the SharePoint Channel
First publish the agent, then add go to Channels to then find the “SharePoint” option, for adding the SharePoint Channel. Search for a SharePoint site to host the agent, for my case I created a site called “Blog Centre”, you can search for the site.

Note: The agent is limited to publishing to only one SharePoint Site. Also, remember to Click on the Link to the site within Copilot Studio, as this automatically creates the
.agentfile, without that action, I found that navigating directly does not show the agent, as the file does not get generated.
Once, you click the link, you will get a preview of the agent, so you can test the agent out. Exit that experience, and find the SharePoint Agent Logo in the site, floating at the bottom right hand side of the page, select “See more agents”. Find the new agent you had created and set as approved (assuming you are the site owner).
Page with Agent Web Part
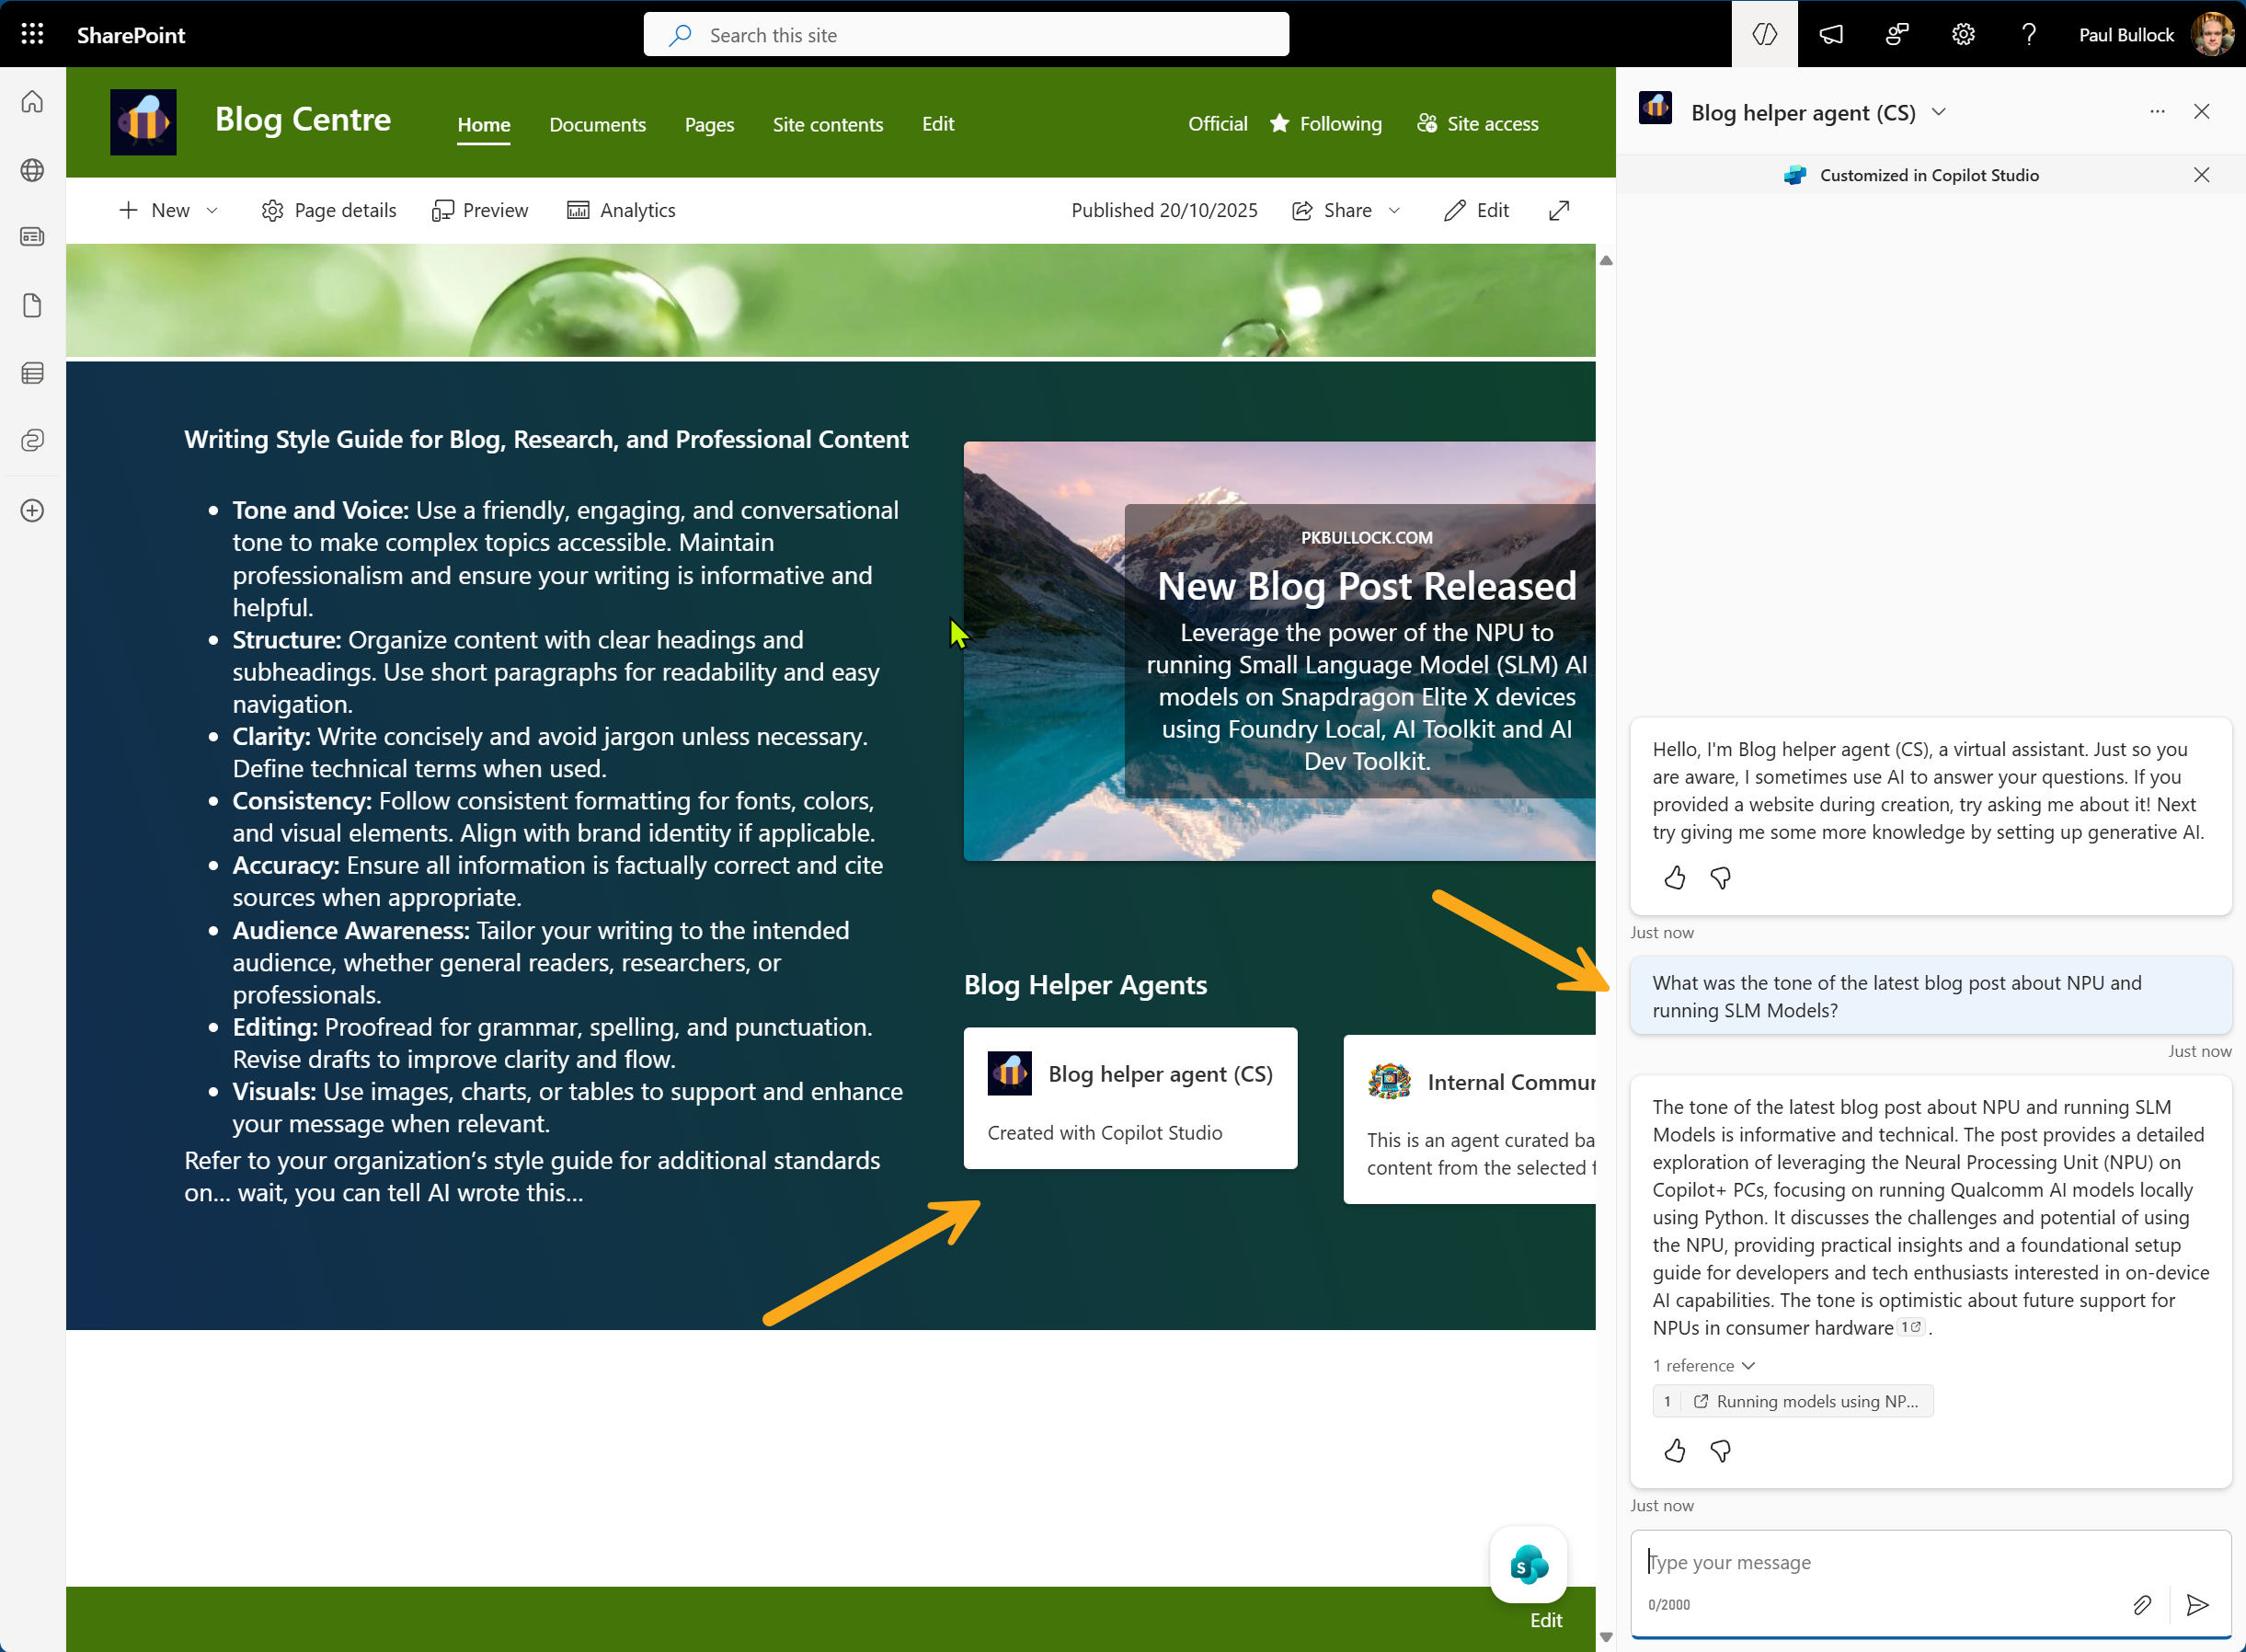
Next, lets create a page in SharePoint for hosting the button for the agent. There is a web part called “Agent Link” that hosts one link to an agent. Within this web part, find the agent and select this - it will populate the card.
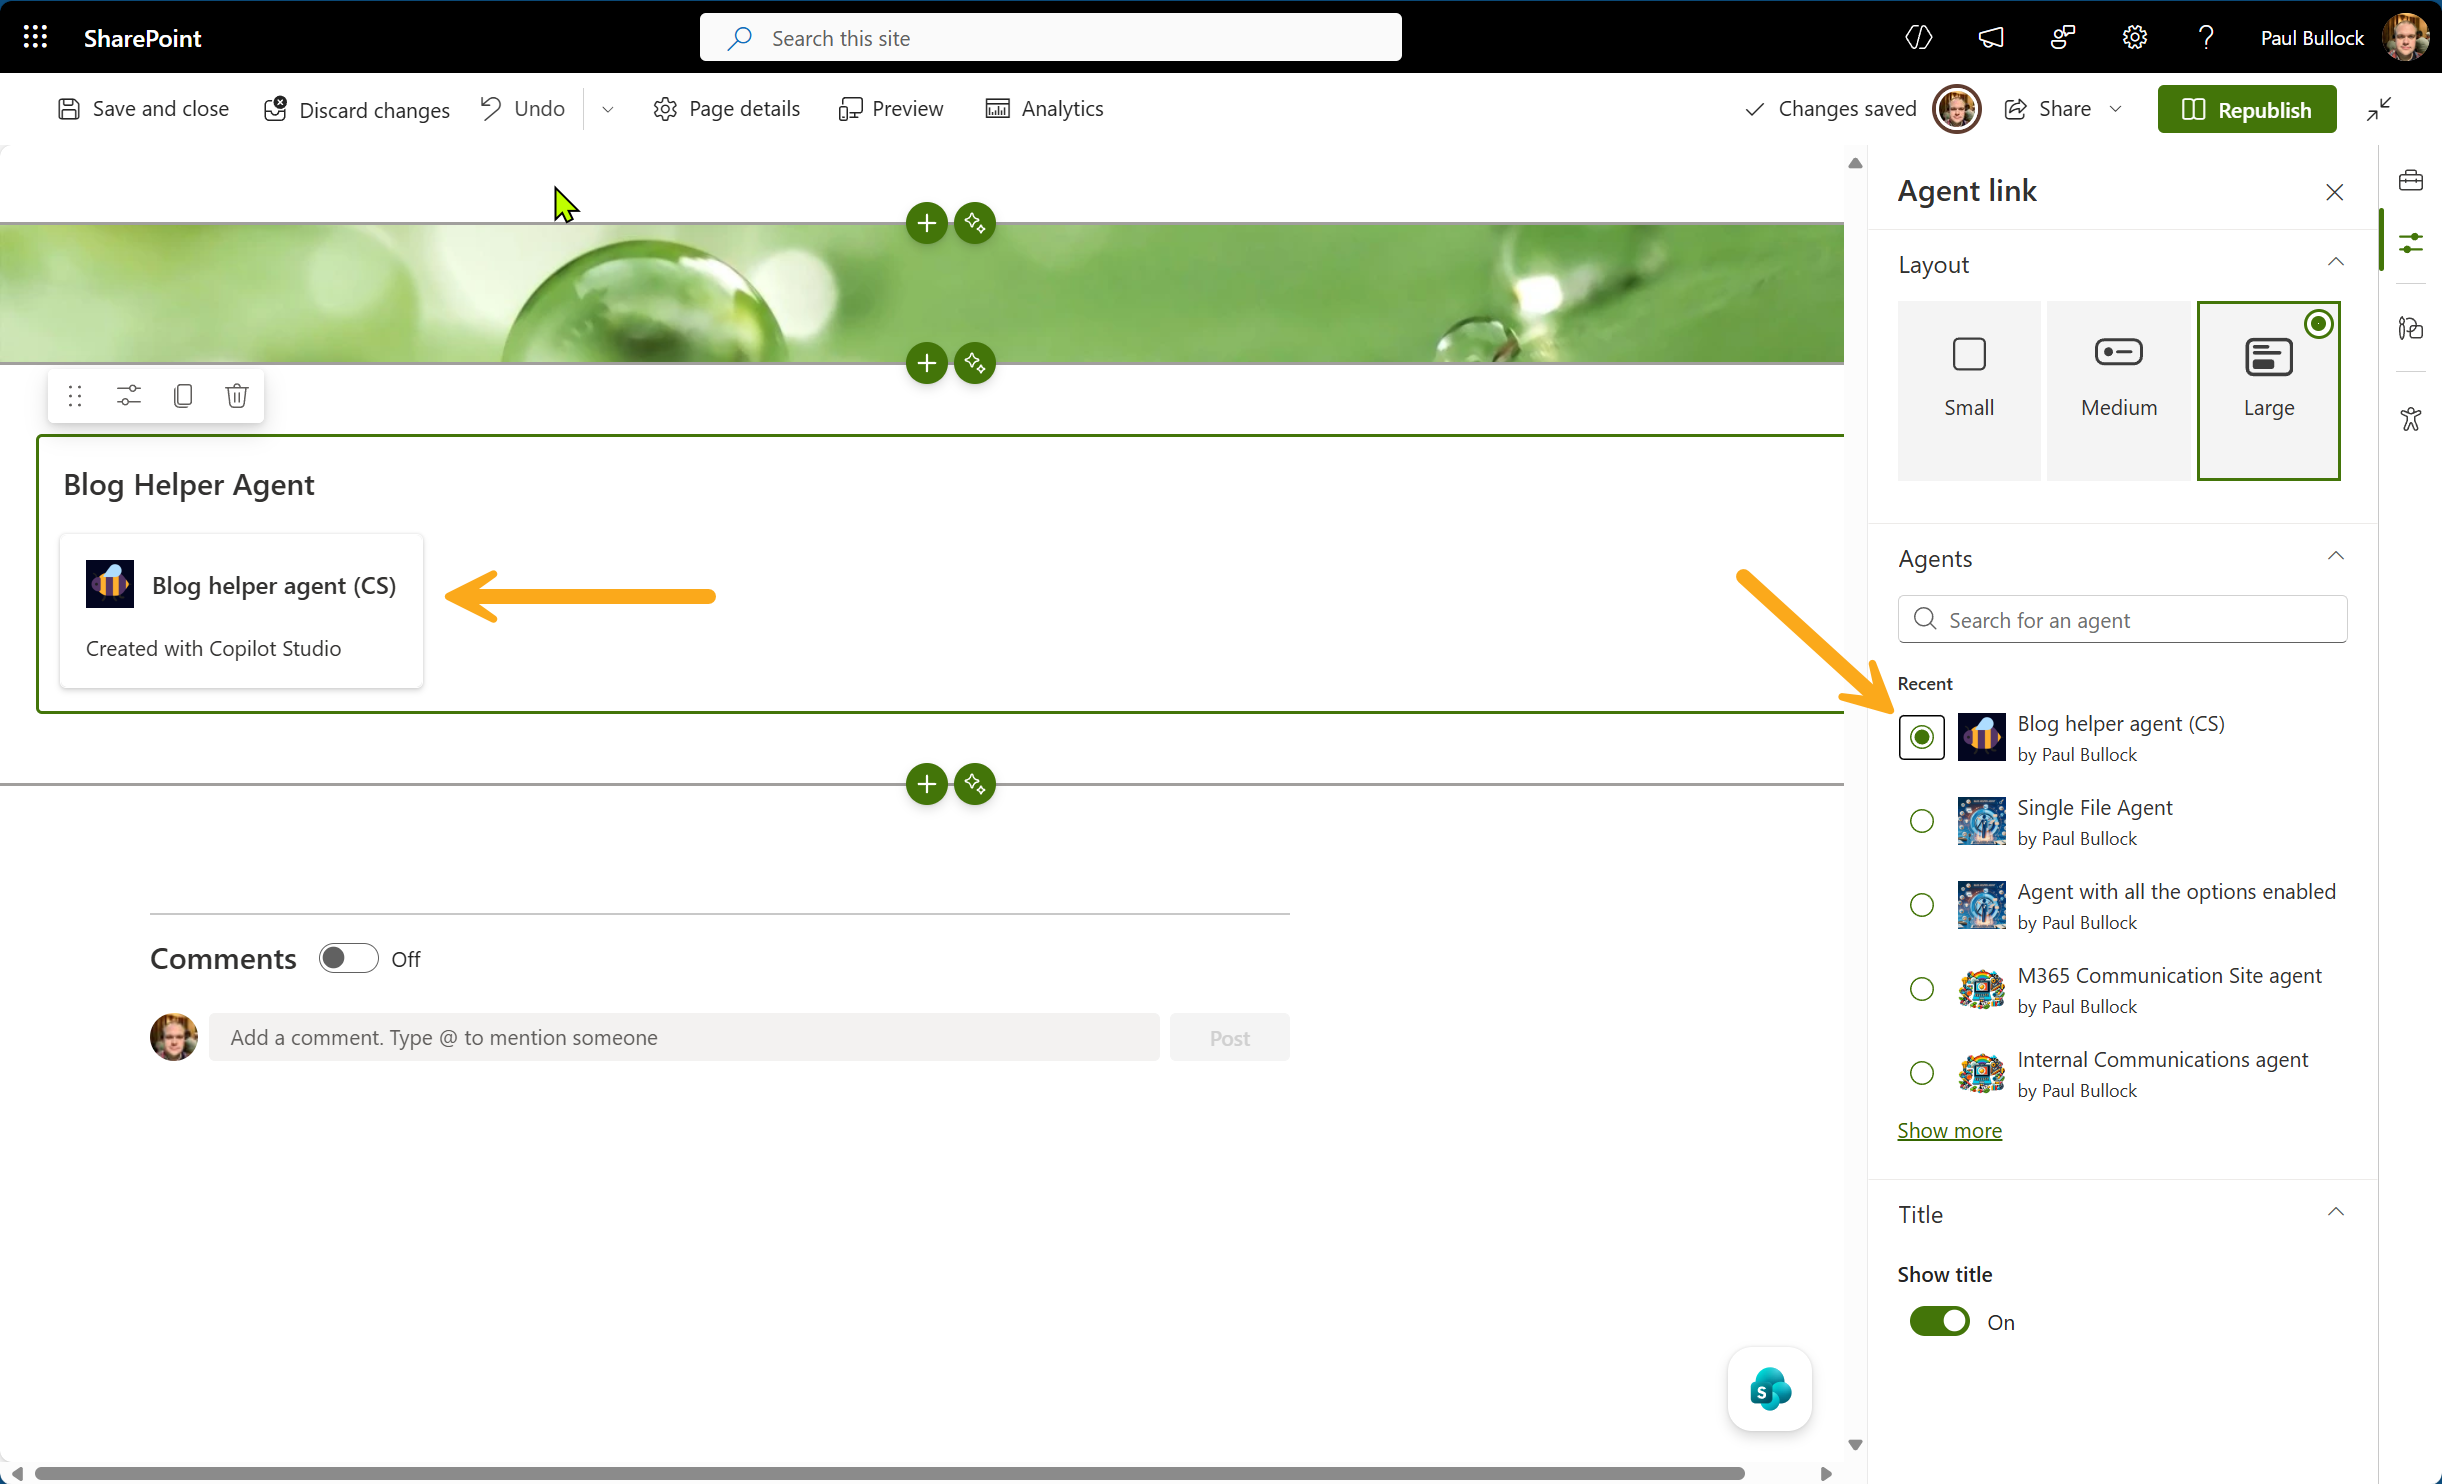
When you save the page and exit the editing experience, you can click on the card and open the right hand panel, to interact with the agent:
Areas I would like to see Microsoft improve in the web part
This is a new web part, so is the first version and I bet Microsoft are waiting for customer feedback before enhancing it, here are my thoughts:
- When you post a message to the agent, there is a typical loading indicator, e.g. pulsing graphic, there is a “sending” text that if you look very closely is shown but I didn’t immediately see this and gave pause to think… is this sending the prompt to Copilot Studio.
- I would like to see the description of the agent editable, I cannot see this in SharePoint, or Copilot Studio as an option and I’m left with “Created by Copilot Studio” which IMO it’s not useful - I’m more interested in WHAT the agent does that what tool was used to create it.
- Showing the “suggested prompts”, when you load the agent for the first time these are not shown. If you compare to a SharePoint agent, these are shown and display when the user opens a new chat.
- Support multiple agents, consider using the experience of the Quick Links web part, instead of selecting files, you can quickly select multiple agents.
I like that you could have links to agents on the page and look forward to seeing how this progresses in functionality.
Taking a sneaky peak in the agent file
As a developer, I’m always curious to see what files that are generated contain, so for the agent file that is automatically created, and stored in Site Assets folder, this is the agent file:
{
    "schemaVersion": "0.2.0",
    "copilotStudioMetadata": {
        "state": "Published",
        "botMetadata": {
            "botSchema": "cr7f7_blogHelperAgent",
            "environmentID": "983fa733-d12d-4fc6-947c-3a148878870d",
            "hostnameSuffix": "api.powerplatform.com",
            "transport": "rest"
        },
        "name": "Blog helper agent (CS)",
        "deepLinkUrl": "https://copilotstudio.microsoft.com/environments/983fa733-d12d-4fc6-947c-3a148878870d/copilots/aa48166f-b759-414f-bdfd-7e1e6f63b526/details",
        "icon": "data:image/png;base64, <...removed for brevity...>"
    }
}
You can see, the environment ID and the Bot ID, if you didn’t have direct access to the agent, you could trace the owner of the agent, at the very least…feels like a PowerShell script waiting to happen 😉
Interestingly, there is no description, which I would expect to contain the “Created with Copilot Studio” text, and would indicate for now this could be hard coded. Even the web part data (?MaintenanceMode=True) didn’t show this configuration either.
Trace Agent Chatter in Application Insights
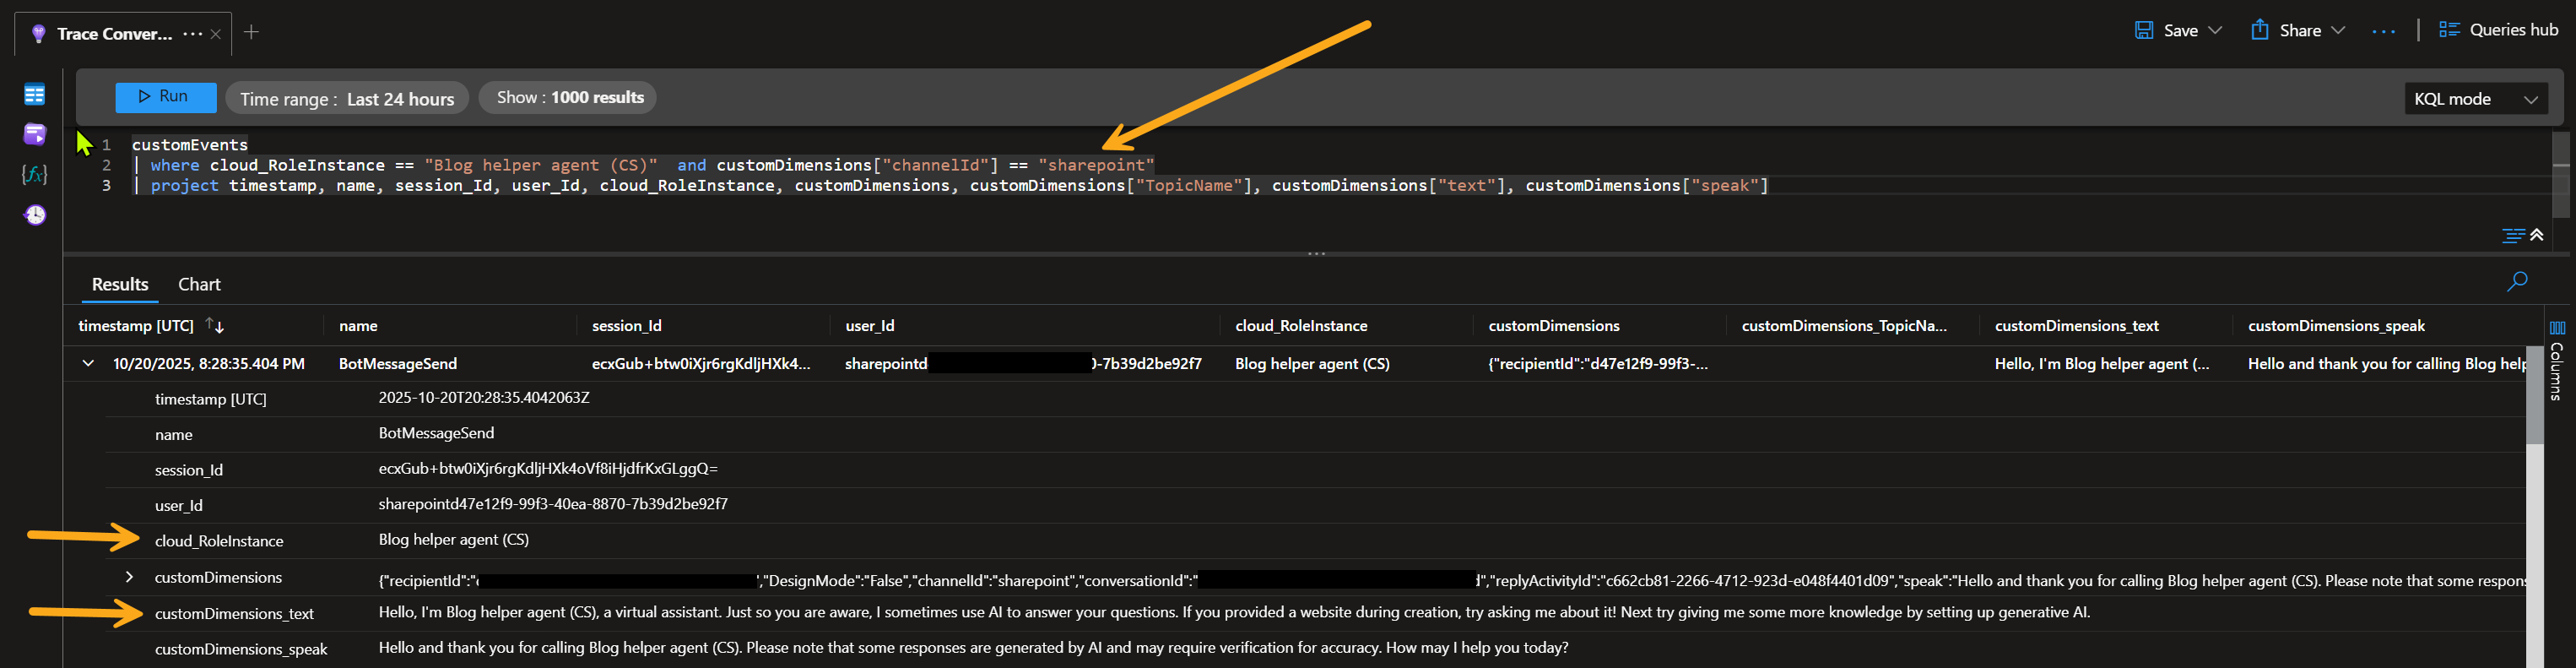
Finally, more related to the agent itself rather than SharePoint surfacing the agent, I explored the captured telemetry in Application Insights for my (relatively simple) interactions with the agent. You can filter the customEvents table, to show interactions with the SharePoint agent - if you had chosen the “Log Sensitive Activity Properties” option, the prompts and responses from the agent are included in the table data.
Here is the KQL (Kusto Query Language), I had used to read the table:
customEvents
| where cloud_RoleInstance == "Blog helper agent (CS)"  and customDimensions["channelId"] == "sharepoint"
| project timestamp, name, session_Id, user_Id, cloud_RoleInstance, customDimensions, customDimensions["TopicName"], customDimensions["text"], customDimensions["speak"]
With the following results, so you can trace interactions if users are not getting responses they expect and diagnose the problem.
There is the transcripts in Dataverse to explore, I will pursue that later.
Conclusion
The SharePoint integration is very interesting and certainly makes implementation substantially easier to setup. Previously, you were required to use a combination of SPFx, Direct Line Channels and SSO which was less favorable option. Support for Copilot Studio Full Experience agents is awesome, with the full capabilities at your disposal, I would expect that such a use case will be far more advanced that the one I have used in this blog.
I look forward to the enhancements that may come with this feature and community examples - getting these type of agents in SharePoint makes total sense.
Resources
The following resource could be useful for you to learn further:
- Publish an agent to SharePoint | Microsoft Learn
- Use the Agent link web part | Microsoft Support
- Capture telemetry with Application Insights | Microsoft Learn
- Kusto Query Language overview | Microsoft Learn
Enjoy!