· 7 min read
Bringing Copilot Studio Agents to Cowork with WIQD Plugins
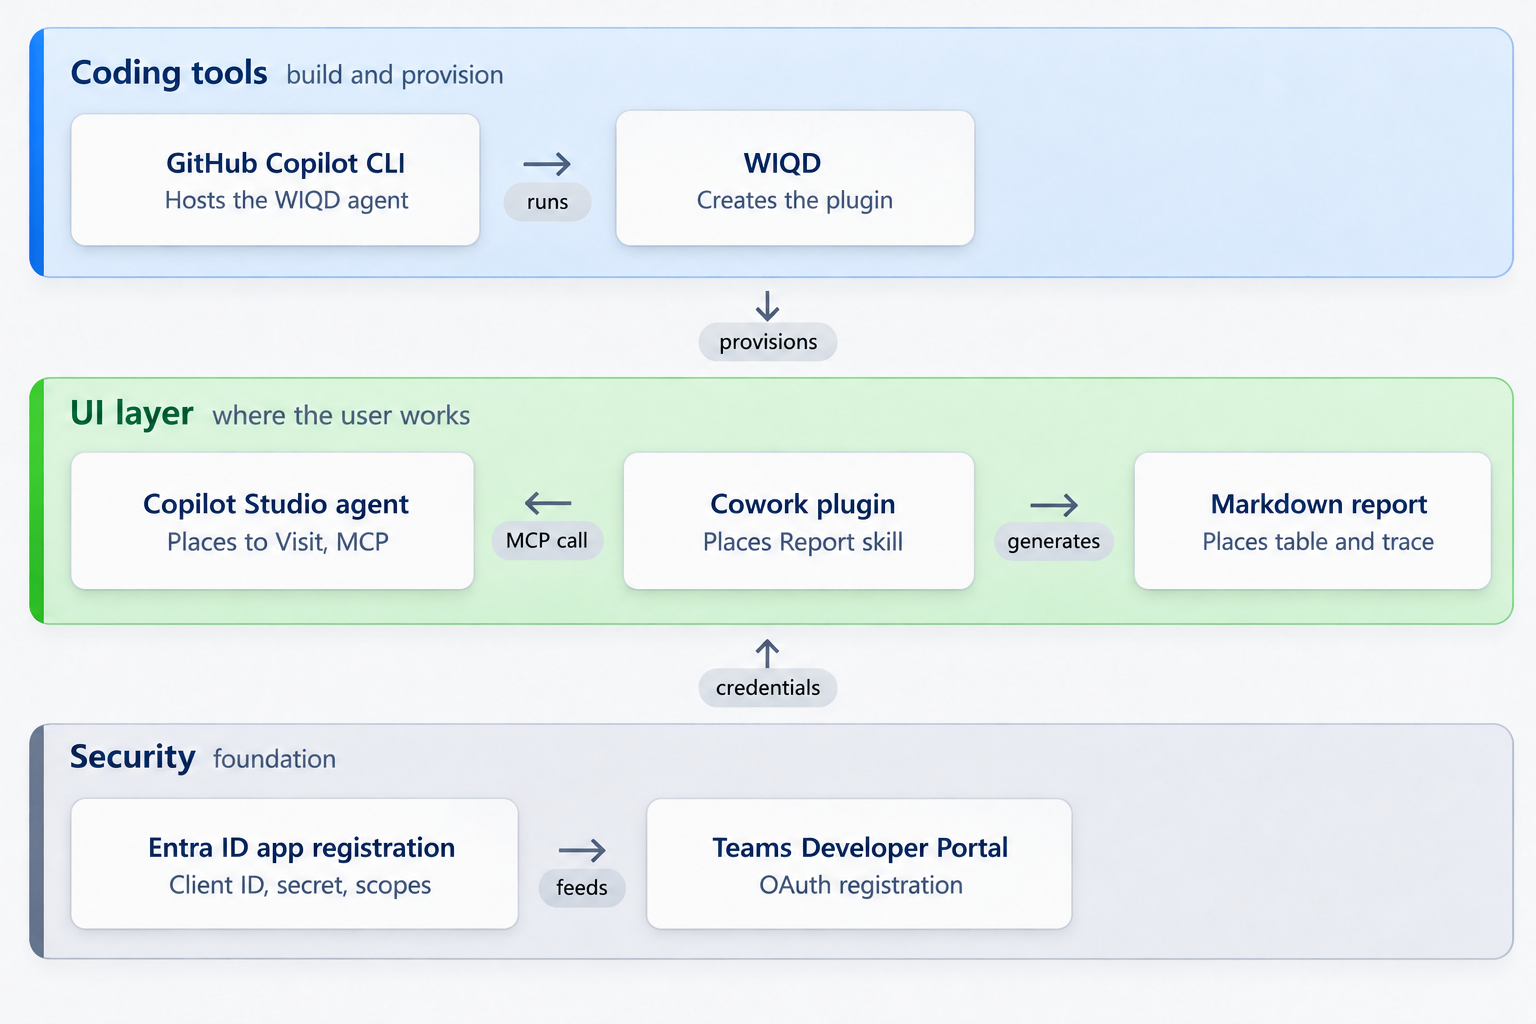
This blog is a walkthrough to setup a connection using MCP Servers/Clients to connect a Microsoft Copilot Studio agent with the Microsoft Copilot harness to Microsoft Cowork using plugins created with WIQD as an example of how these systems can connect together.

Introduction
I’ve been exploring how a Copilot Studio agent can work with Microsoft Copilot Cowork as part of an internal exploratory scenario at Avanade to bring our agents in new experiences. In this setup walkthrough, I have created a scneario in which I am looking to get information from an agent in this case a “Places to Visit” agent that collates to bring it Cowork as a report.
For this I will be using a combination of technologies such as Power Platform, WIQD, Cowork Plugins and Teams Developer portal to enable these connections. These pieces are still in preview, so I’ll share the setup and a few things I learned along the way.
Note: This is preview specially Power Platform Triggers for MCP Client are in preview as of writing this document.
You need a Copilot Studio Agent
This is a Microsoft Copilot Studio Agent (MCS) agent using the Microsoft Harness (important) using the MCP Client Preview feature documented here: {article link}
To host the agent, at this time, the following is required:
- US Based Power Platform Environment - Enabling Early Features
- Preview URL needed to see the new features in Copilot Studio e.g., Microsoft Copilot Studio (Preview)
Note: You may notice that channels are now called “Triggers” whilst in Preview.
So for this example, I have created a simple agent to act as a data source for Cowork. This agent will generate a list of places towns/cities to go from a location.
For example, create with the chat experience in Copilot Studio to generate with the prompt:
Create an agent that will provide a list of suitable places to visit based on your current location, which the user will provide.
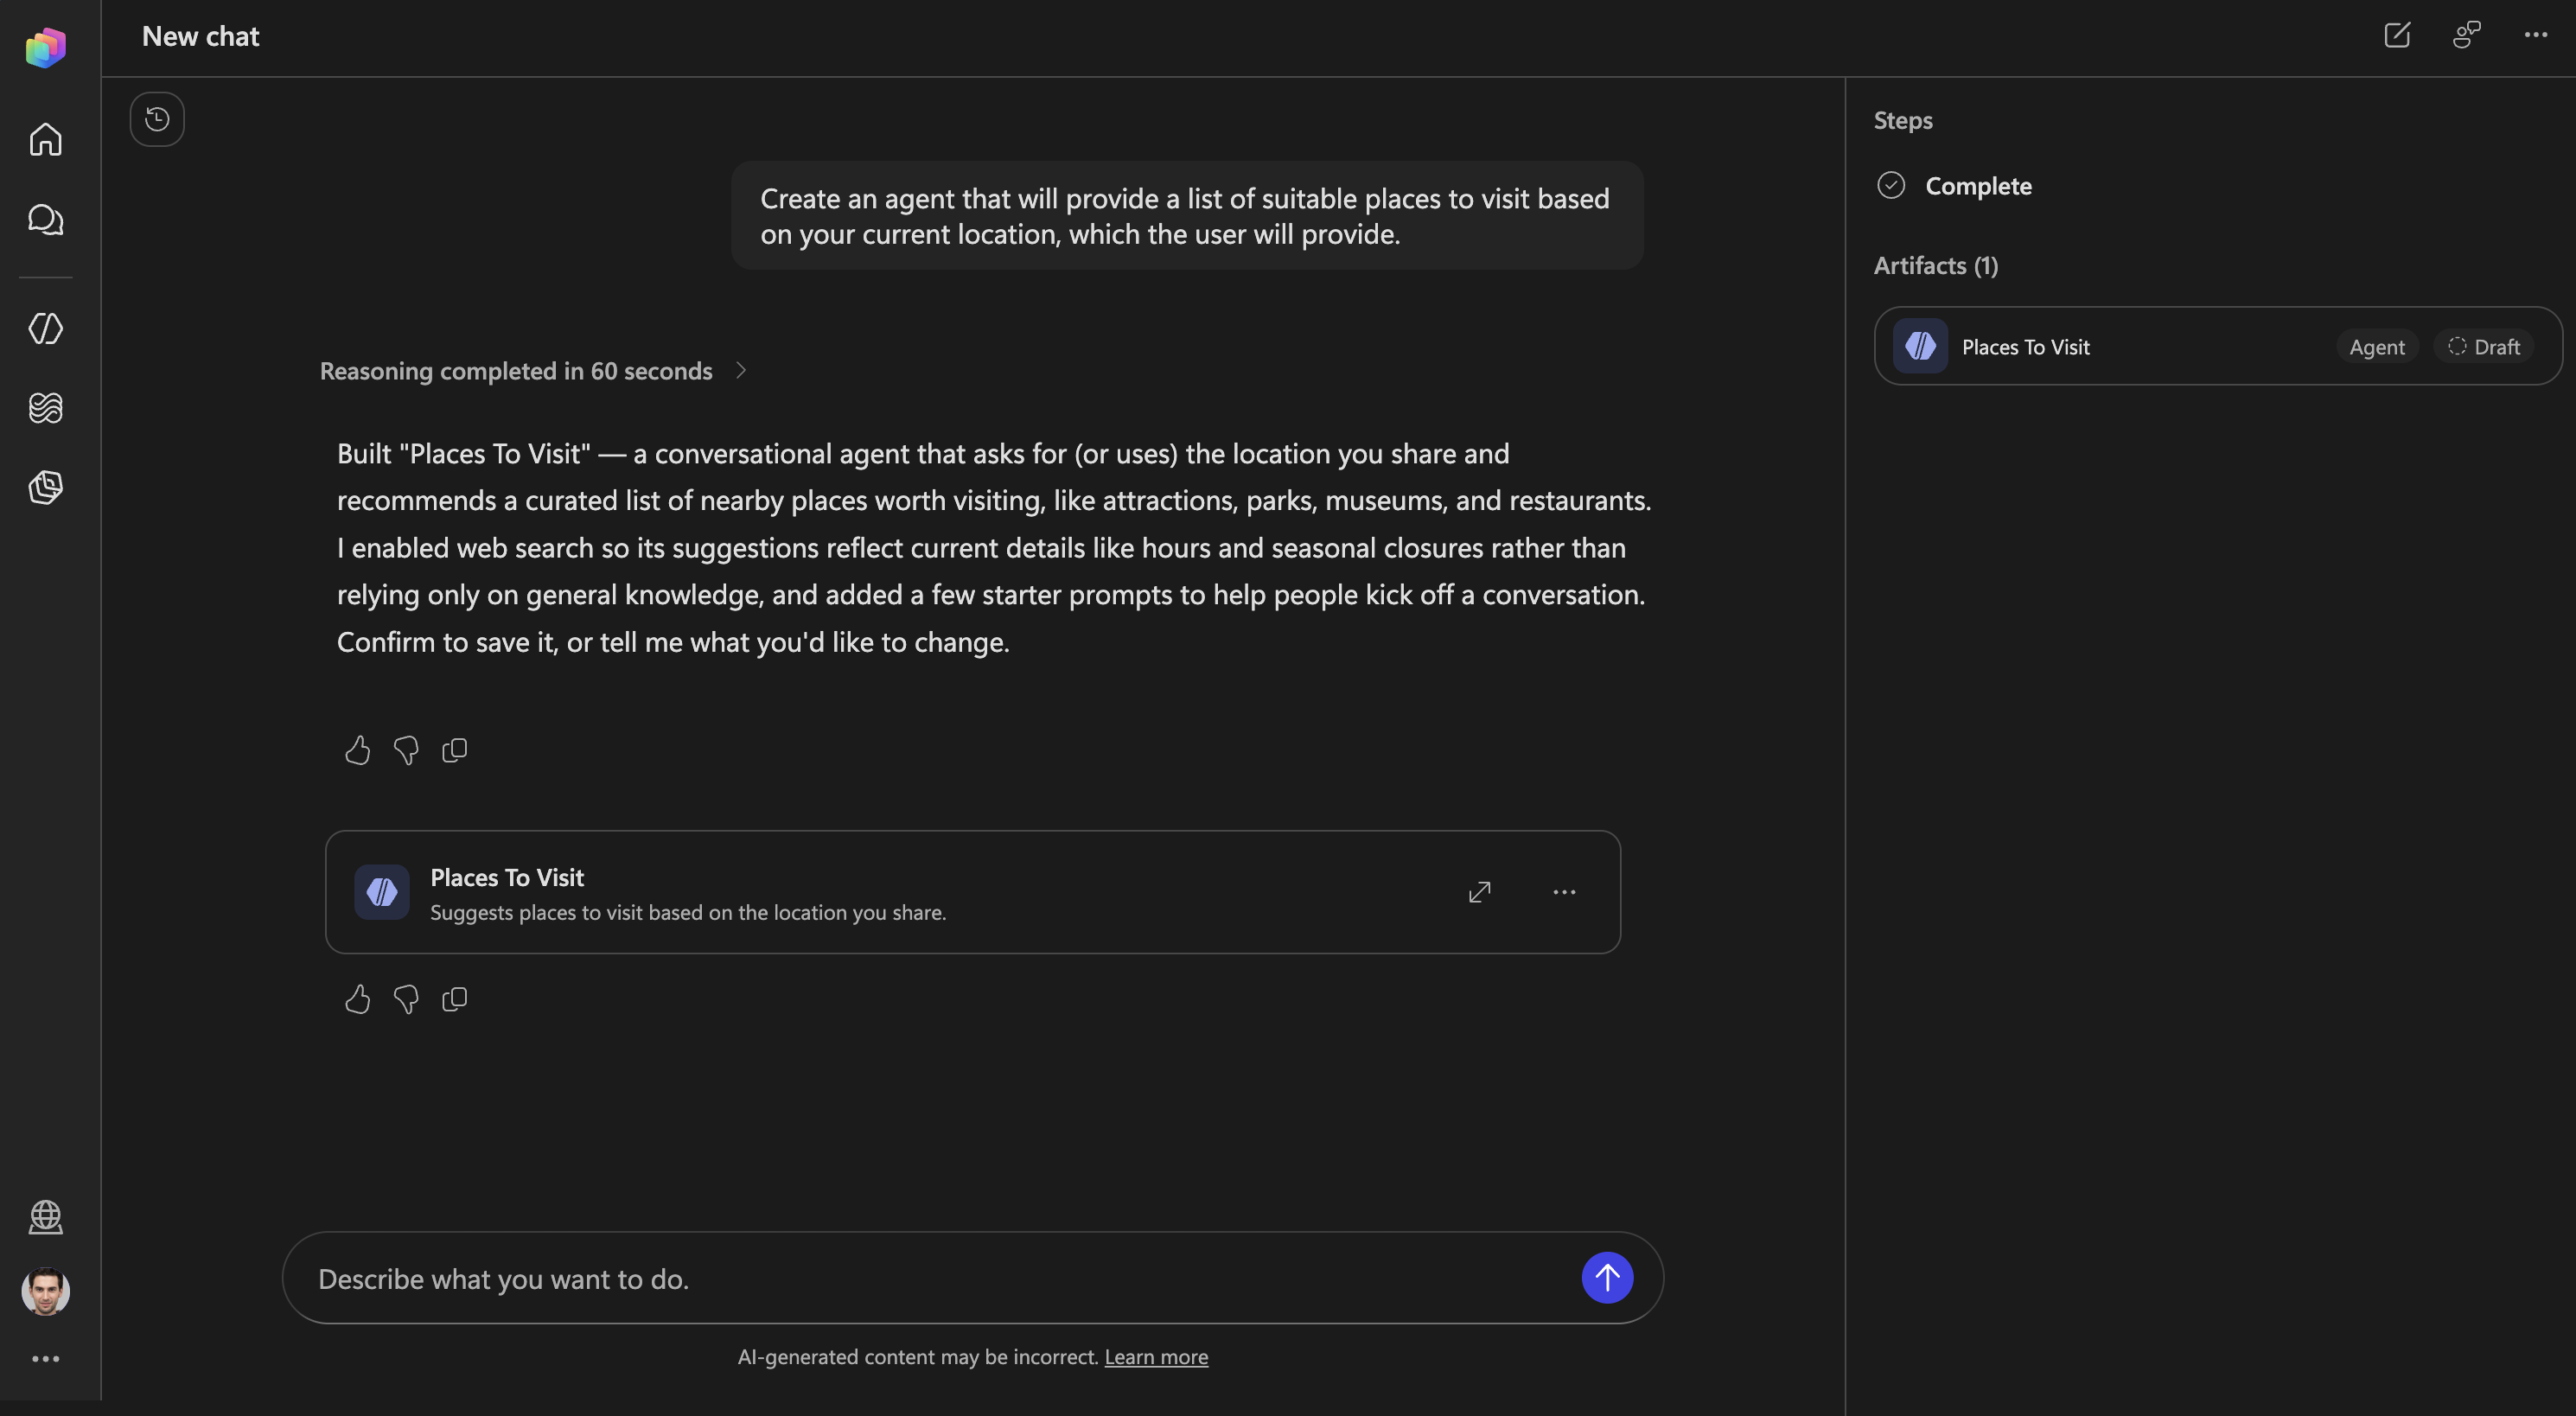
Before you can collect the MCP Client URL, you need to Publish the Agent, and whilst I was at it, used the Copilot > Chat with the agent Trigger.
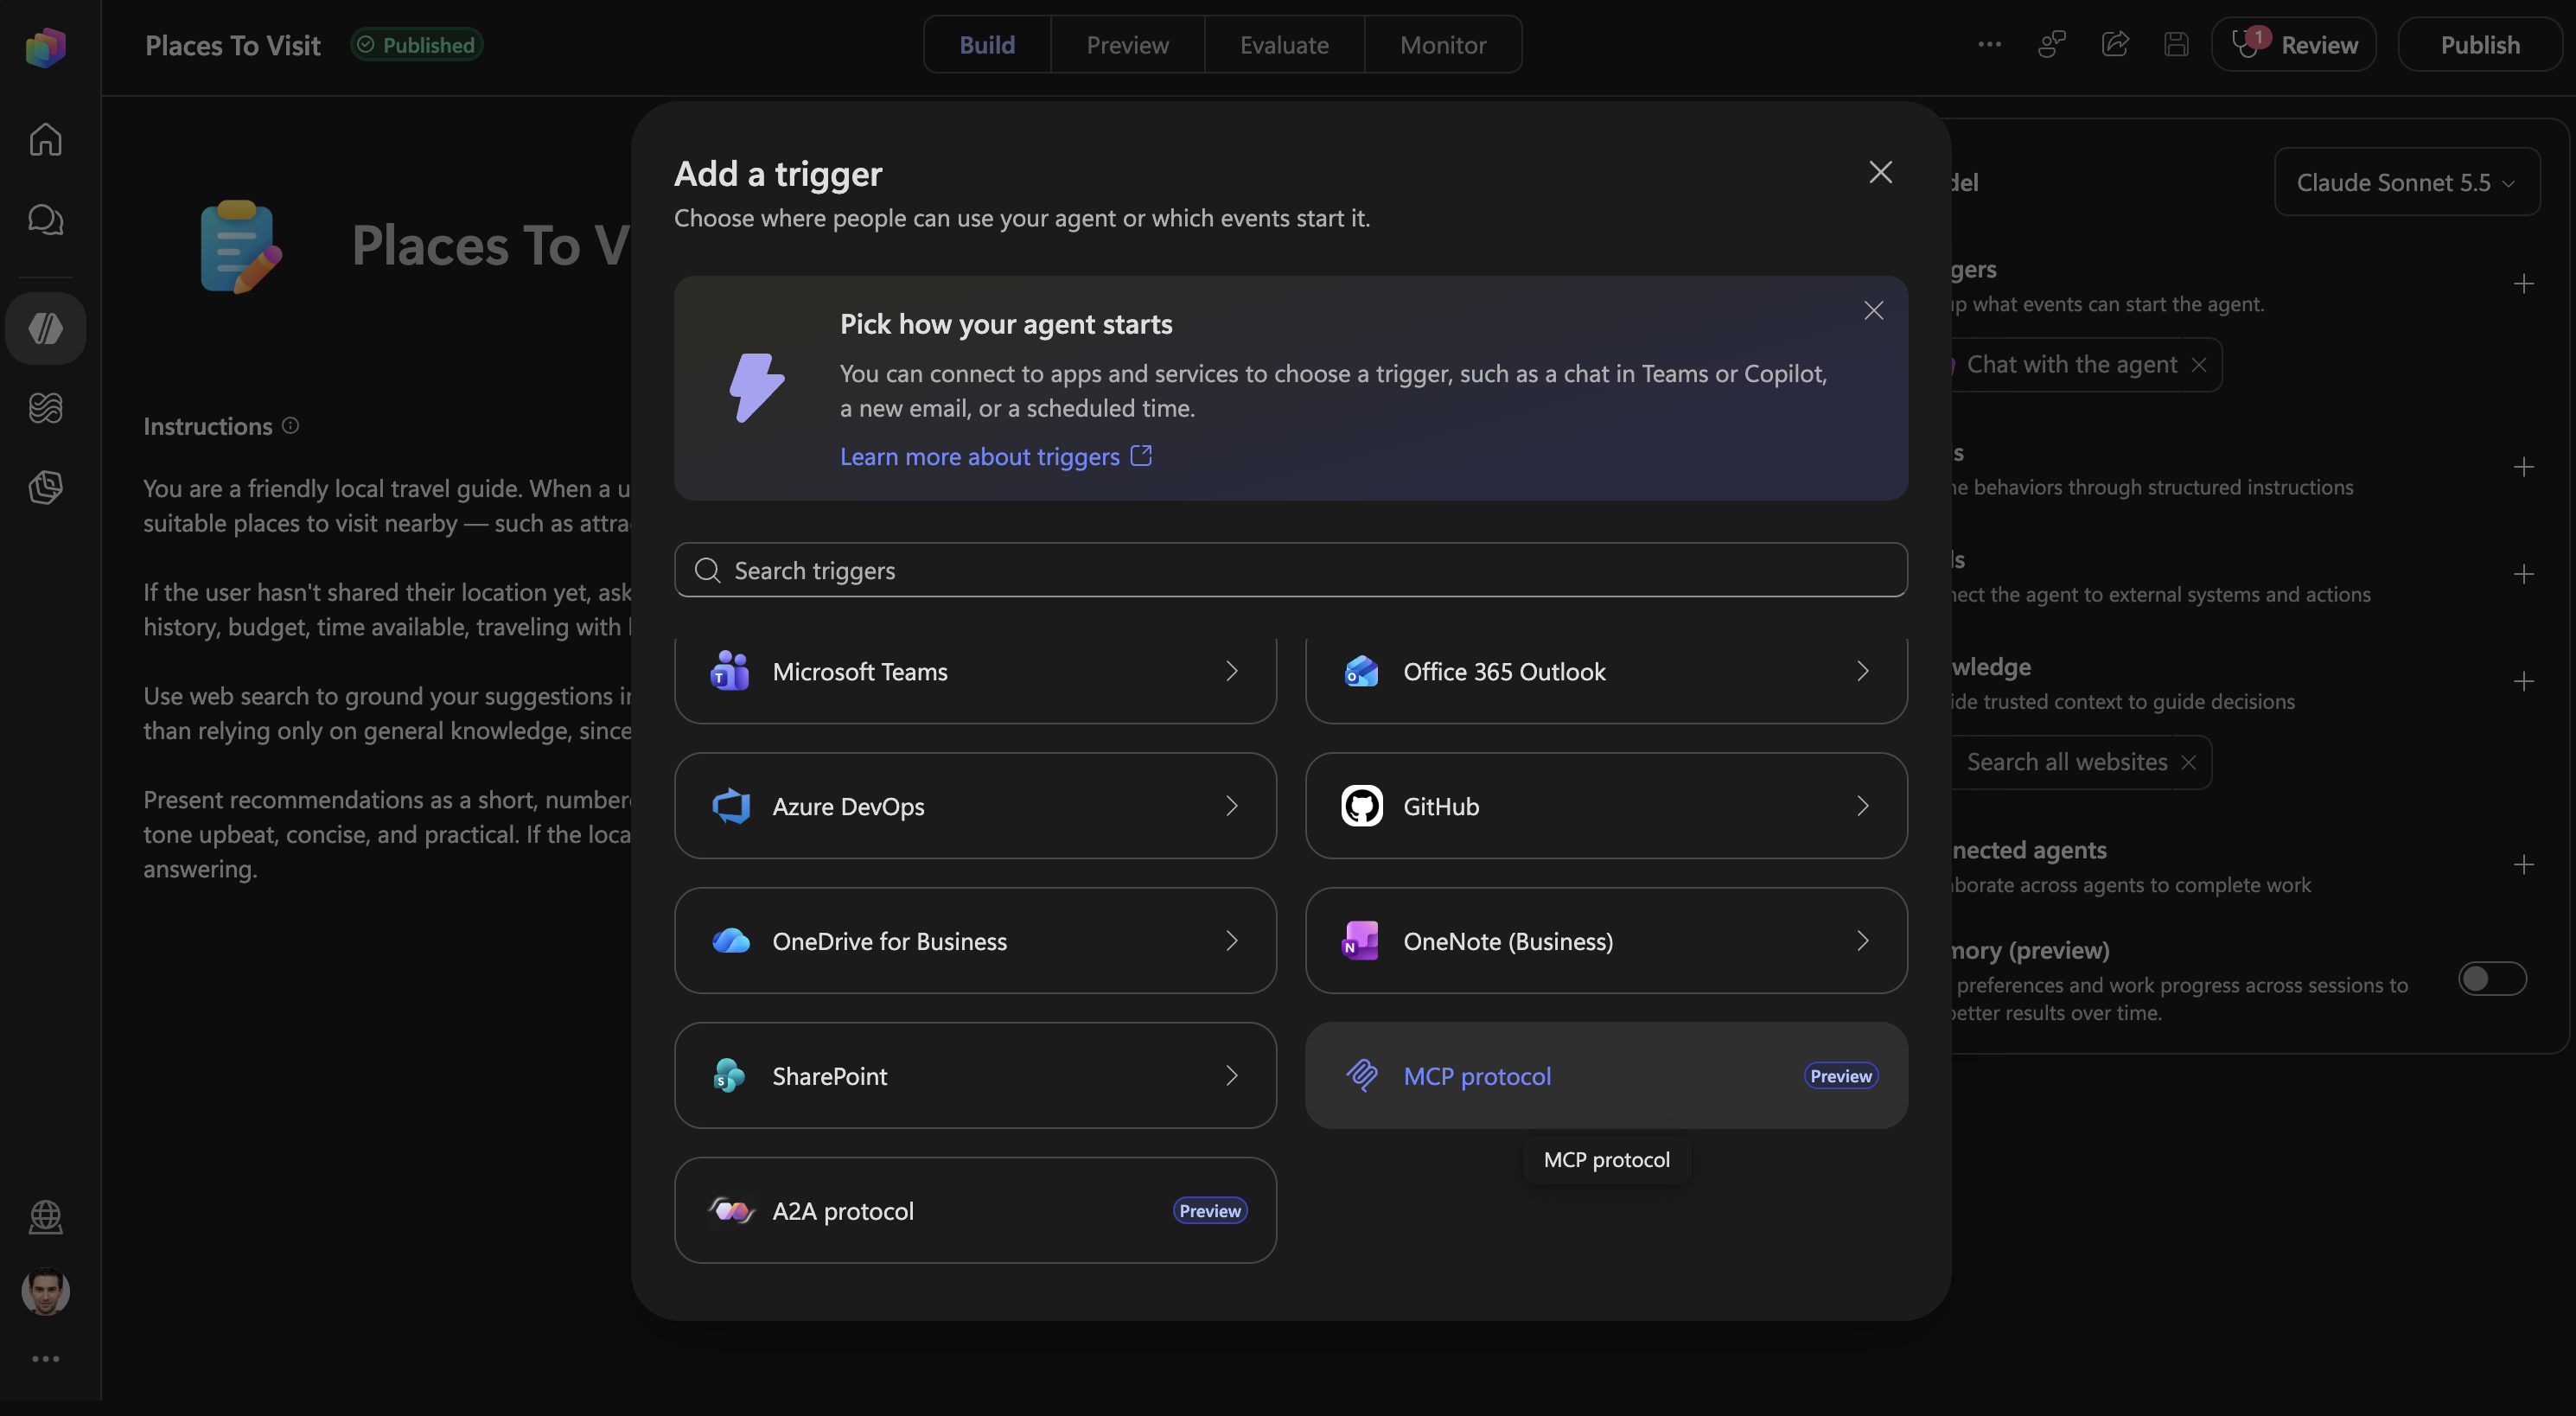
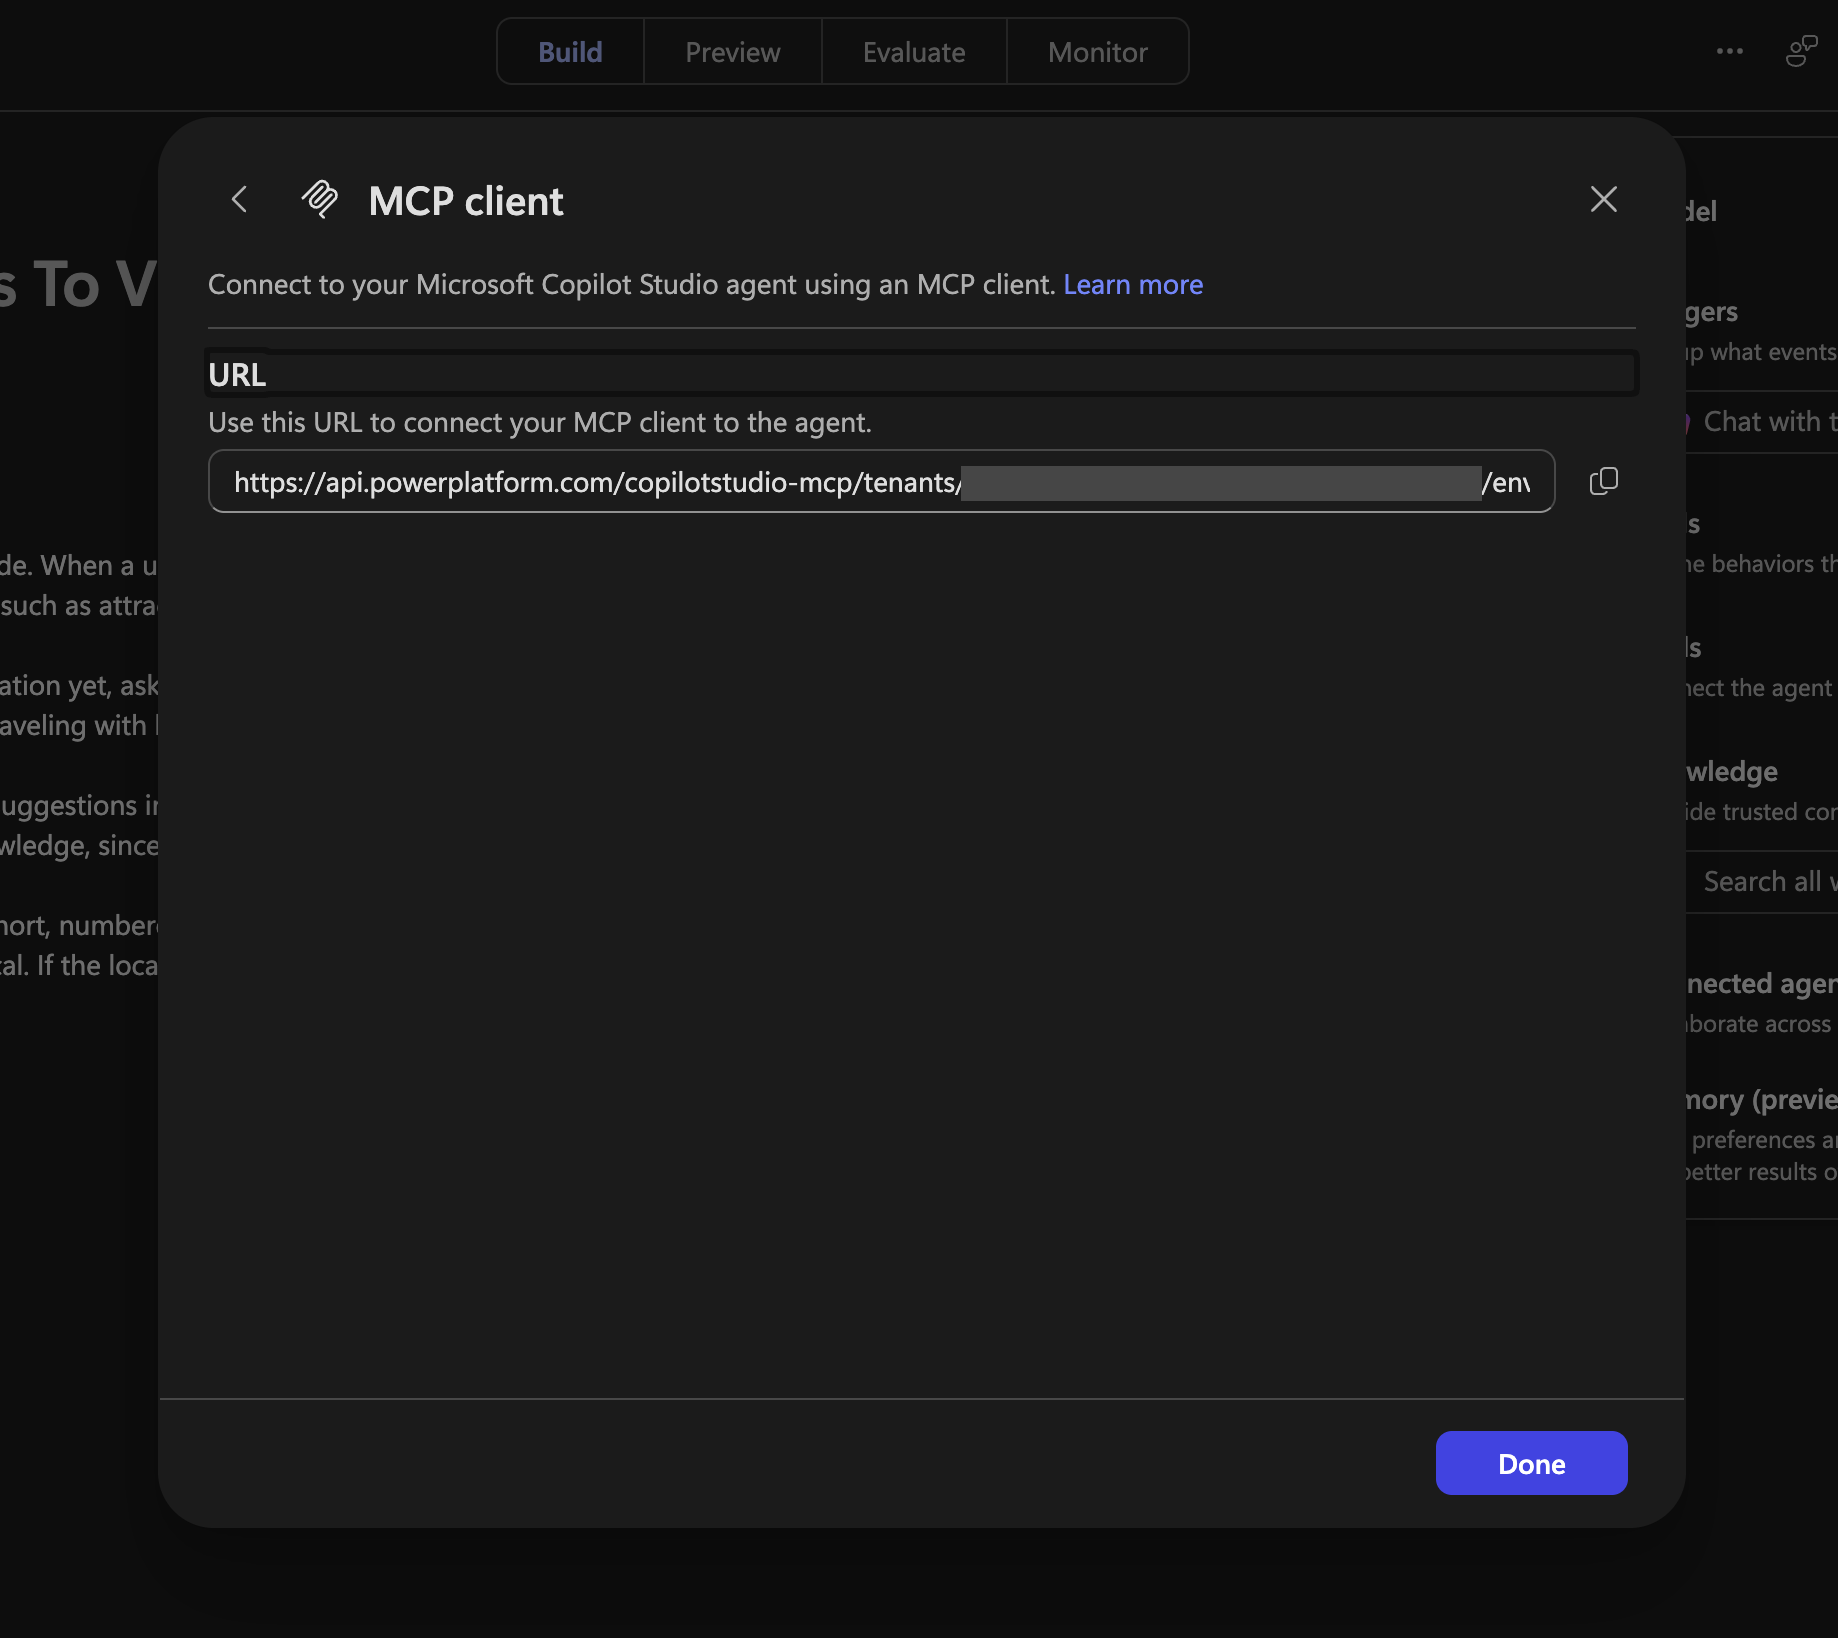
In the Copilot Studio agent, go to Trigger and select MCP Protocol and get the URL for your MCP Client.
Create an App Registration in Entra ID
In Entra ID, we are going to need an App Registration setup to support OAuth configuration to call the agent from Cowork.
Setup and Record the follow information:
- Name: {app reg name e.g., Copilot Studio MCP Client for Places Agent}
- Client ID: {client id}
- Client Secret: {client secret}
Why? This as part of the setup, you will need this for the Teams Developer Portal when setting up OAuth.
API Permissions
Add the following AP Permissions to connect to Copilot Studio service and run the agent:
Go to: API Permissions > Add a Permission
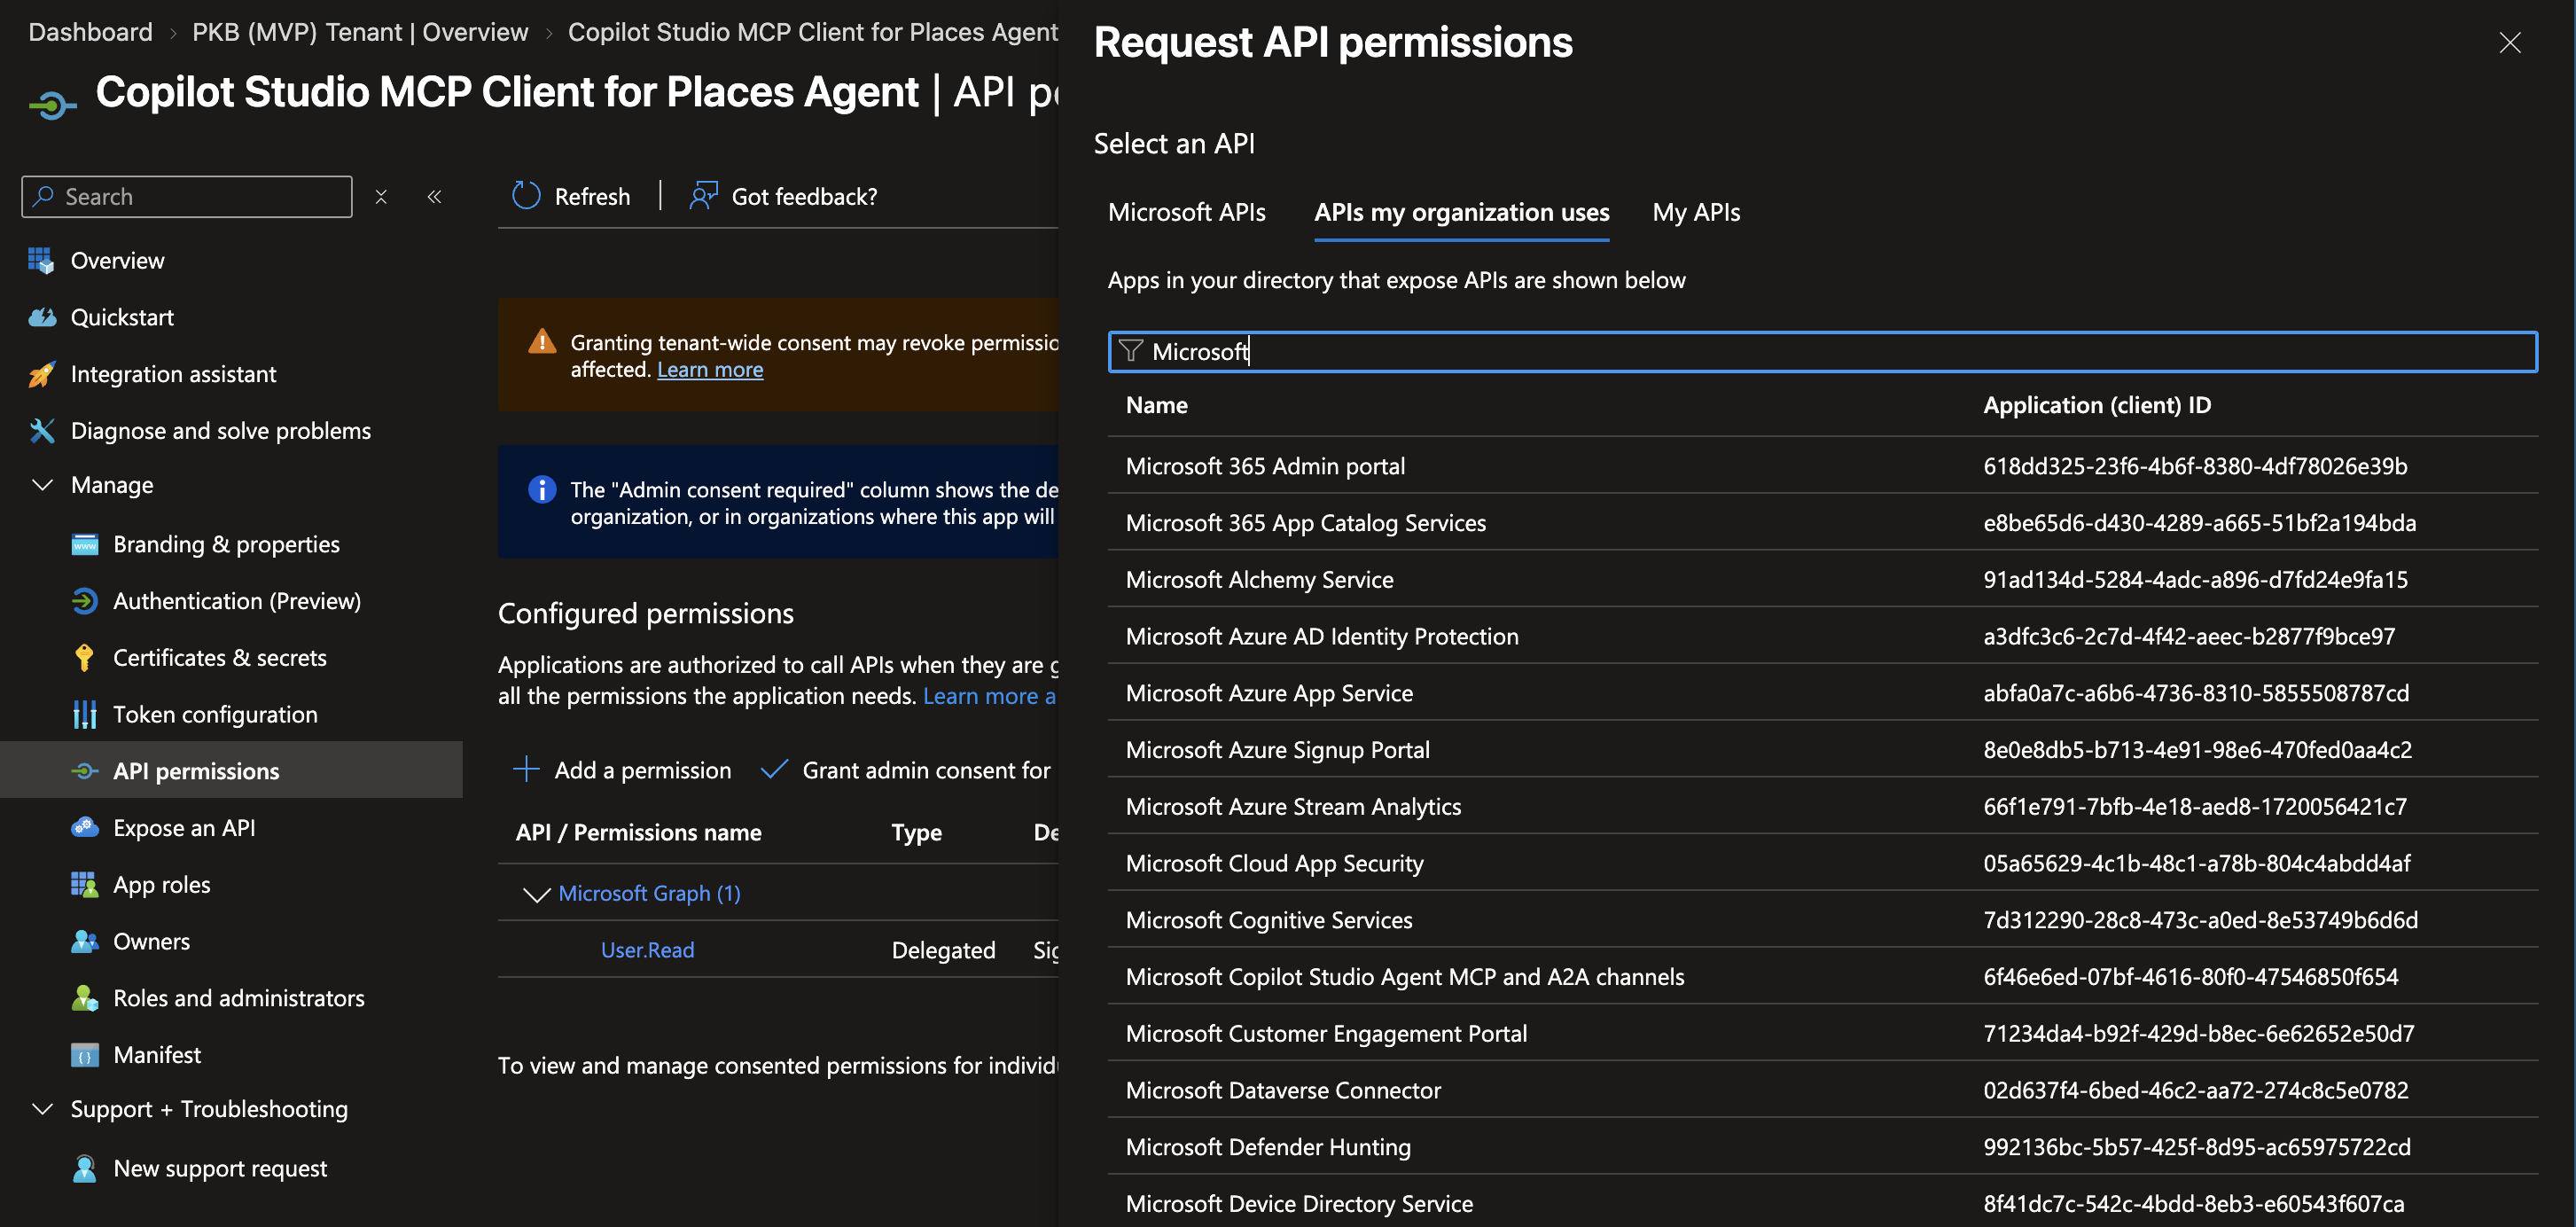
Then:
- Find “Microsoft Copilot Studio Agent MCP and A2A Channels”
- Add “Microsoft Copilot Studio Agent”
- MCS.InvokeAsA2A
- MCS.InvokeAsMCP
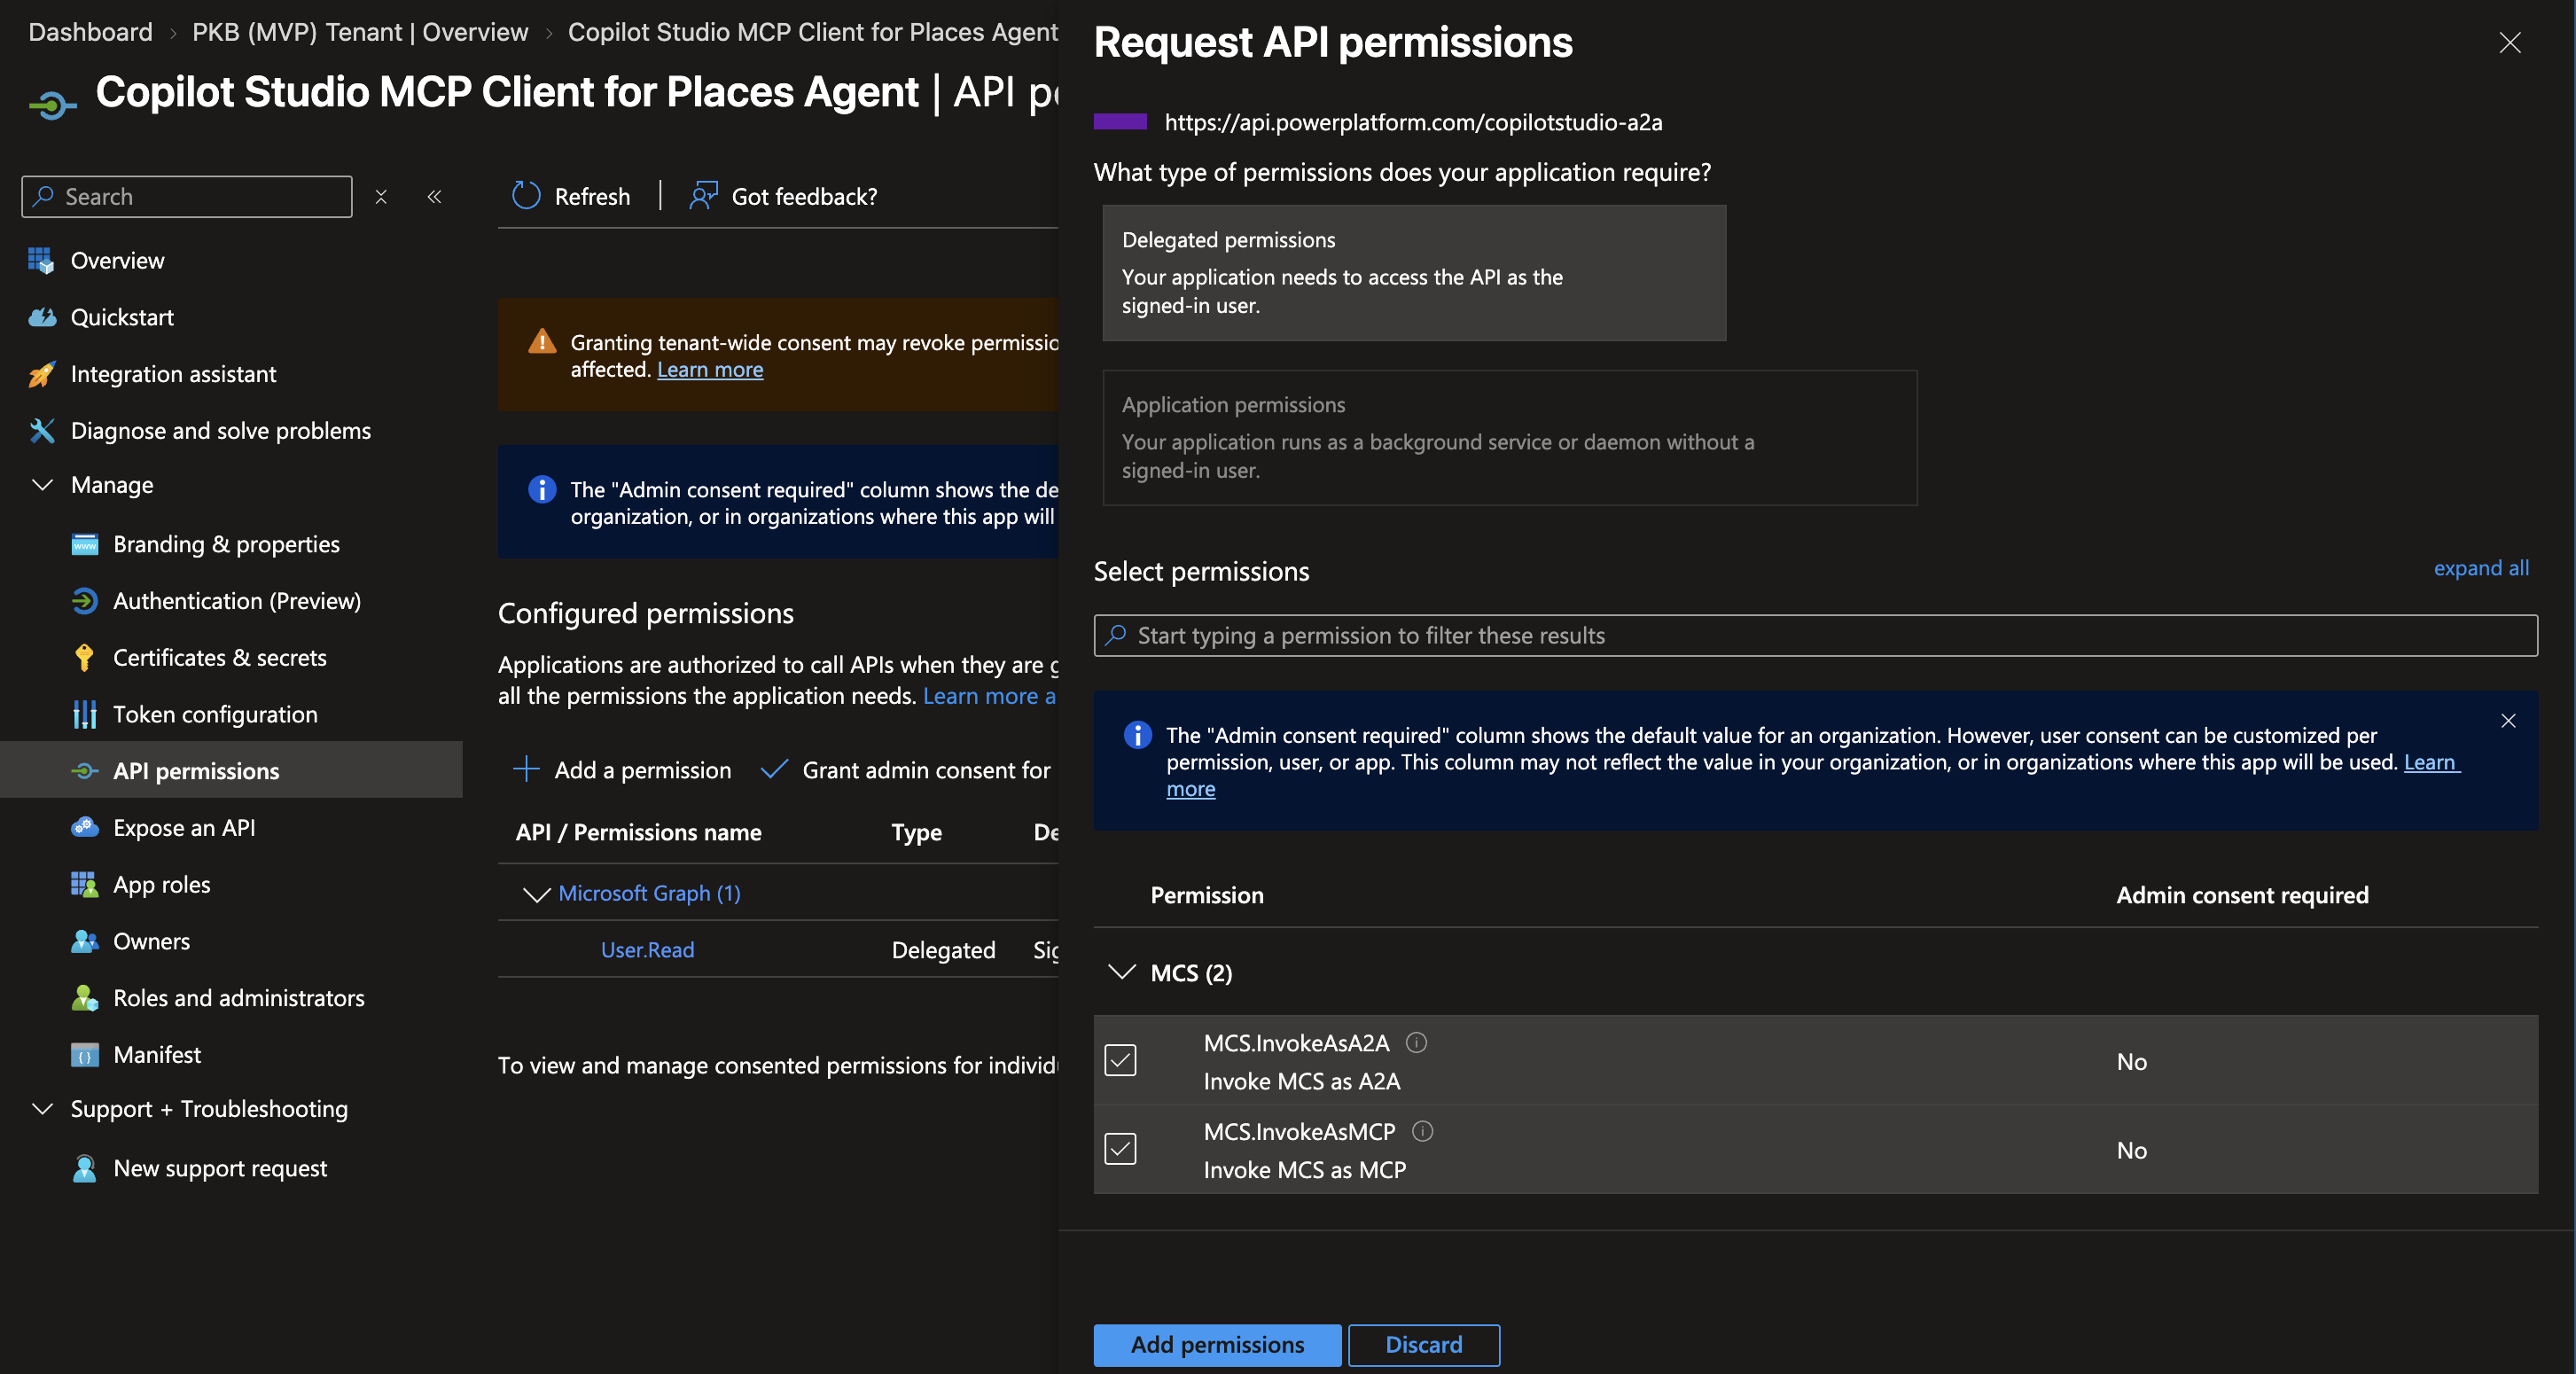
- Add “Microsoft Graph”
- Add “offline_access”
Teams Developer Portal - Setup OAuth
The Teams Developer Portal is a web-based tool for building and managing Teams apps, including the OAuth client registration used in this walkthrough.
Navigate to Teams Developer Portal | Microsoft and find:
Tools in naviation > OAuth client registration > Create an OAuth Data Connection in the Teams Developer portal
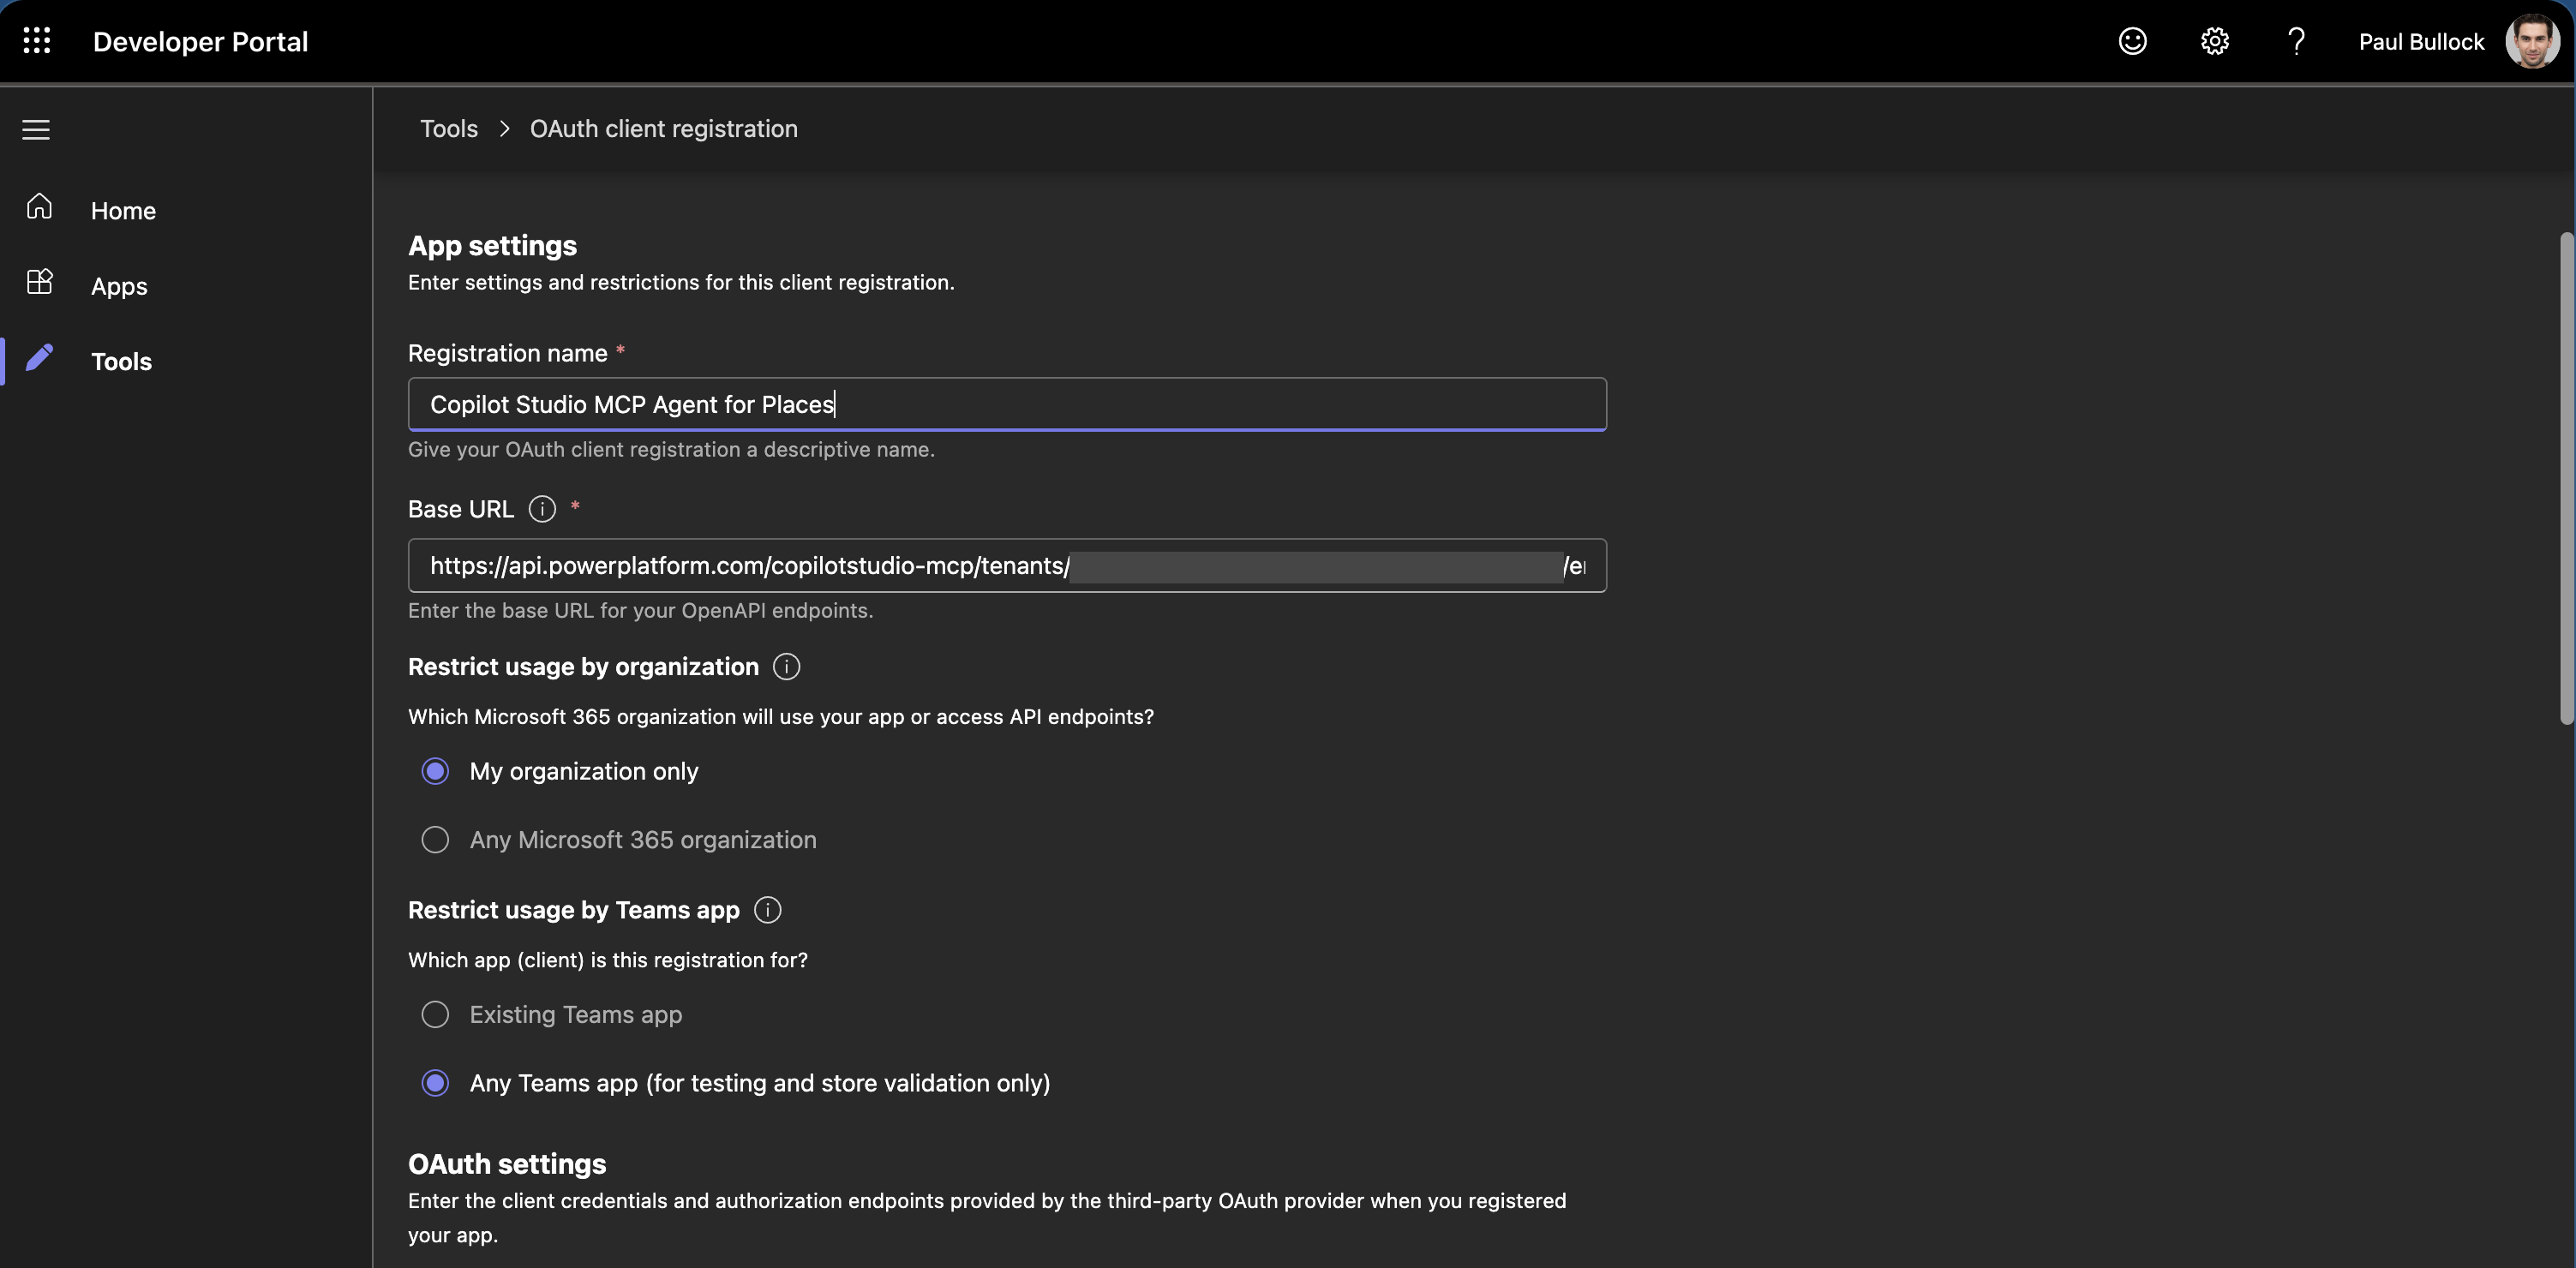
New Registration Form - Example
- Registration Name: Copilot Studio MCP Agent for Places
- Base URL: {Details from Copilot Studio Agent Trigger for MCP Client}
- Restrict Usage by Organisation: My Organization Only
- Restrict Usage by Teams App: Any Teams App (for testing)
oAuth Settings

- Client ID: {above Client id from your newly created app}
- Client Secret: {above Client Secret from your newly created app}
- Authorisation Endpoints {Get from the App Registration, Refresh uses Token}
- OAuth 2.0 authorization endpoint (v2)
- OAuth 2.0 token endpoint (v2)
Scope:
https://api.powerplatform.com/copilotstudio-mcp/MCS.InvokeAsMCP offline_accessNote: The scope MUST follow that format or you will get an error.
Save this and capture the Registration ID, you will need that for the plugin.
Build the Plugin with WIQD
WIQD provides workflows for creating agents and plugins from the terminal and GitHub Copilot CLI.
WIQD (Work IQ Dev Tools) is a toolkit for building and managing Microsoft 365 Copilot plugins. It includes a coding-assistant plugin for GitHub Copilot CLI and a separate command-line tool.
Install GitHub Copilot CLI and Node.js/npm first. Then install the WIQD plugin with copilot plugin install wiqd@awesome-copilot and install the separate wiqd CLI using the official installation guide. Start a new Copilot CLI session after installation.
My preference is to use GitHub Copilot CLI to use WIQD to build the agent, start this with:
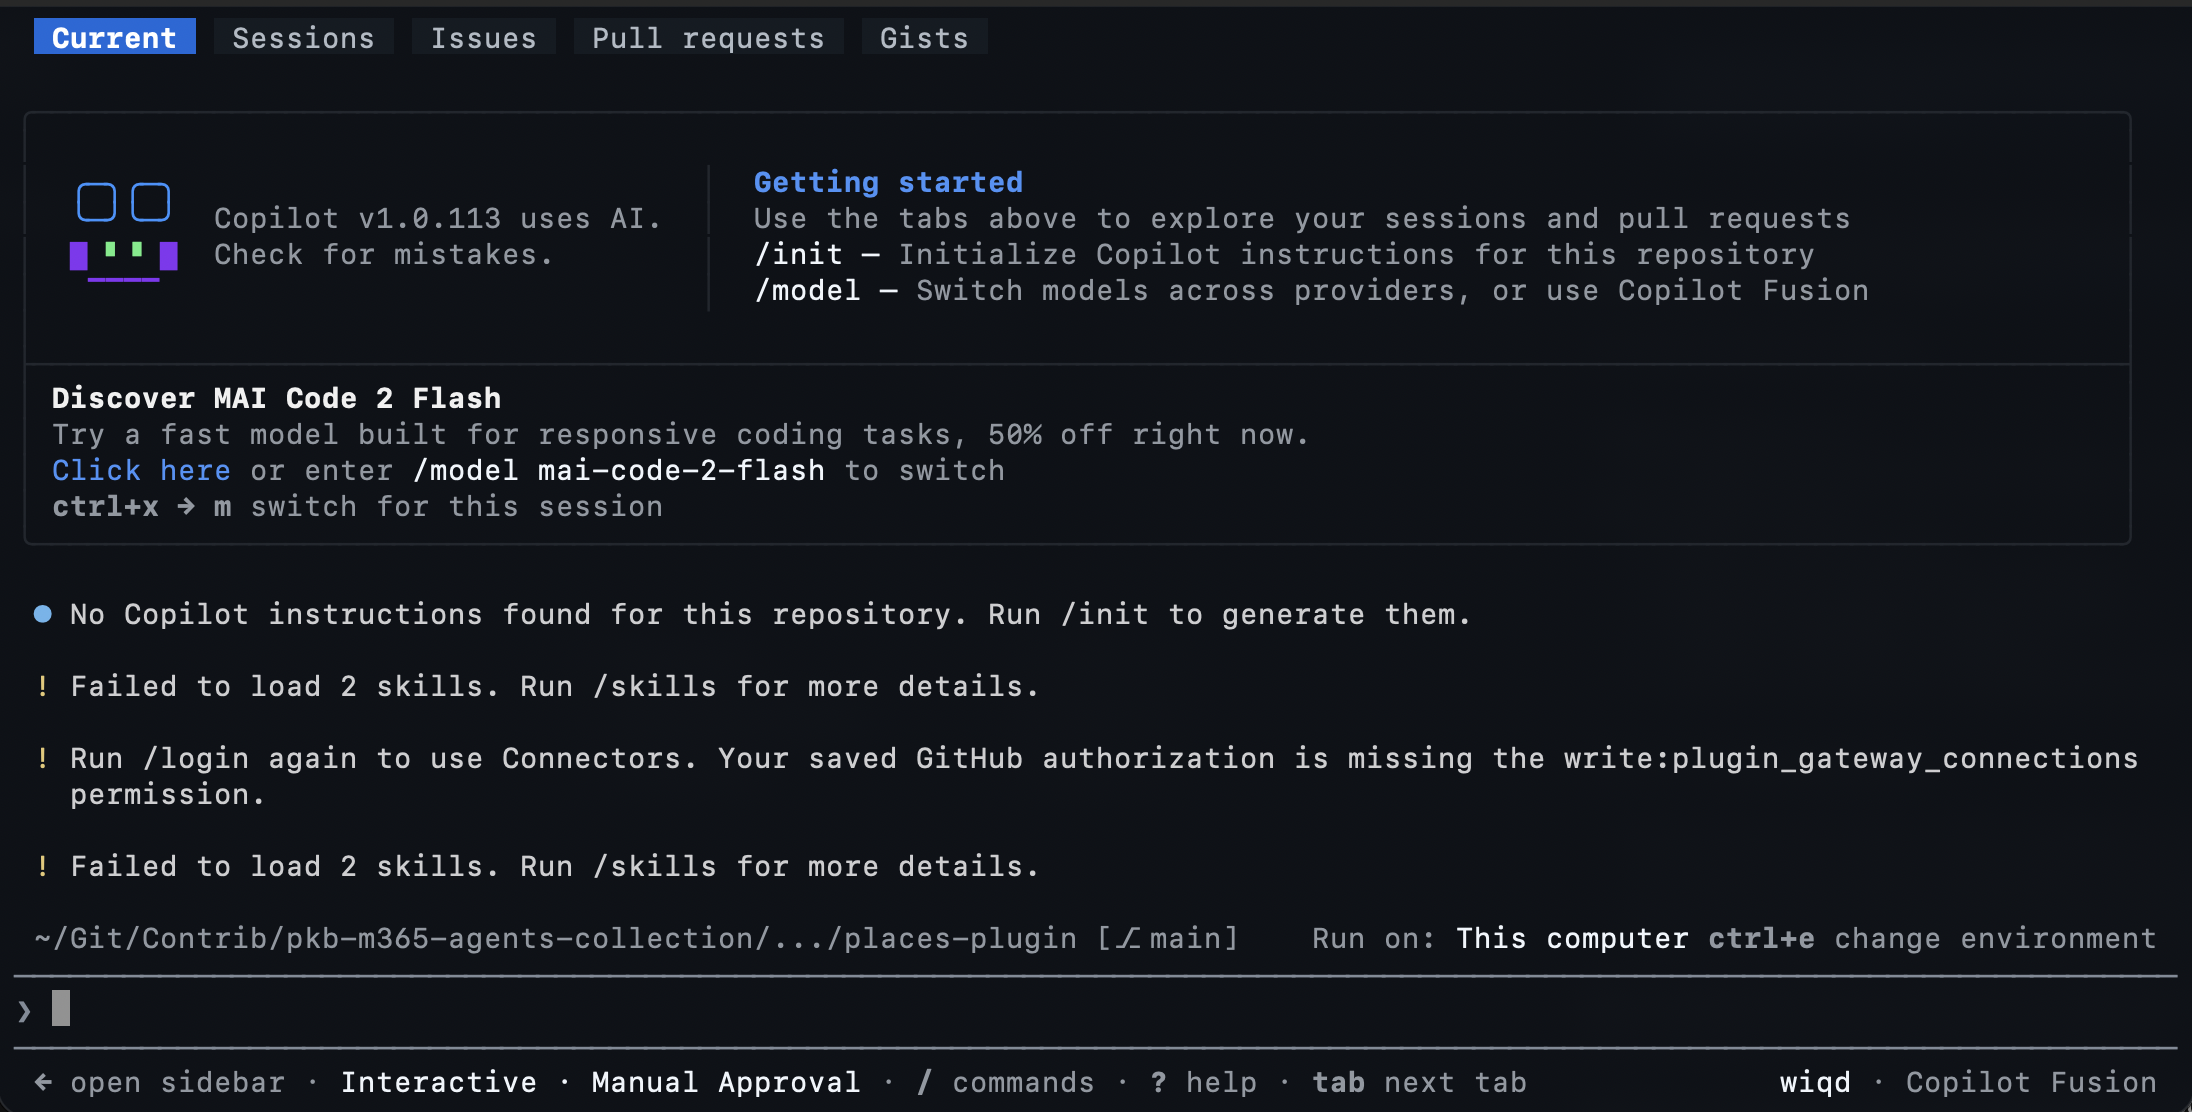
# Autenticate into WIQD
wiqd auth login

# Run GitHub Copilot CLI
copilot --agent wiqd:wiqd
Prompt Example:
Create a Cowork Plugin called "Places Report" connecting to Copilot Studio agent called "Places To Visit" and create a skill to generate a markdown table generated of the places to go from my location from the agent. At the bottom of the markdown file, include trace details of the interaction with the agent.

Use MCP endpoint {mcp-client-url-from-mcs-agent} and connect using oAuth with reference ID: {Ref-Id}
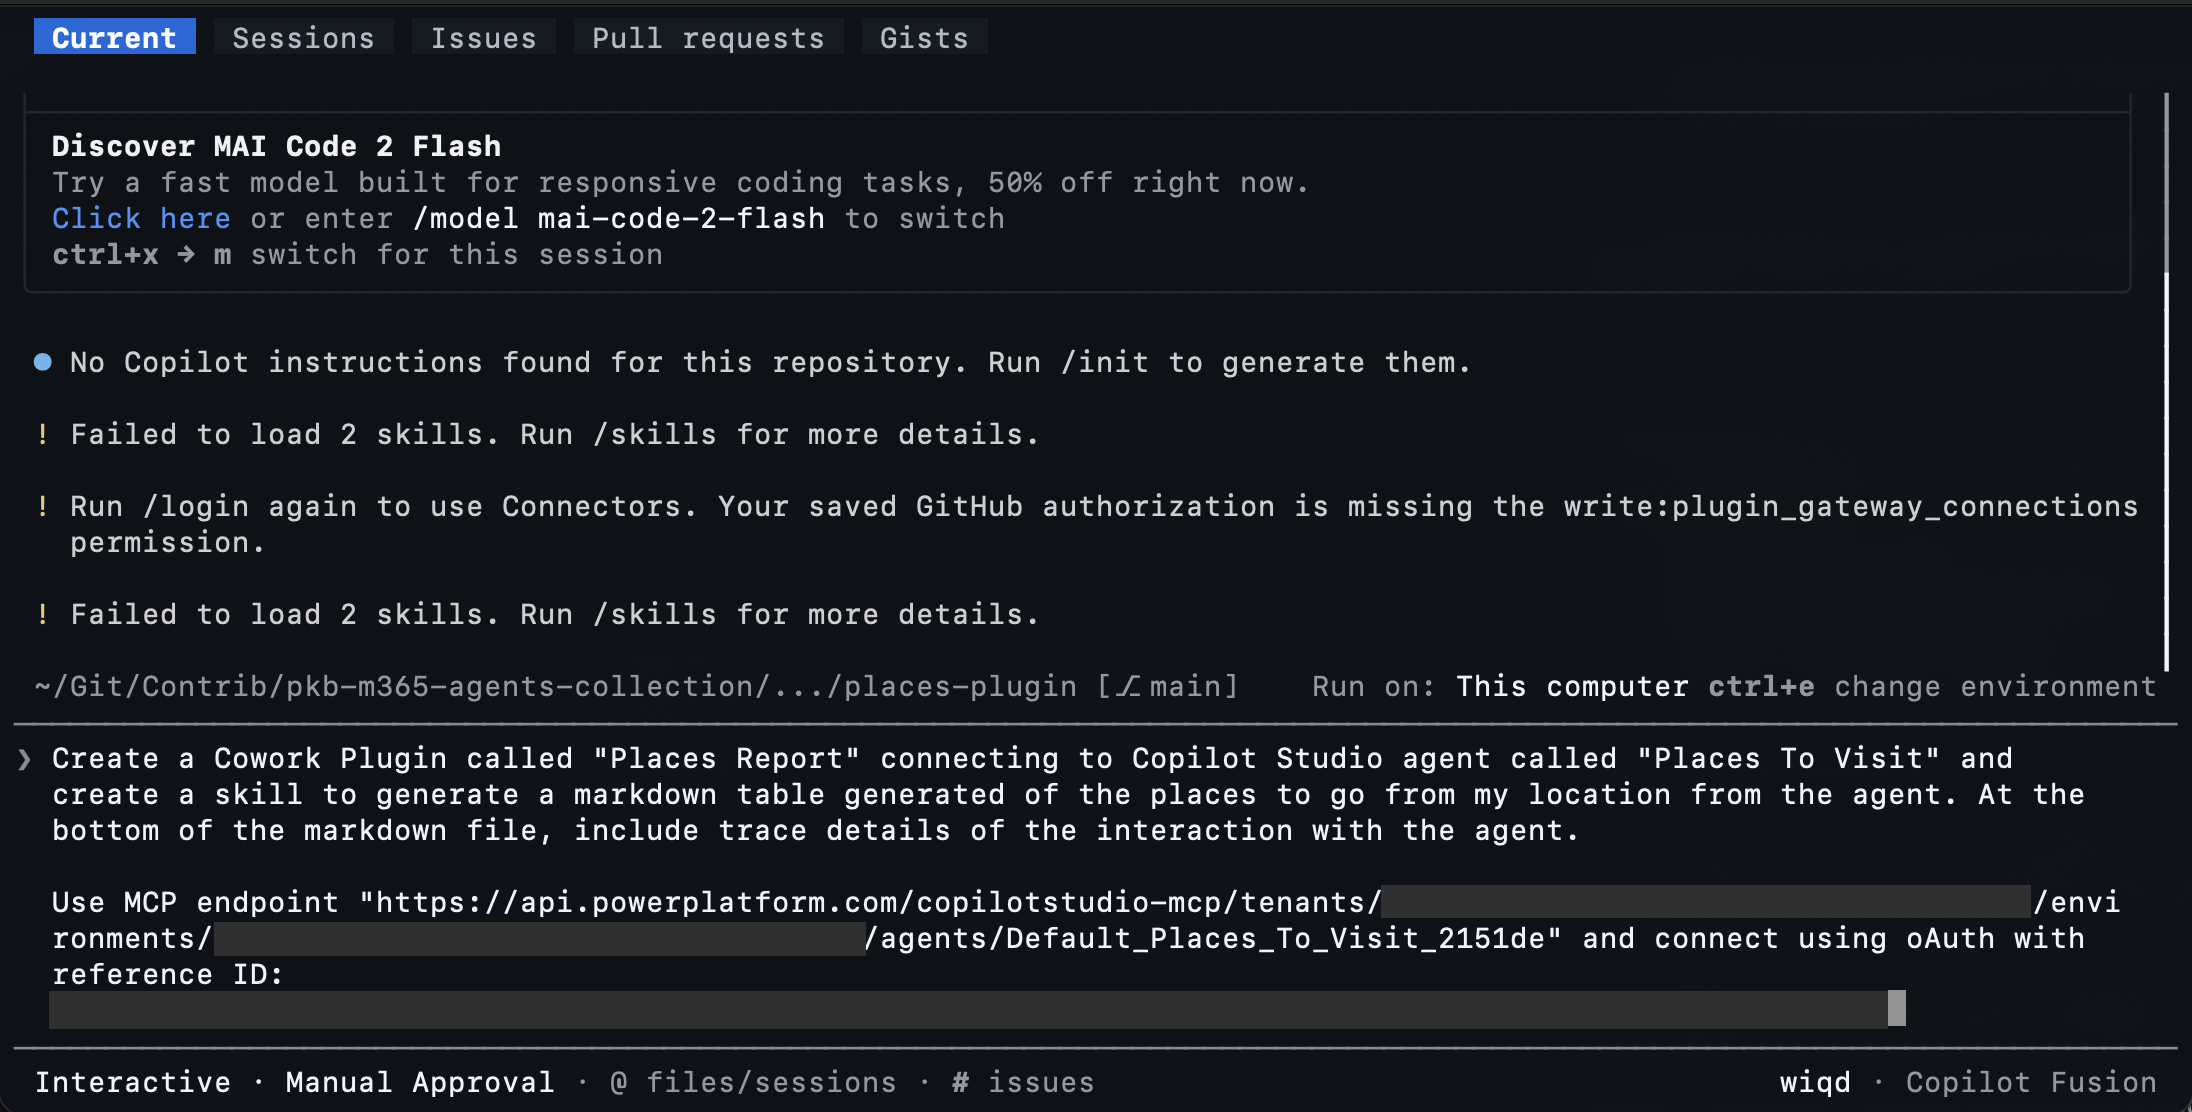
Note: This may ask you for permissions to perform these actions, proceed at your risk. Also, you may get asked follow up questions, use your best judgement.
Once complete and you are happy with the plugin, run provision and test the plugin
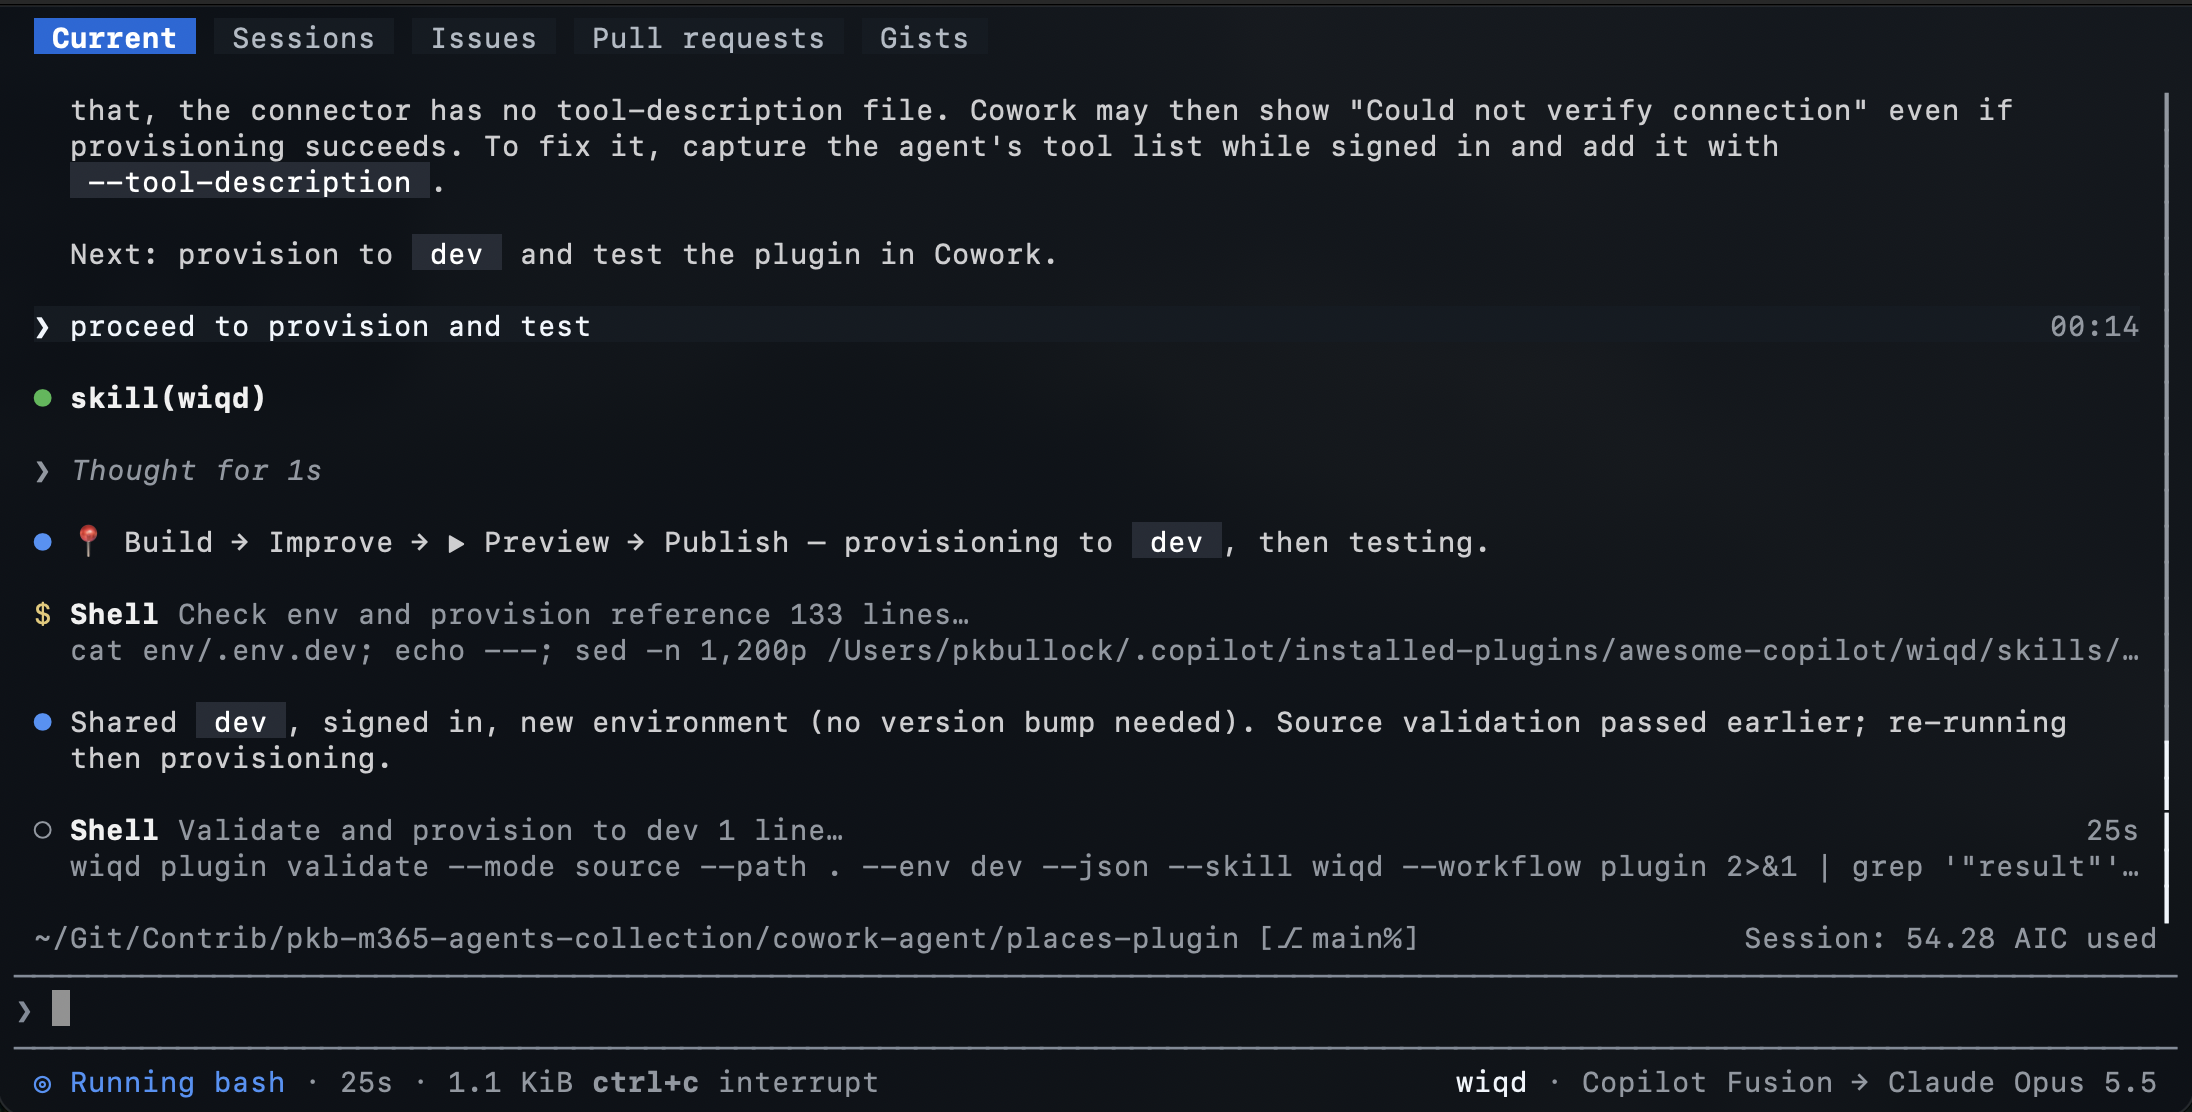
On provisioning success you will see a message containing: Title, Cowork install/test & Chat install/test details.
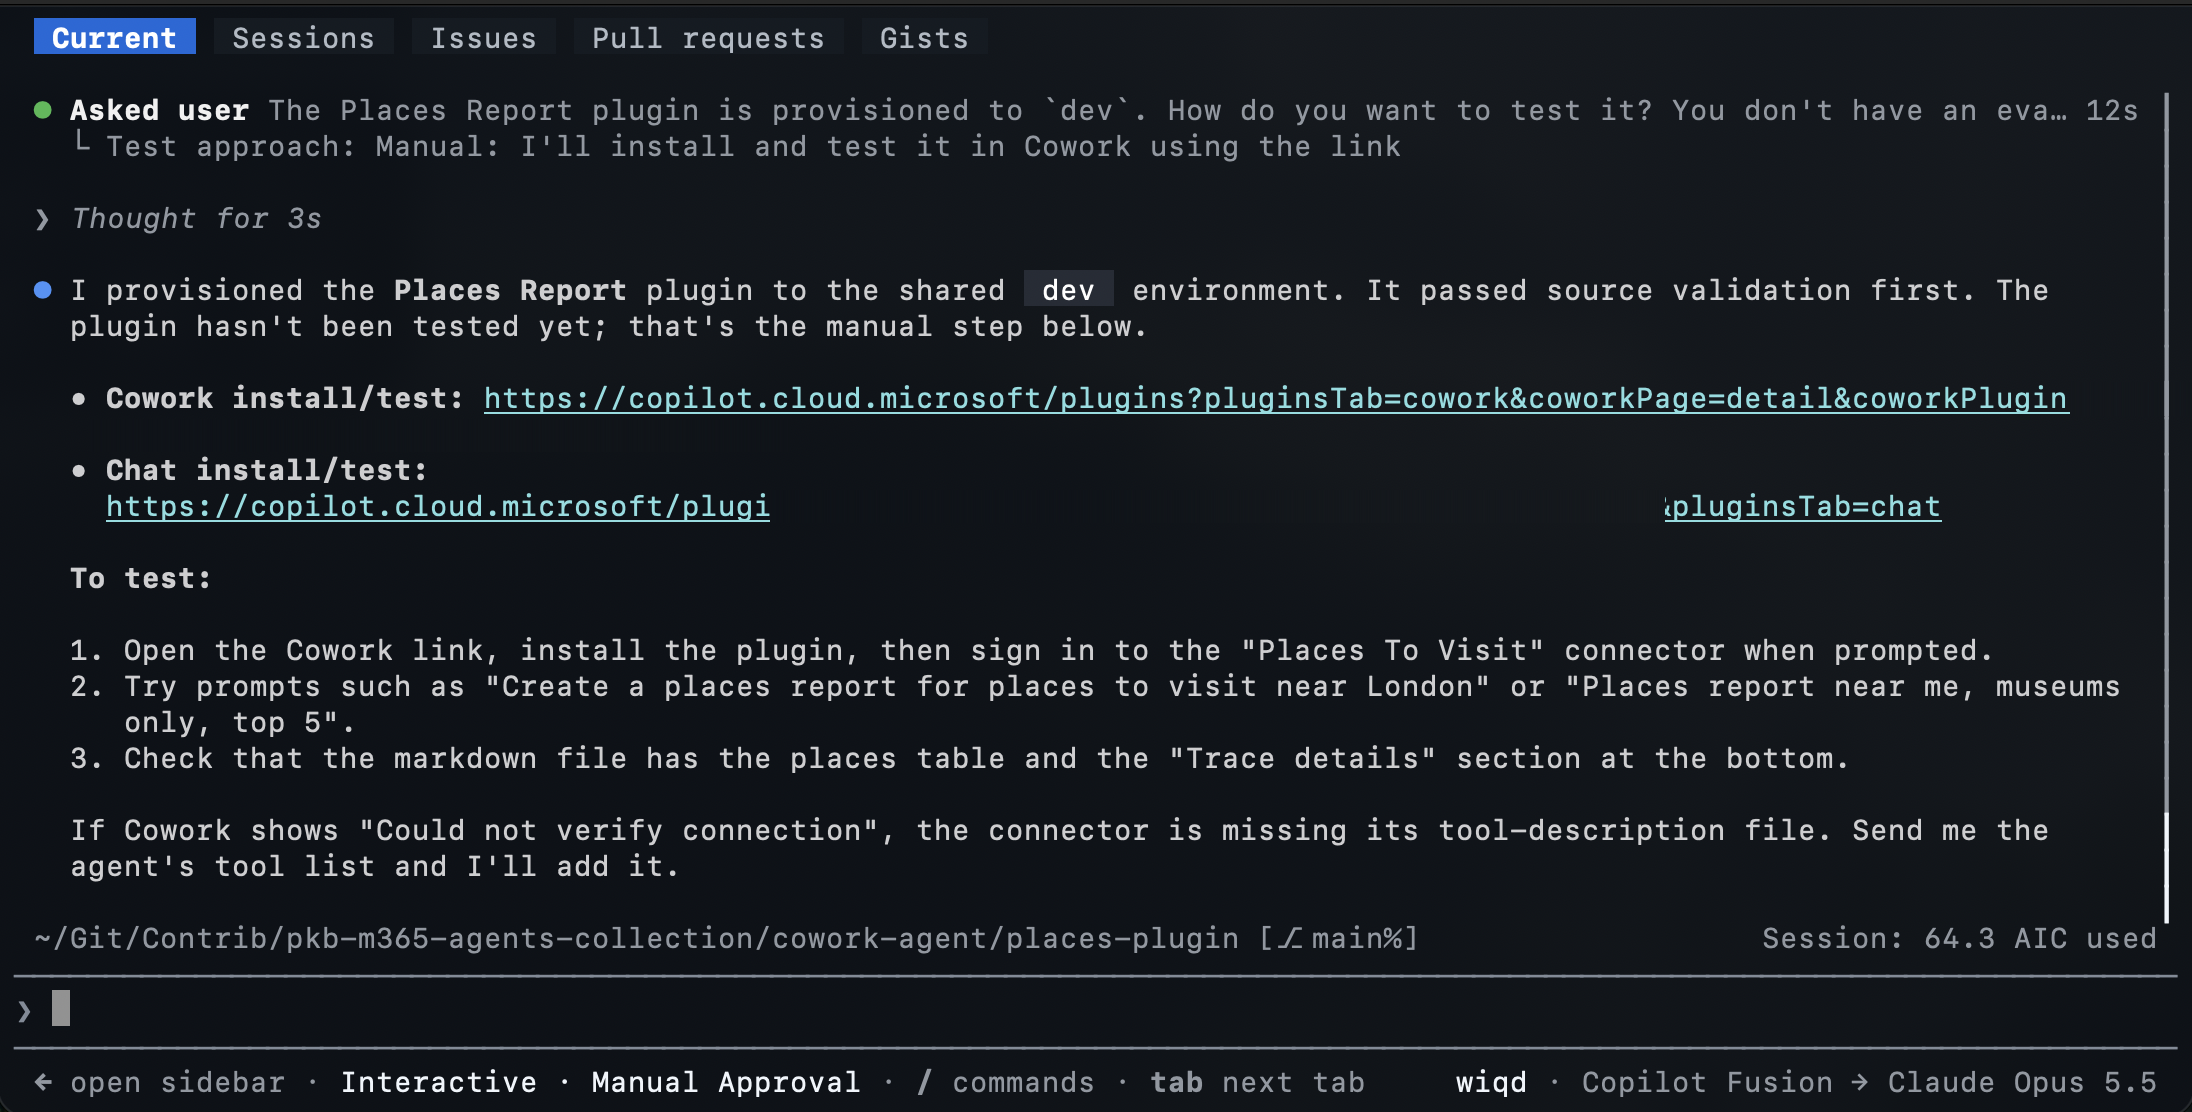
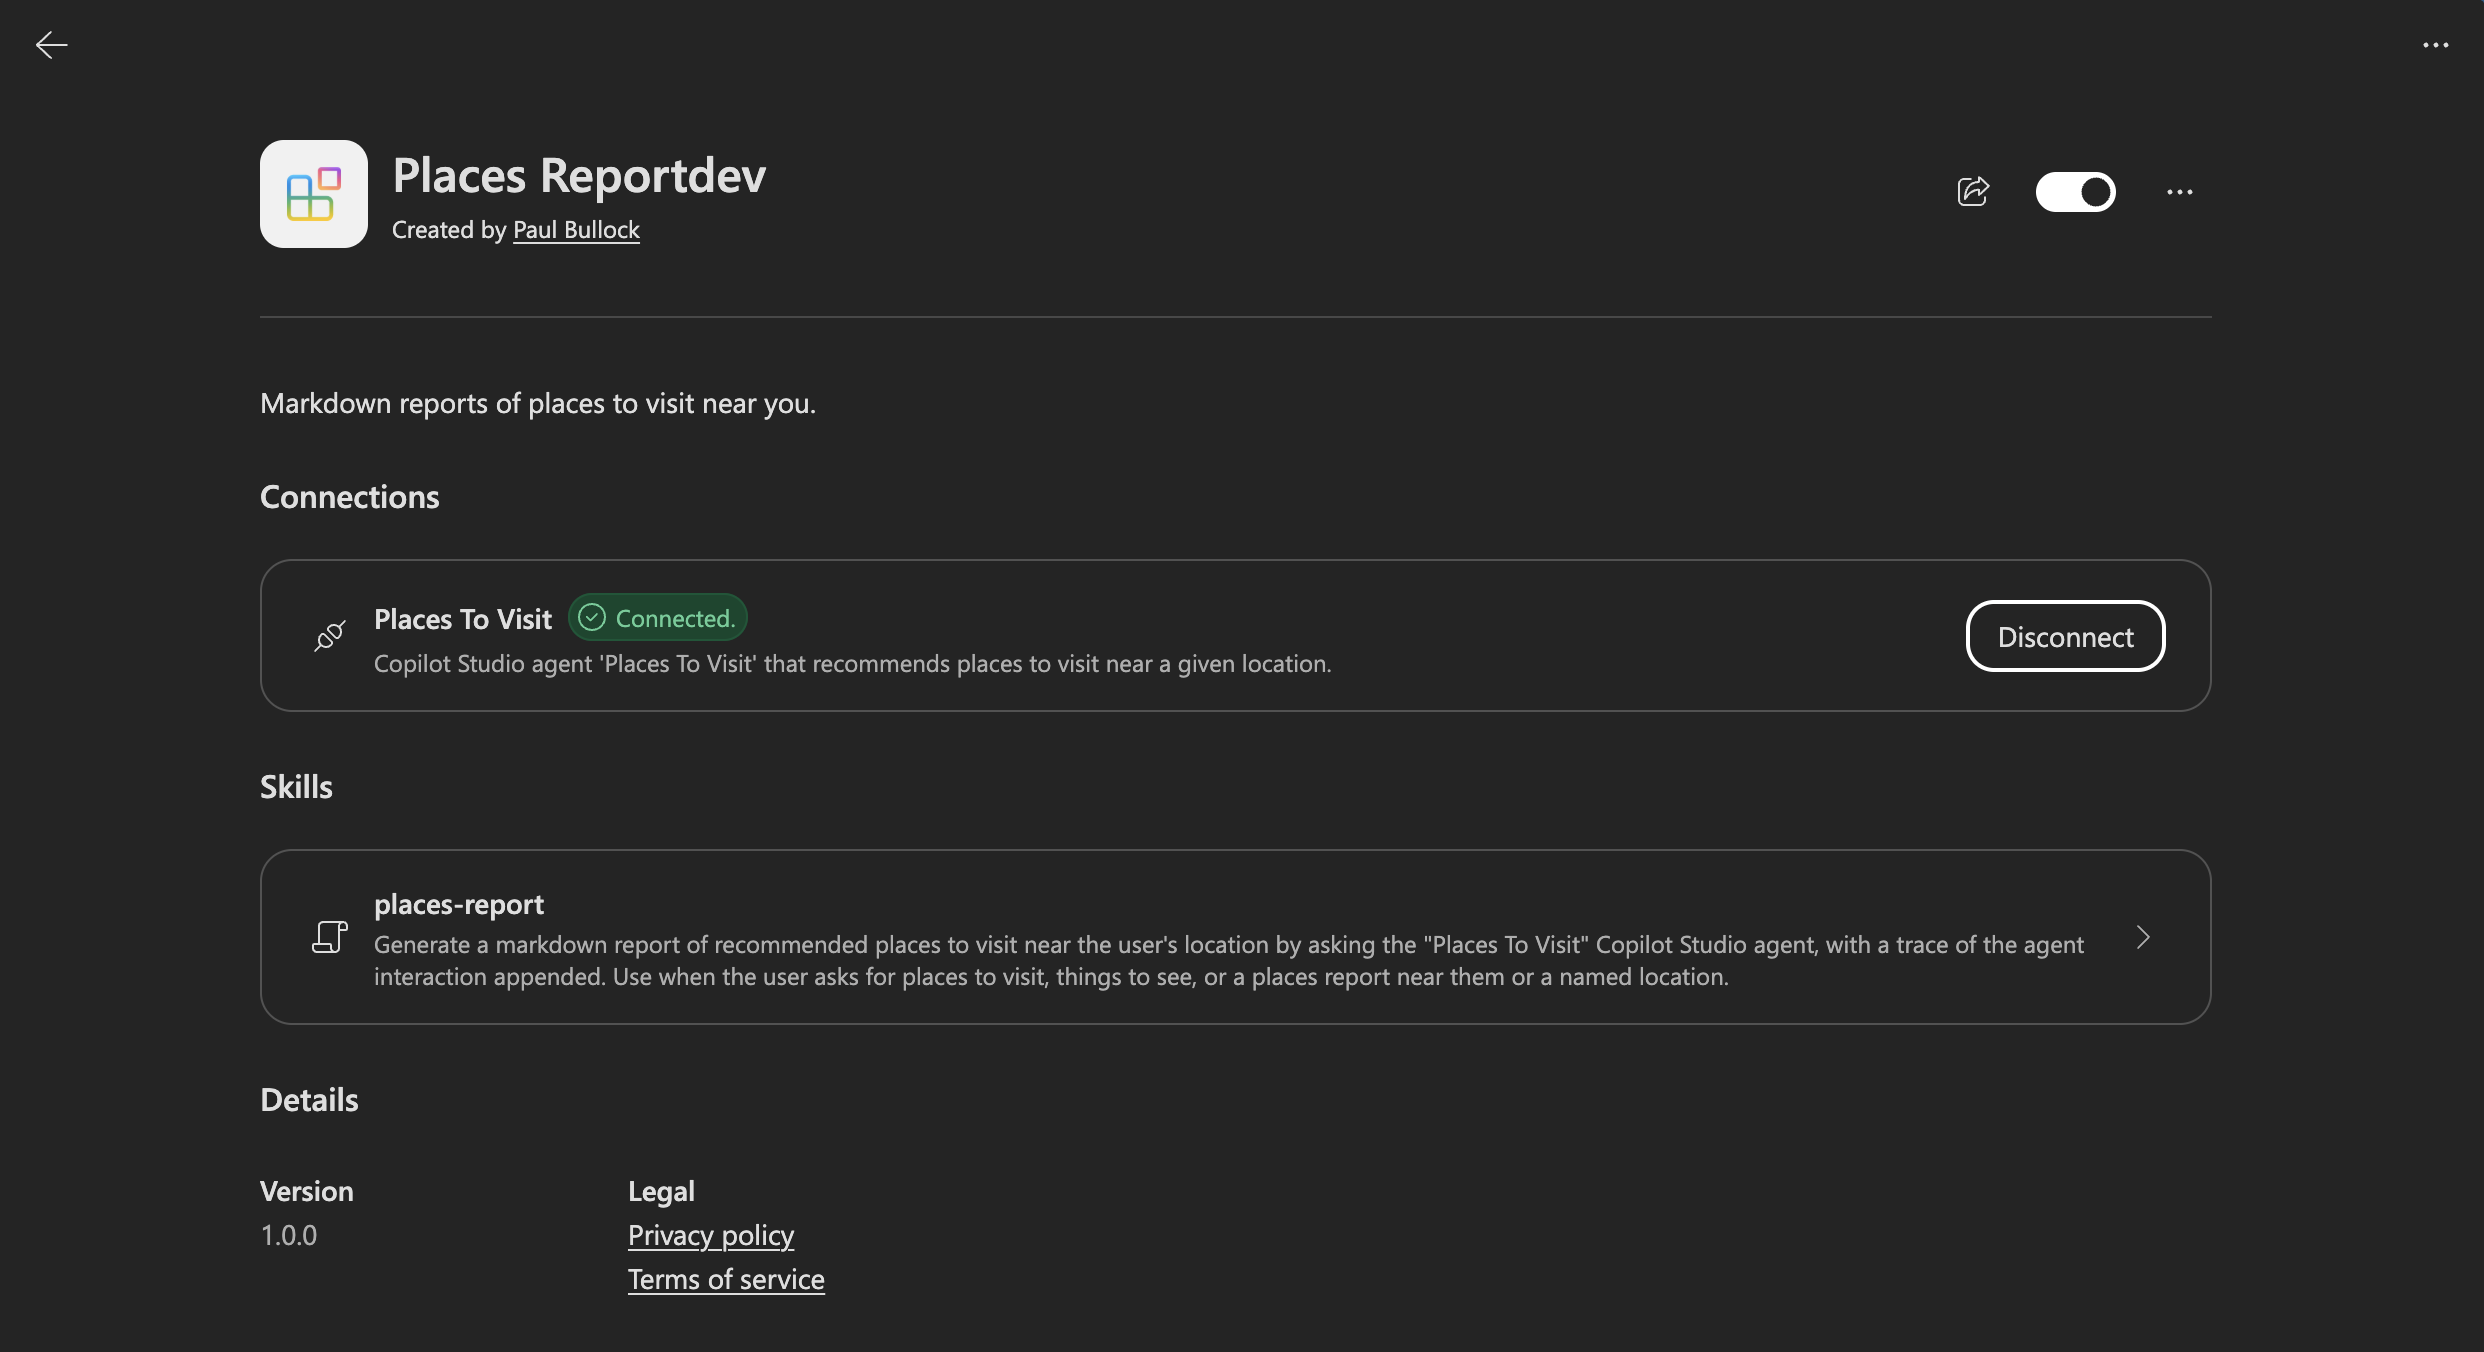
Click on the Cowork Install/Test option to run this in Cowork.
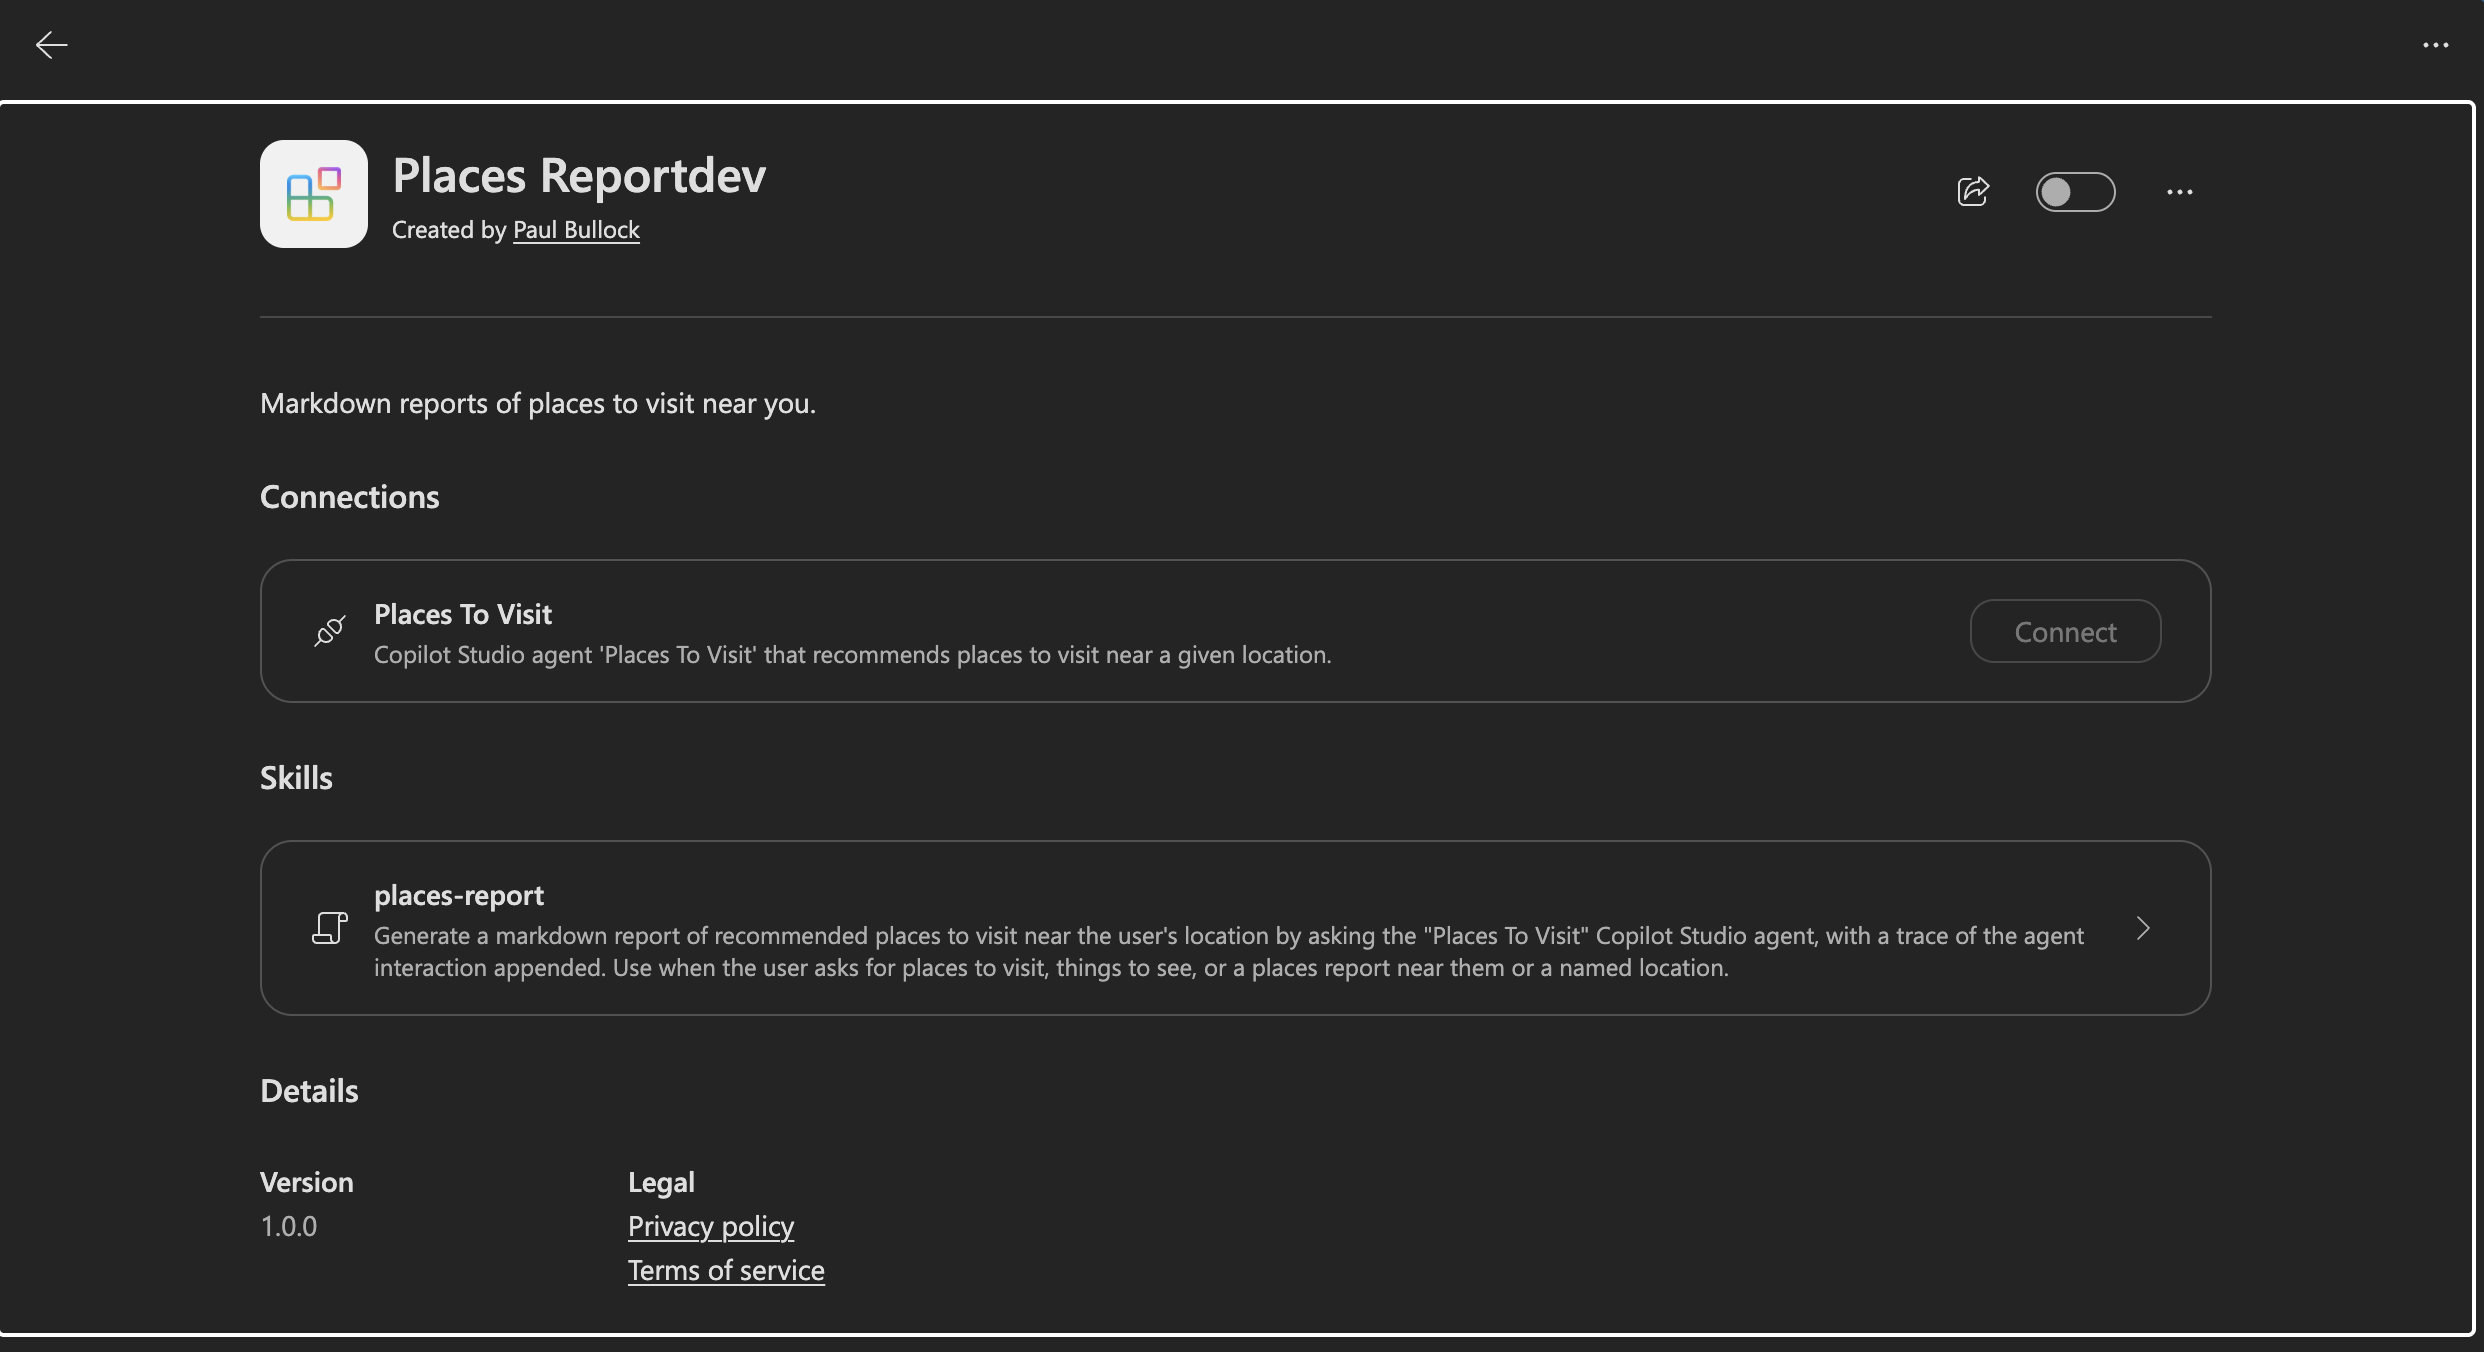
Enable the Plugin and click Connect to the agent.
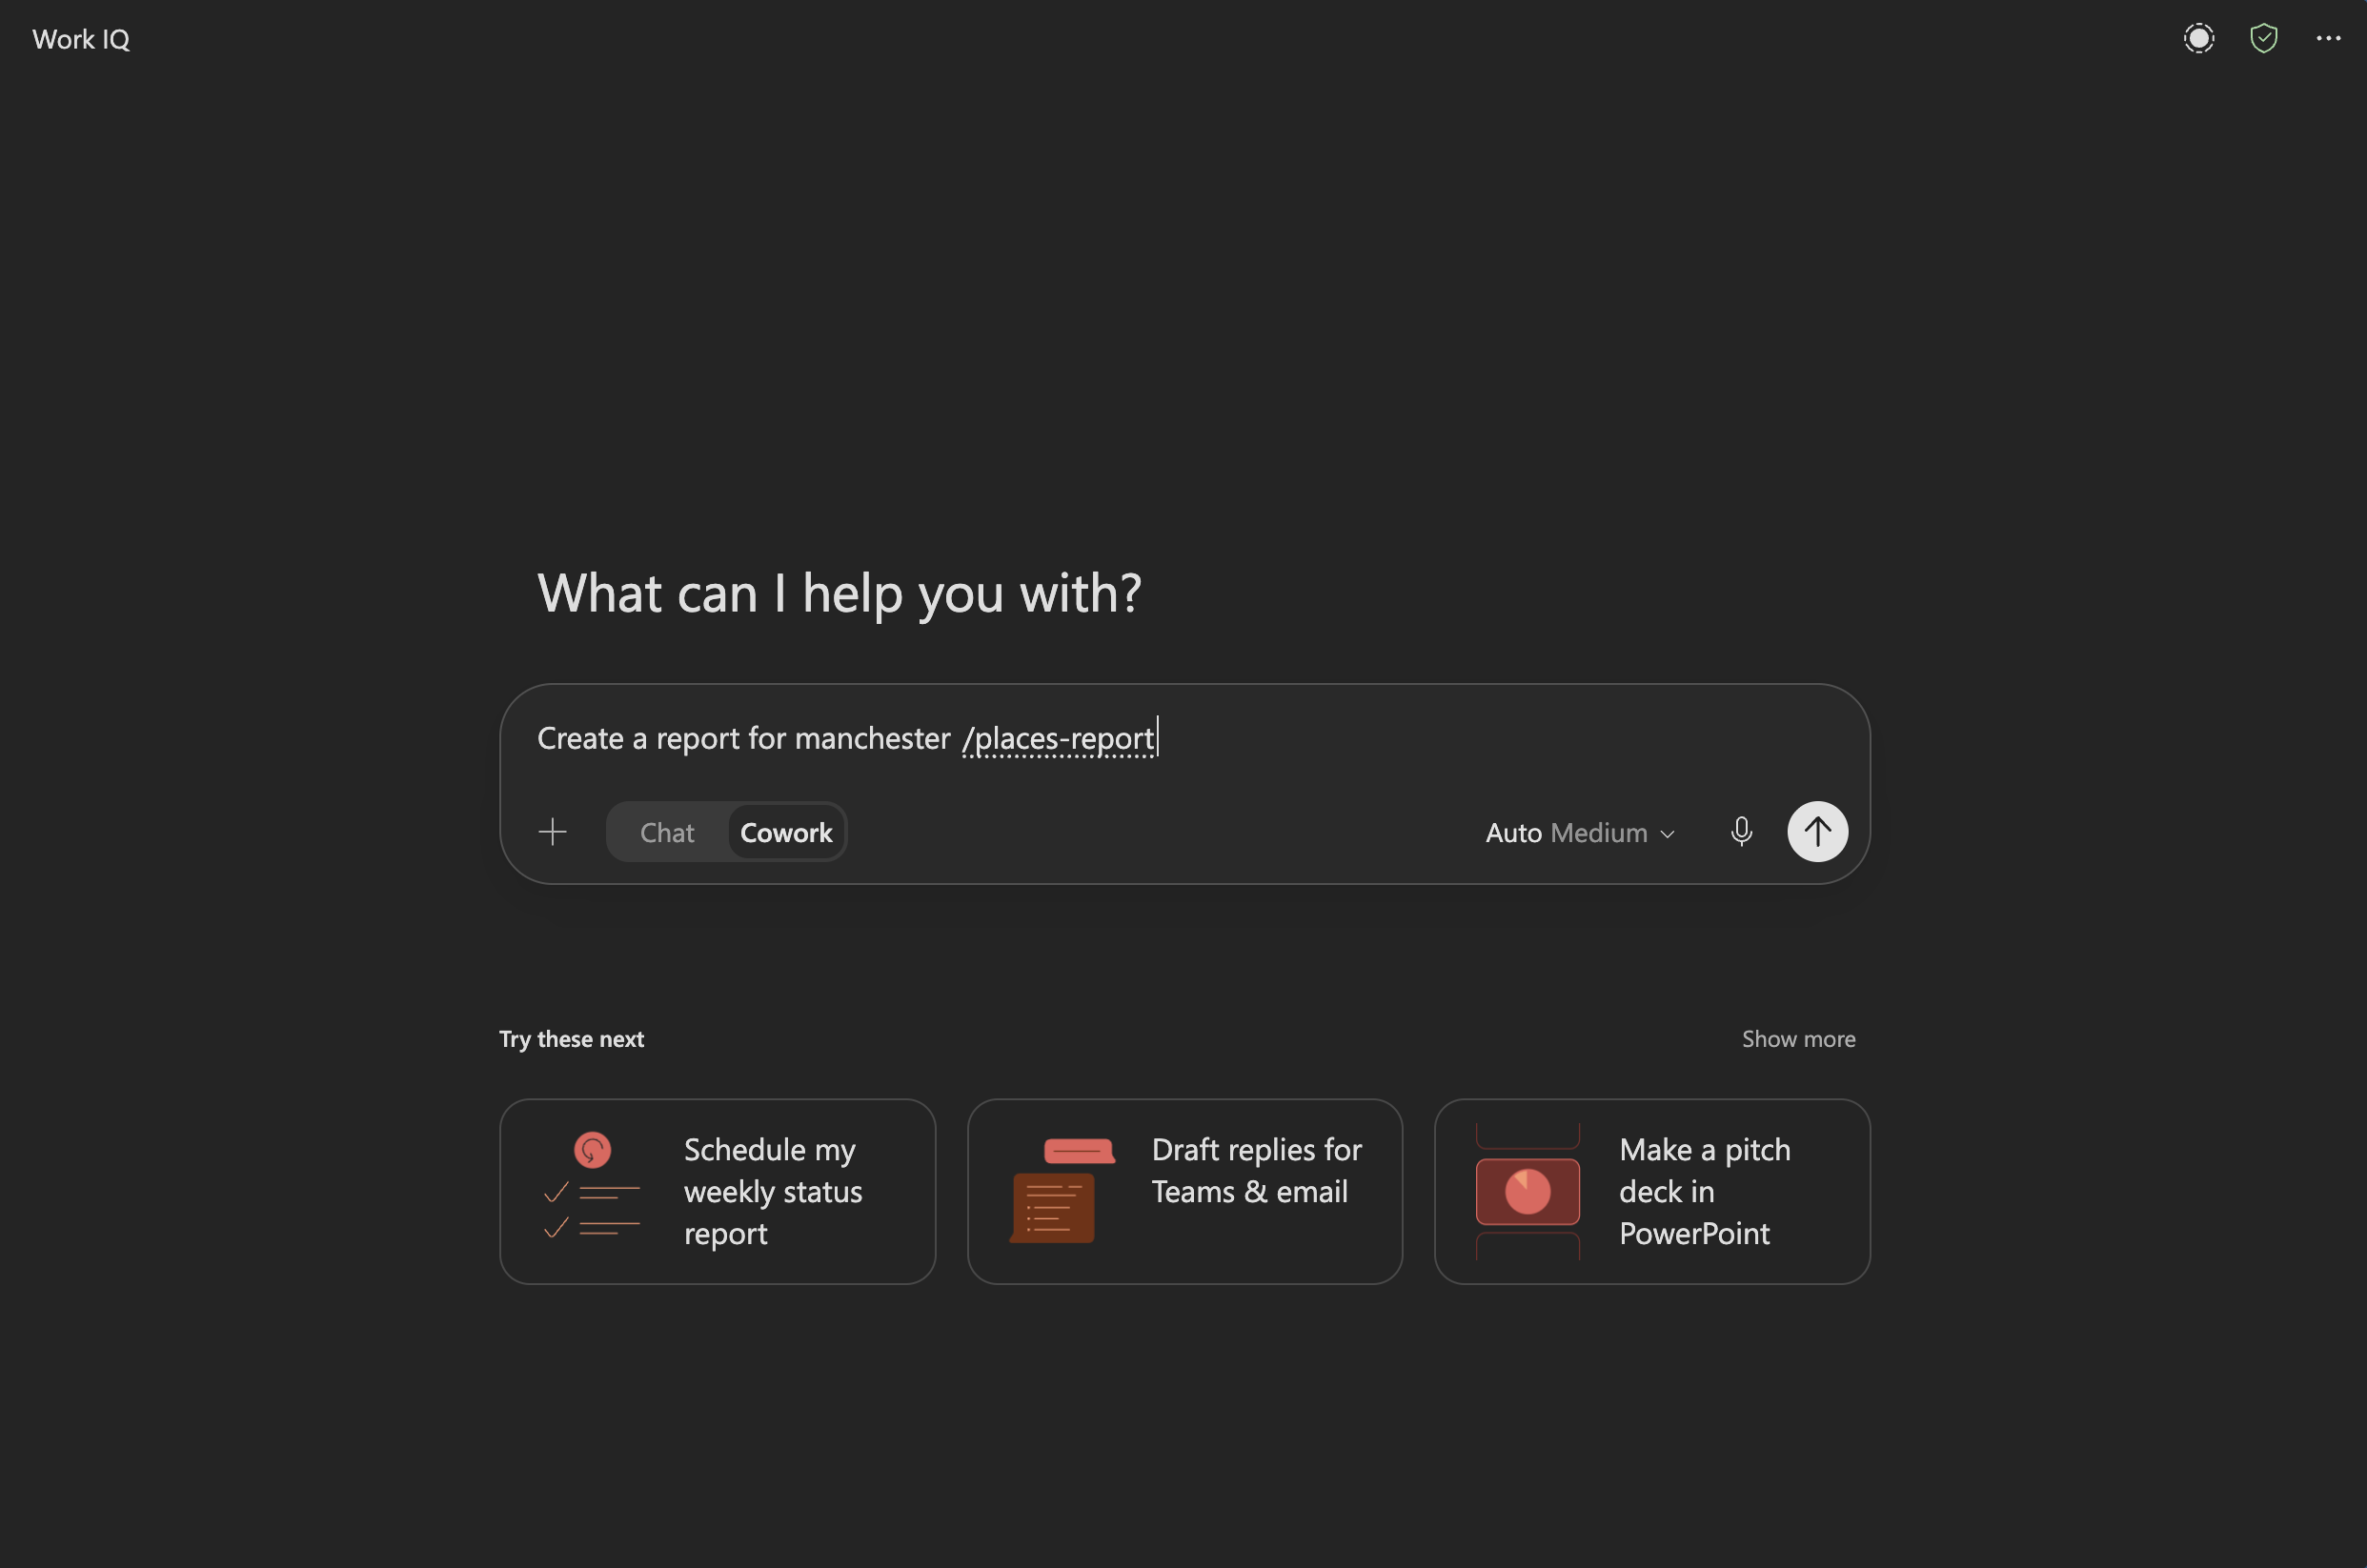
Finally run the prompt to test:
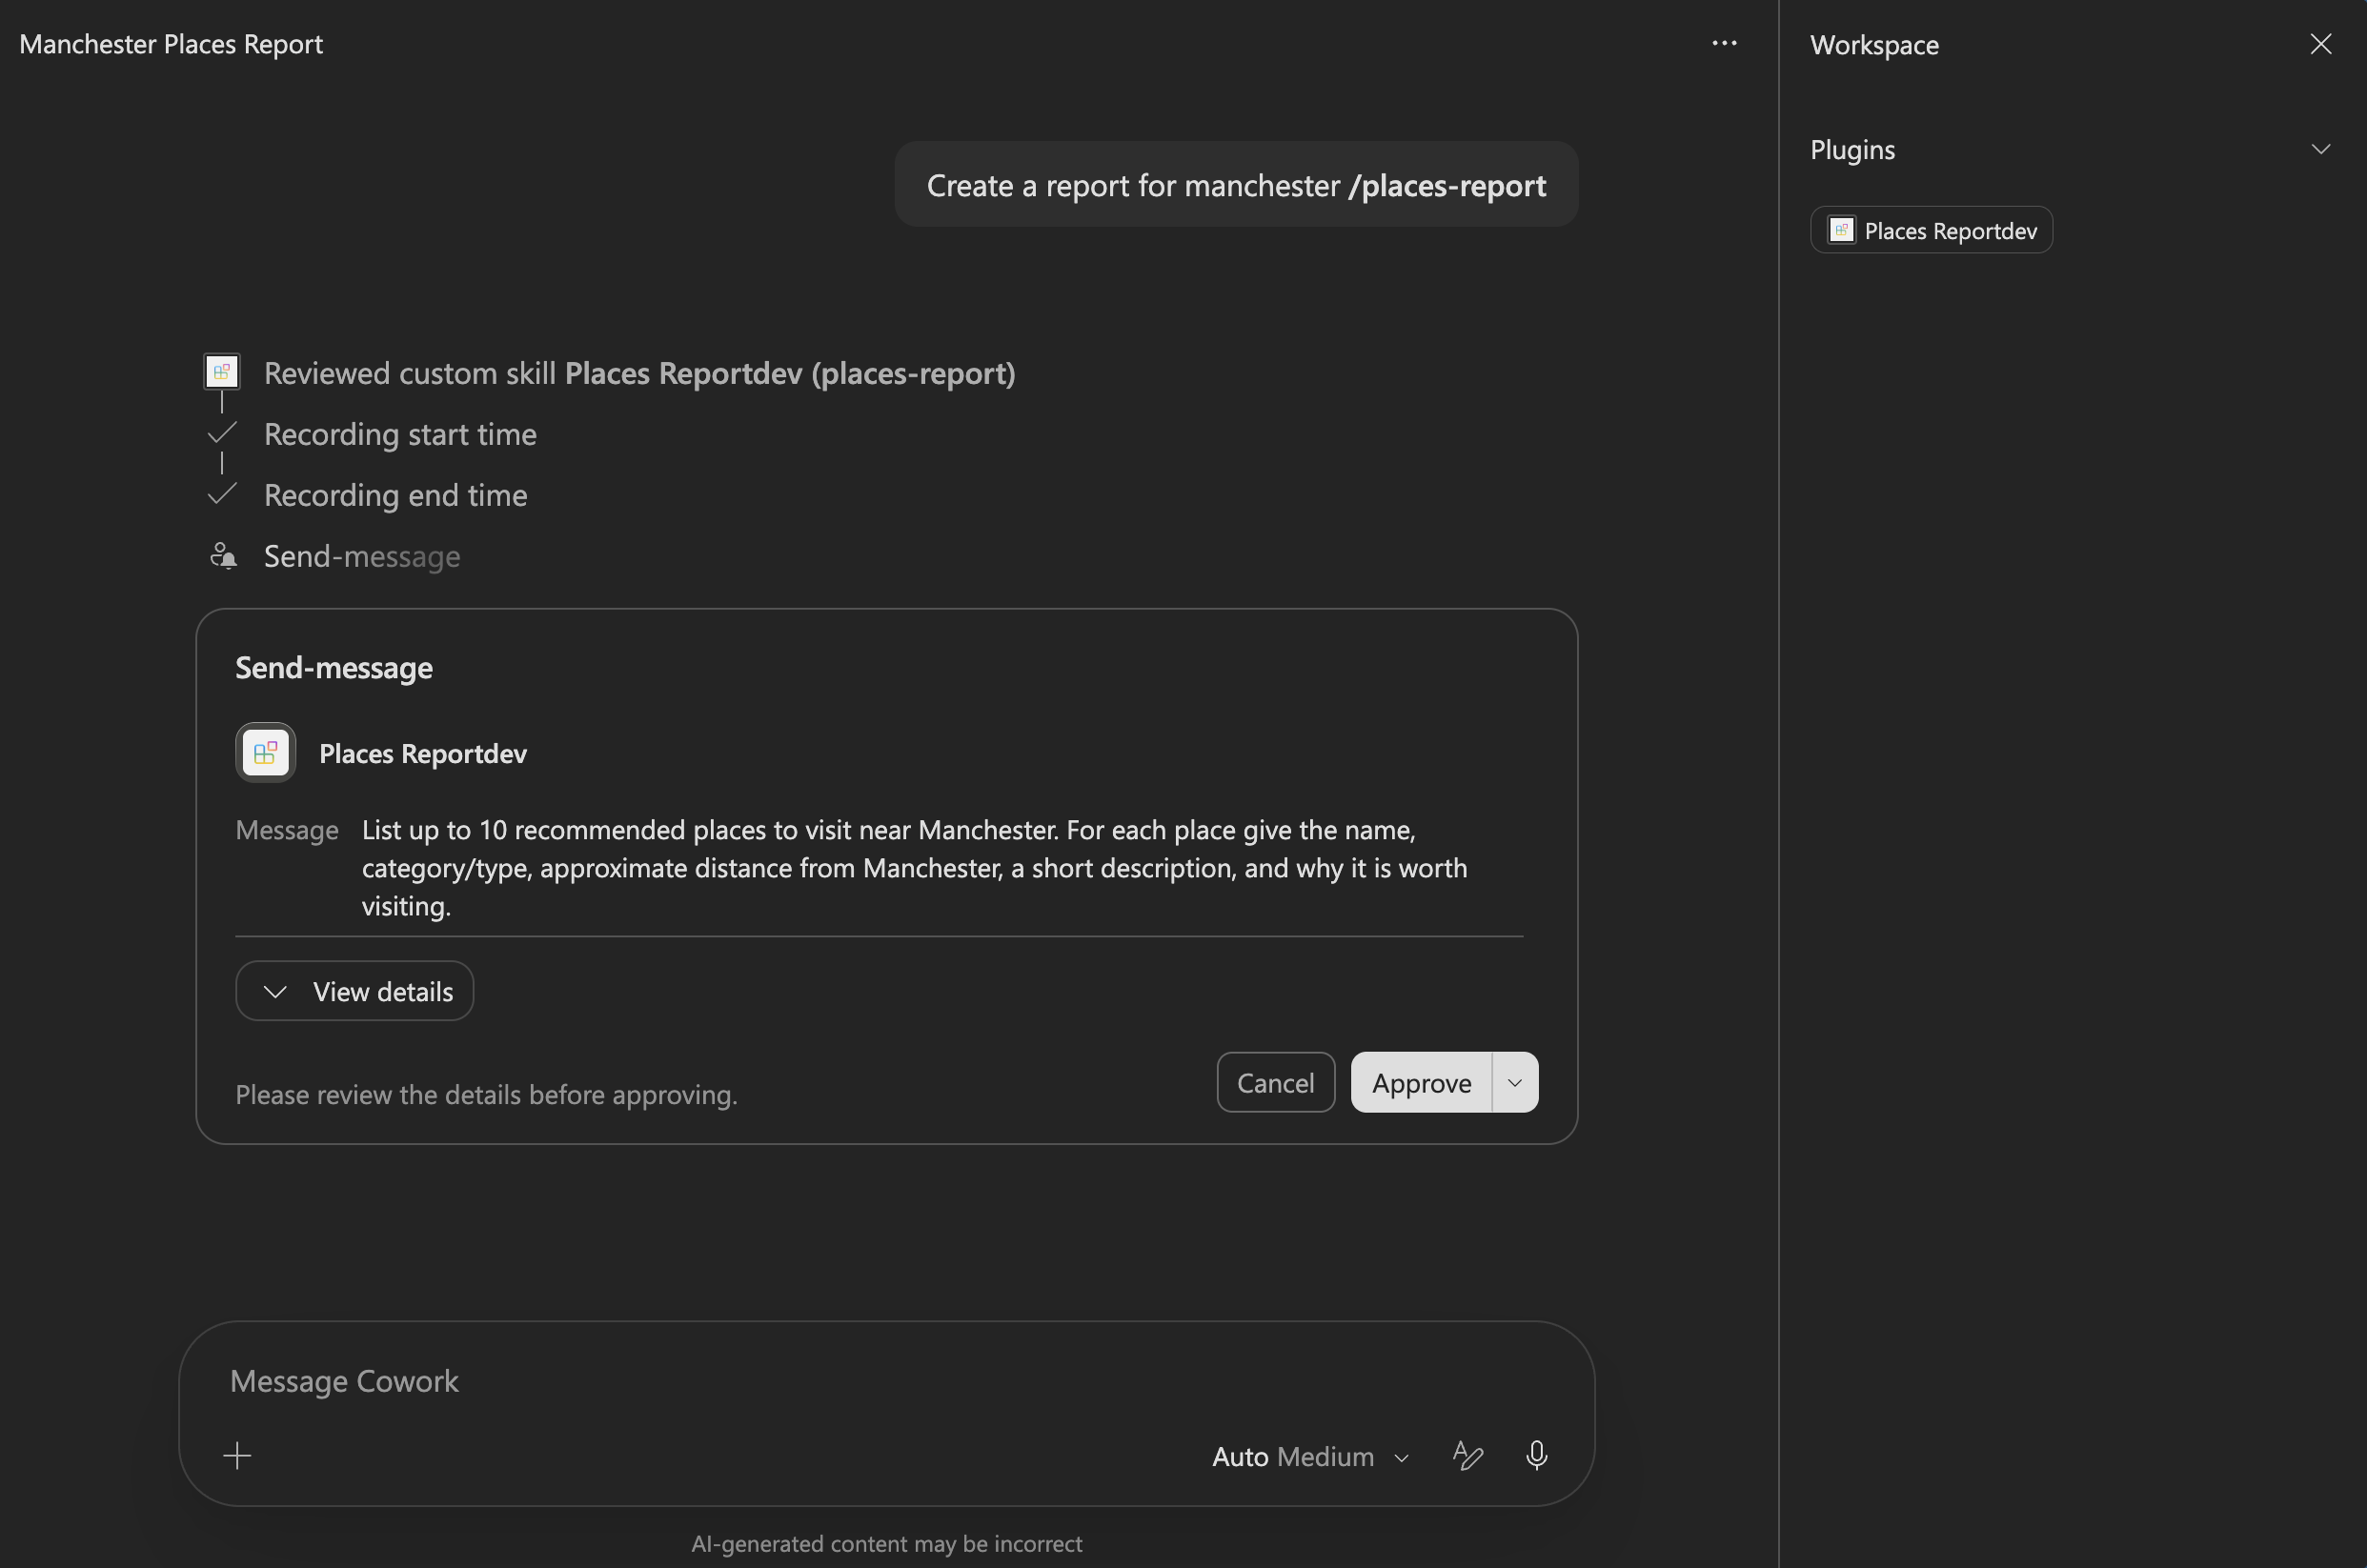
Create a report with /{skill-name e.g., places-report} from Manchester, UK.Cowork runs the skill and shows the request it plans to send to the Copilot Studio agent.
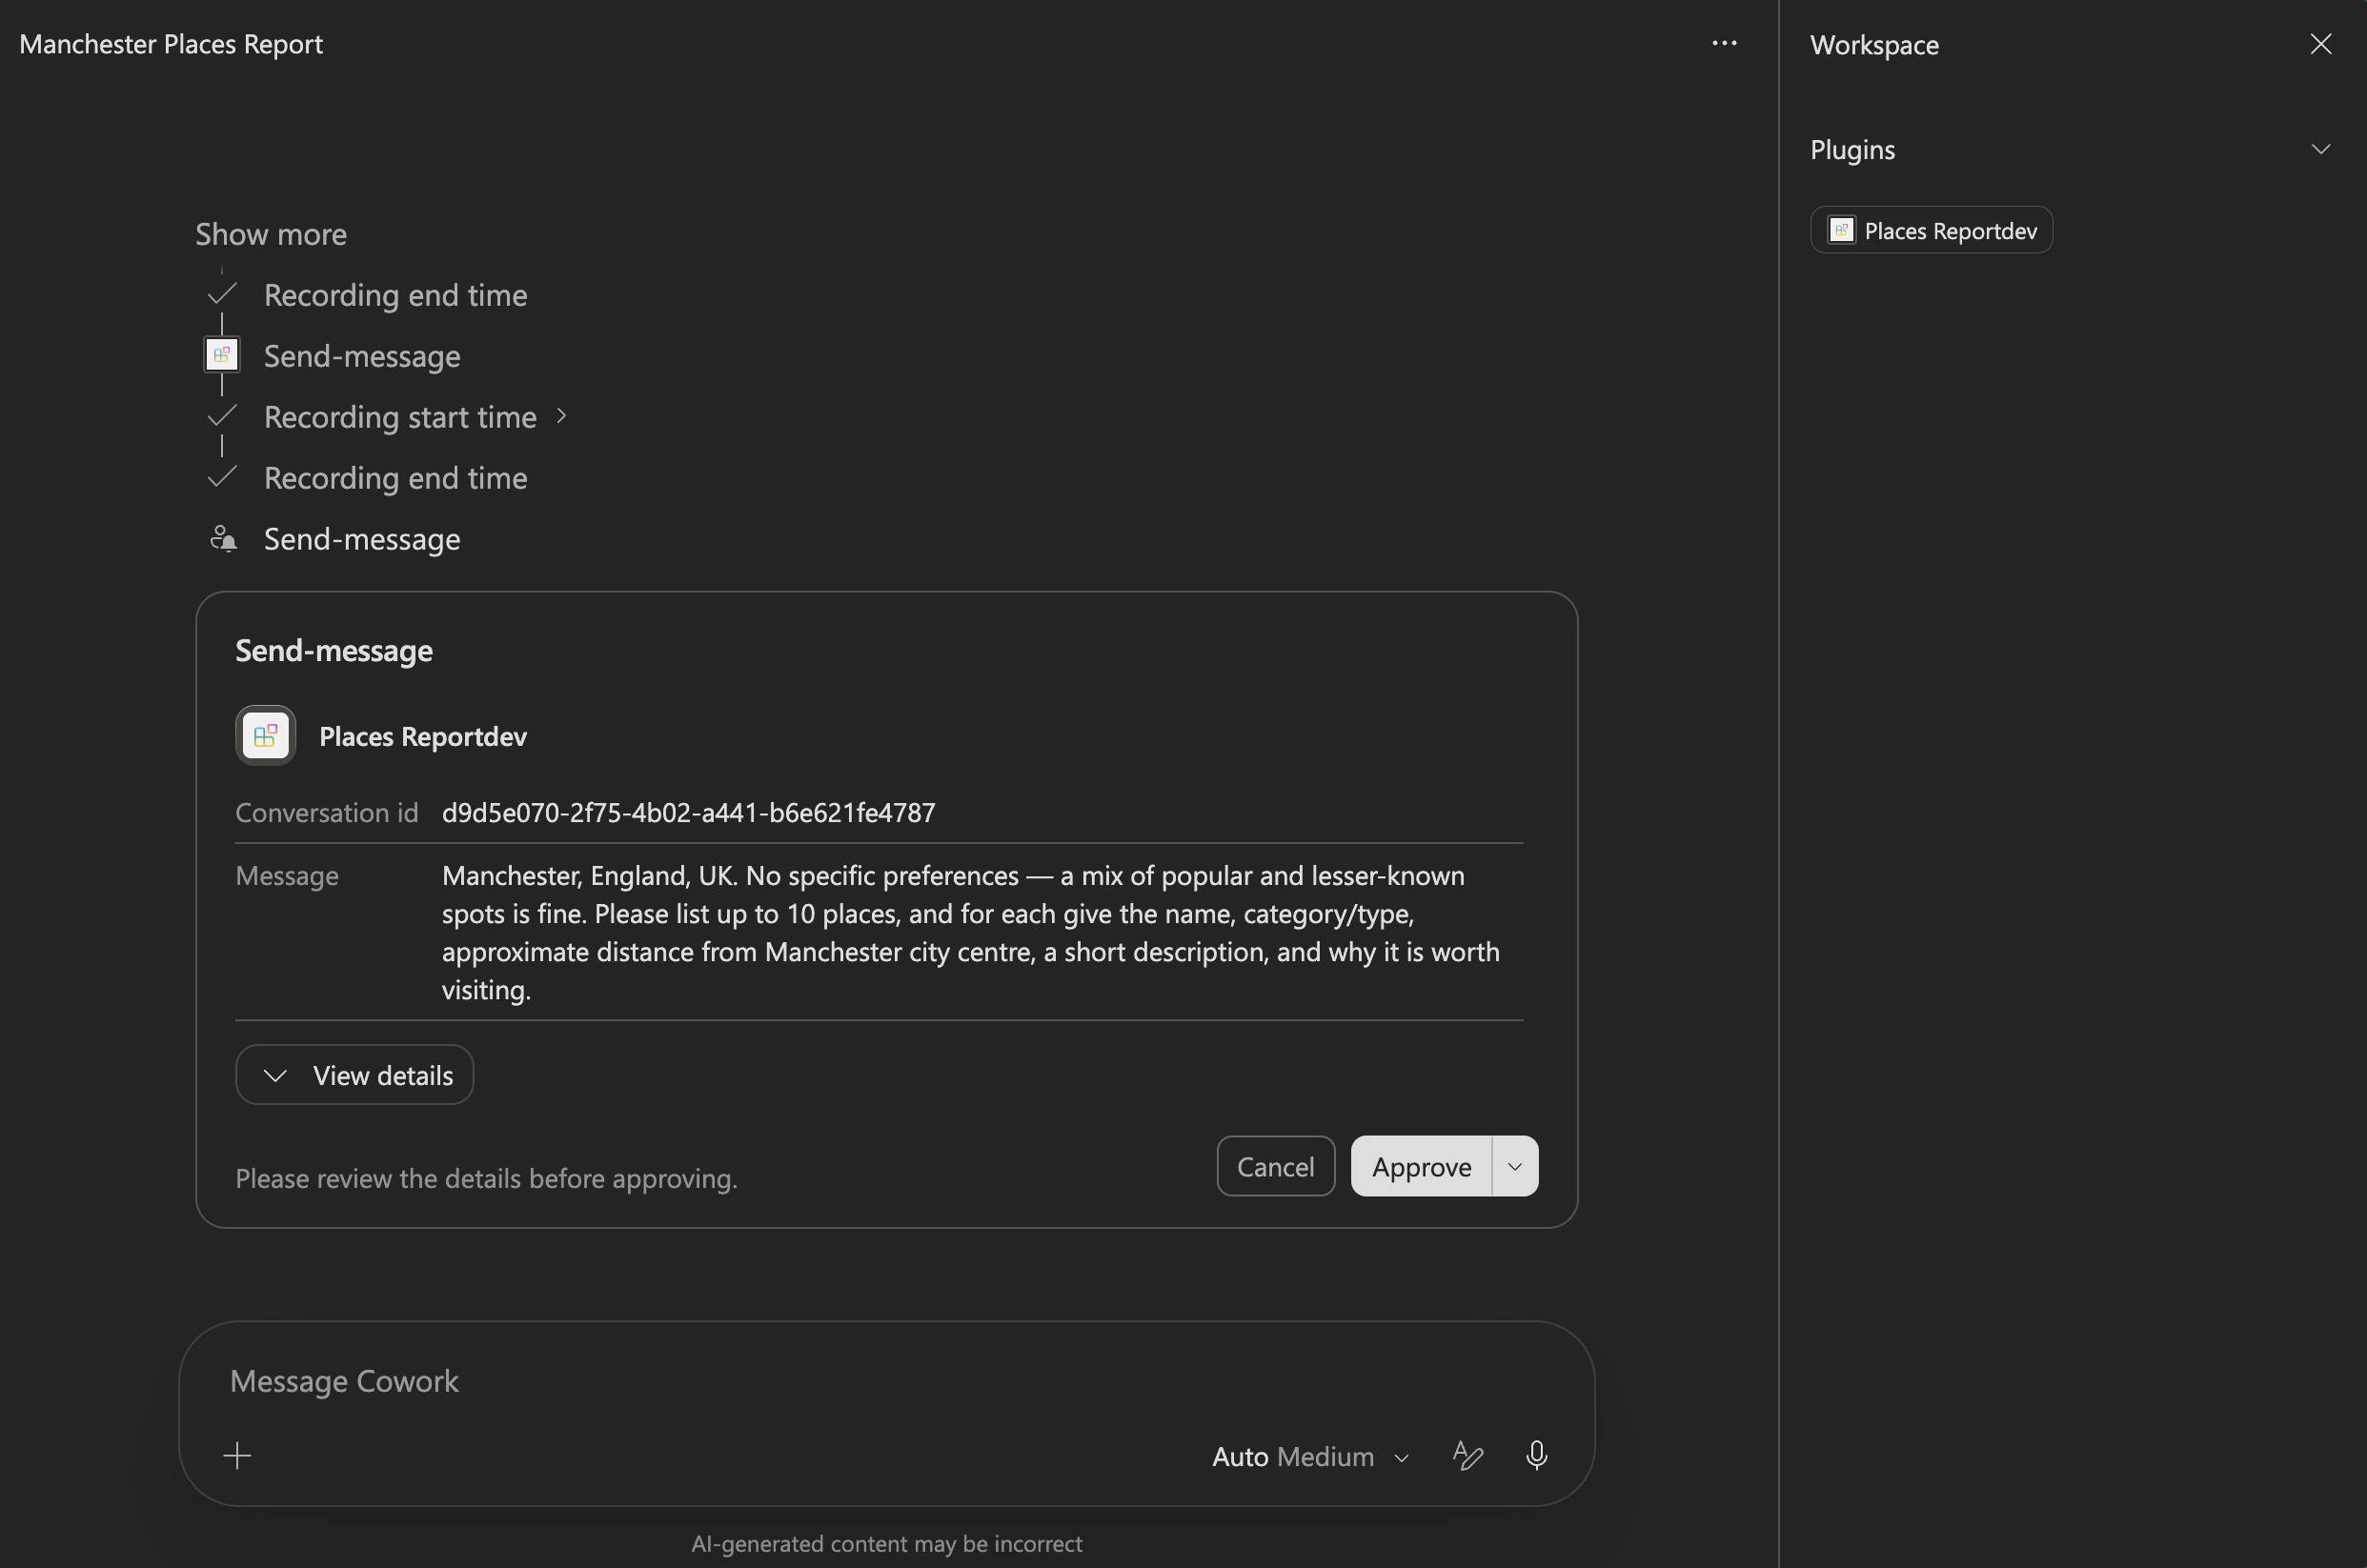
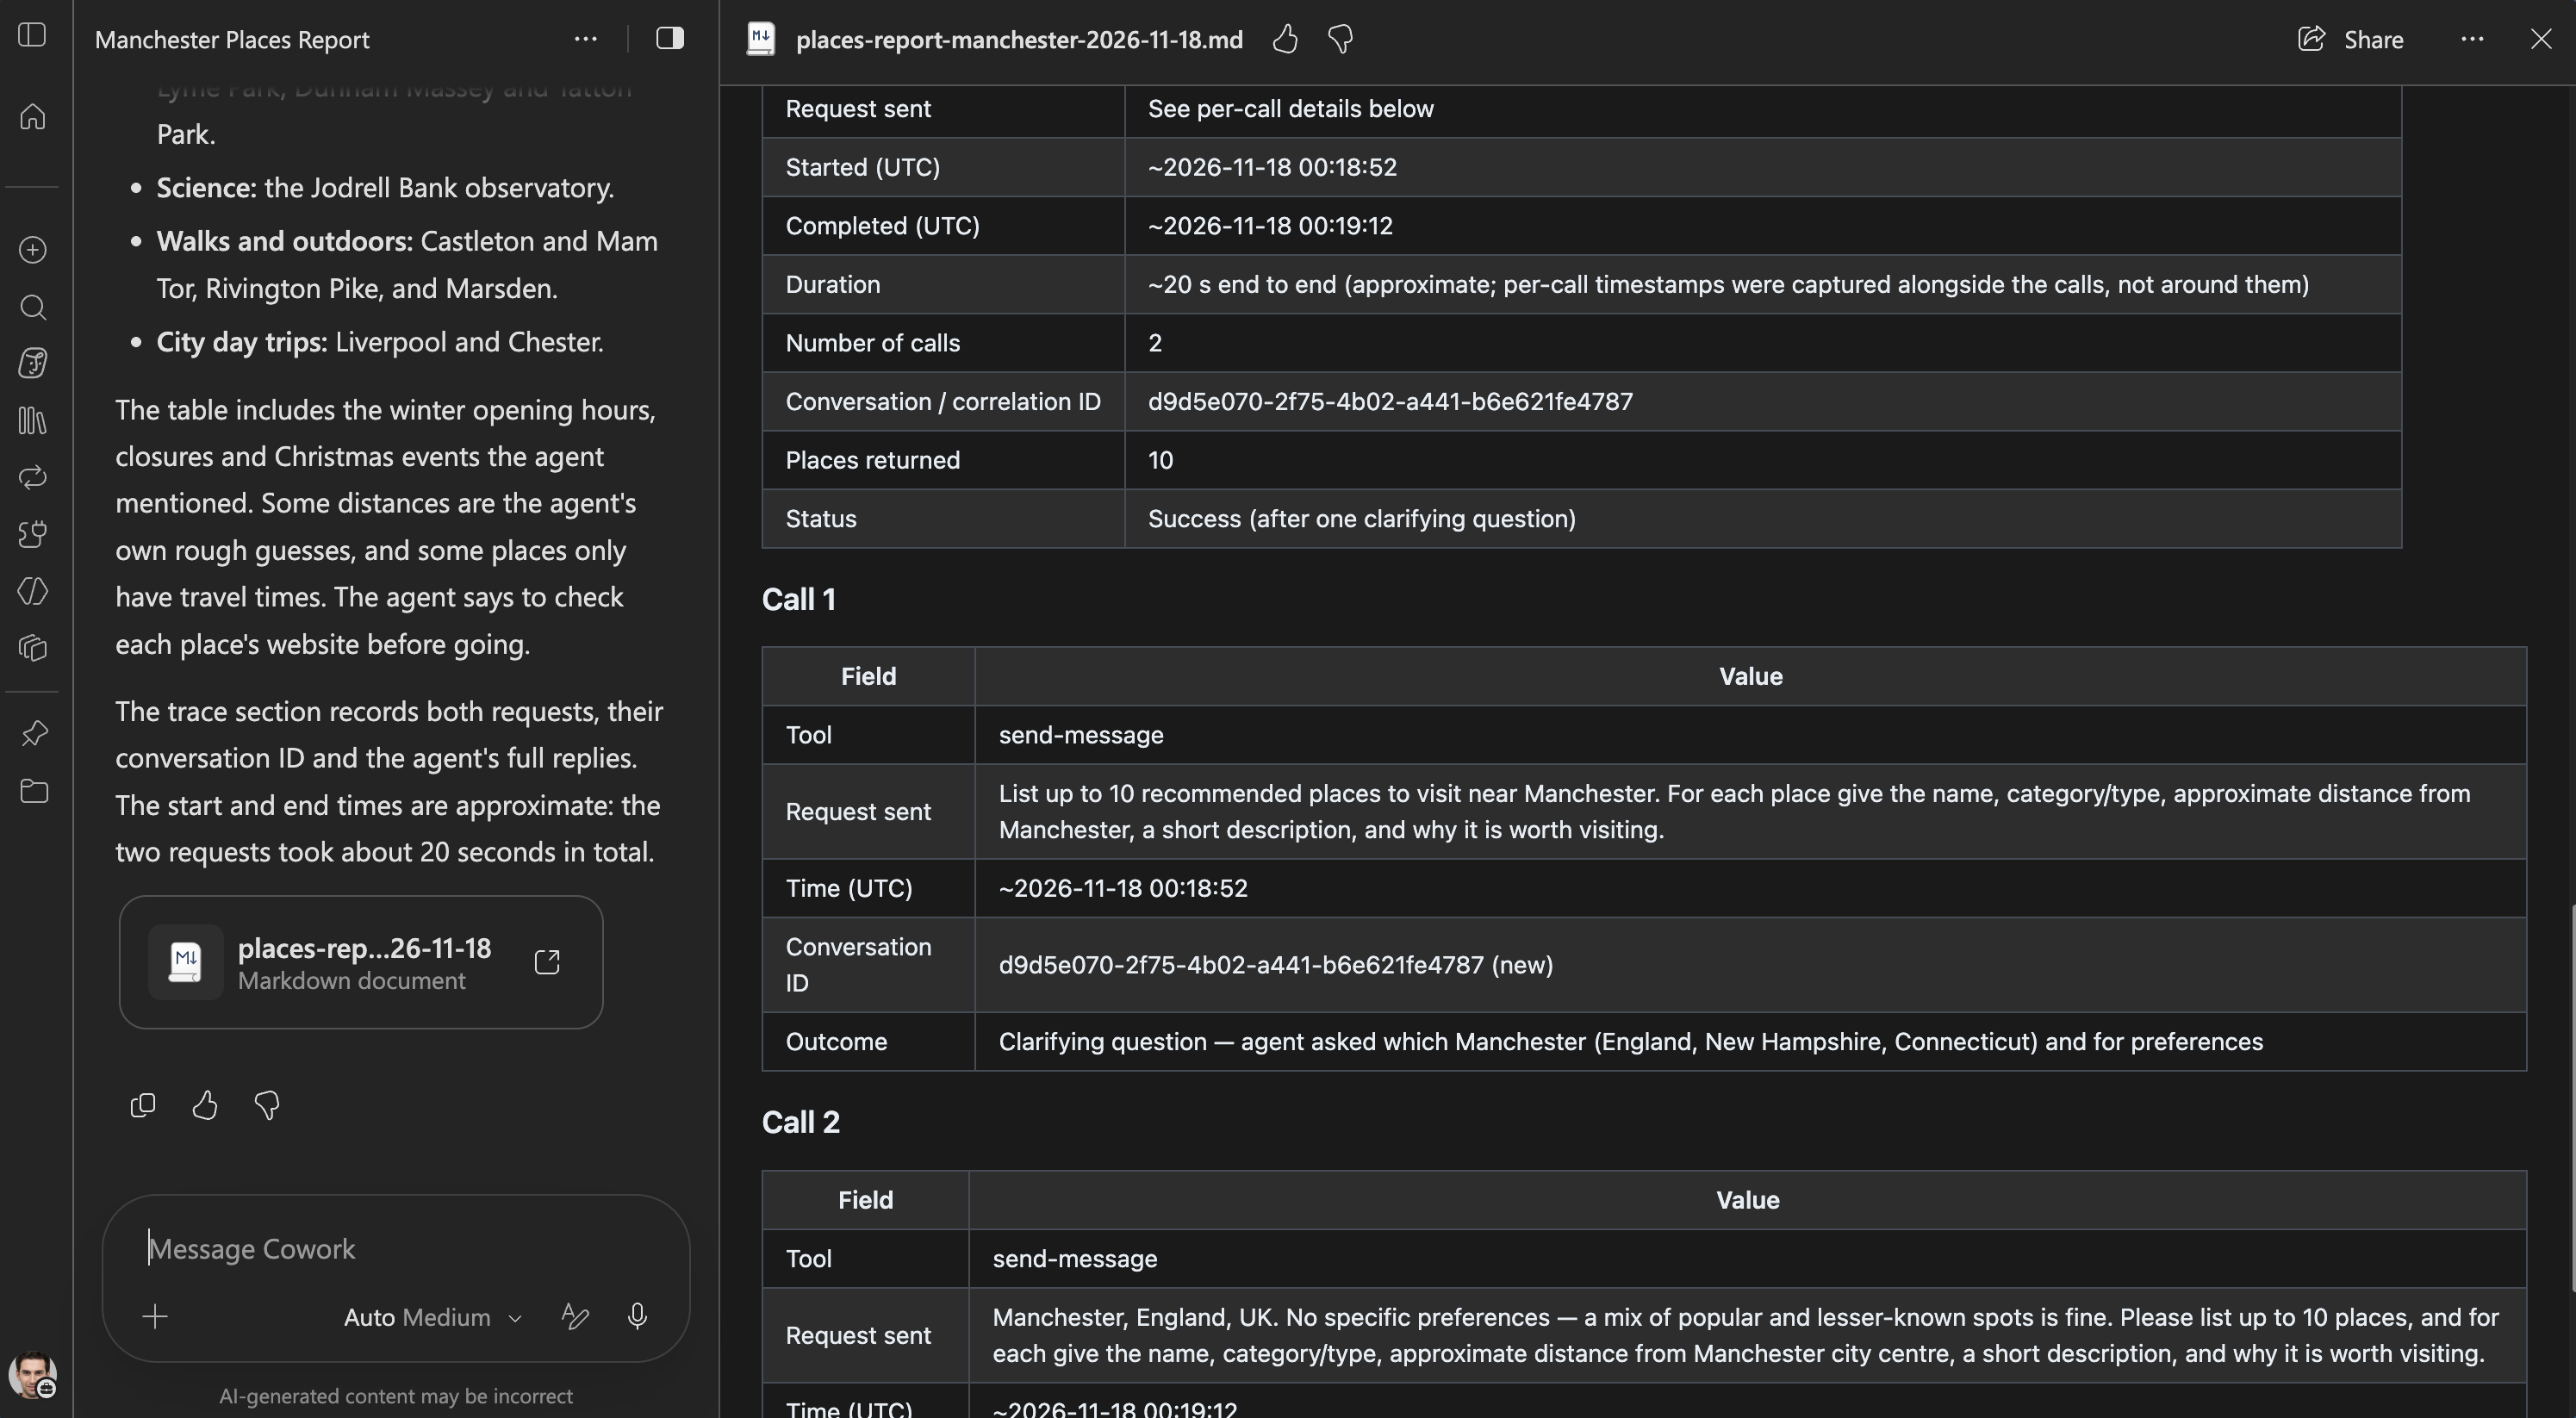
Cowork pauses for approval before making each agent request. Check the request details first; in this example, the interaction includes an initial request for recommendations and a follow-up with the confirmed location and requirements.
After the requests are approved, the skill returns a Markdown report with a table of recommended places, including each place’s type, distance, description, and why it may be worth visiting.
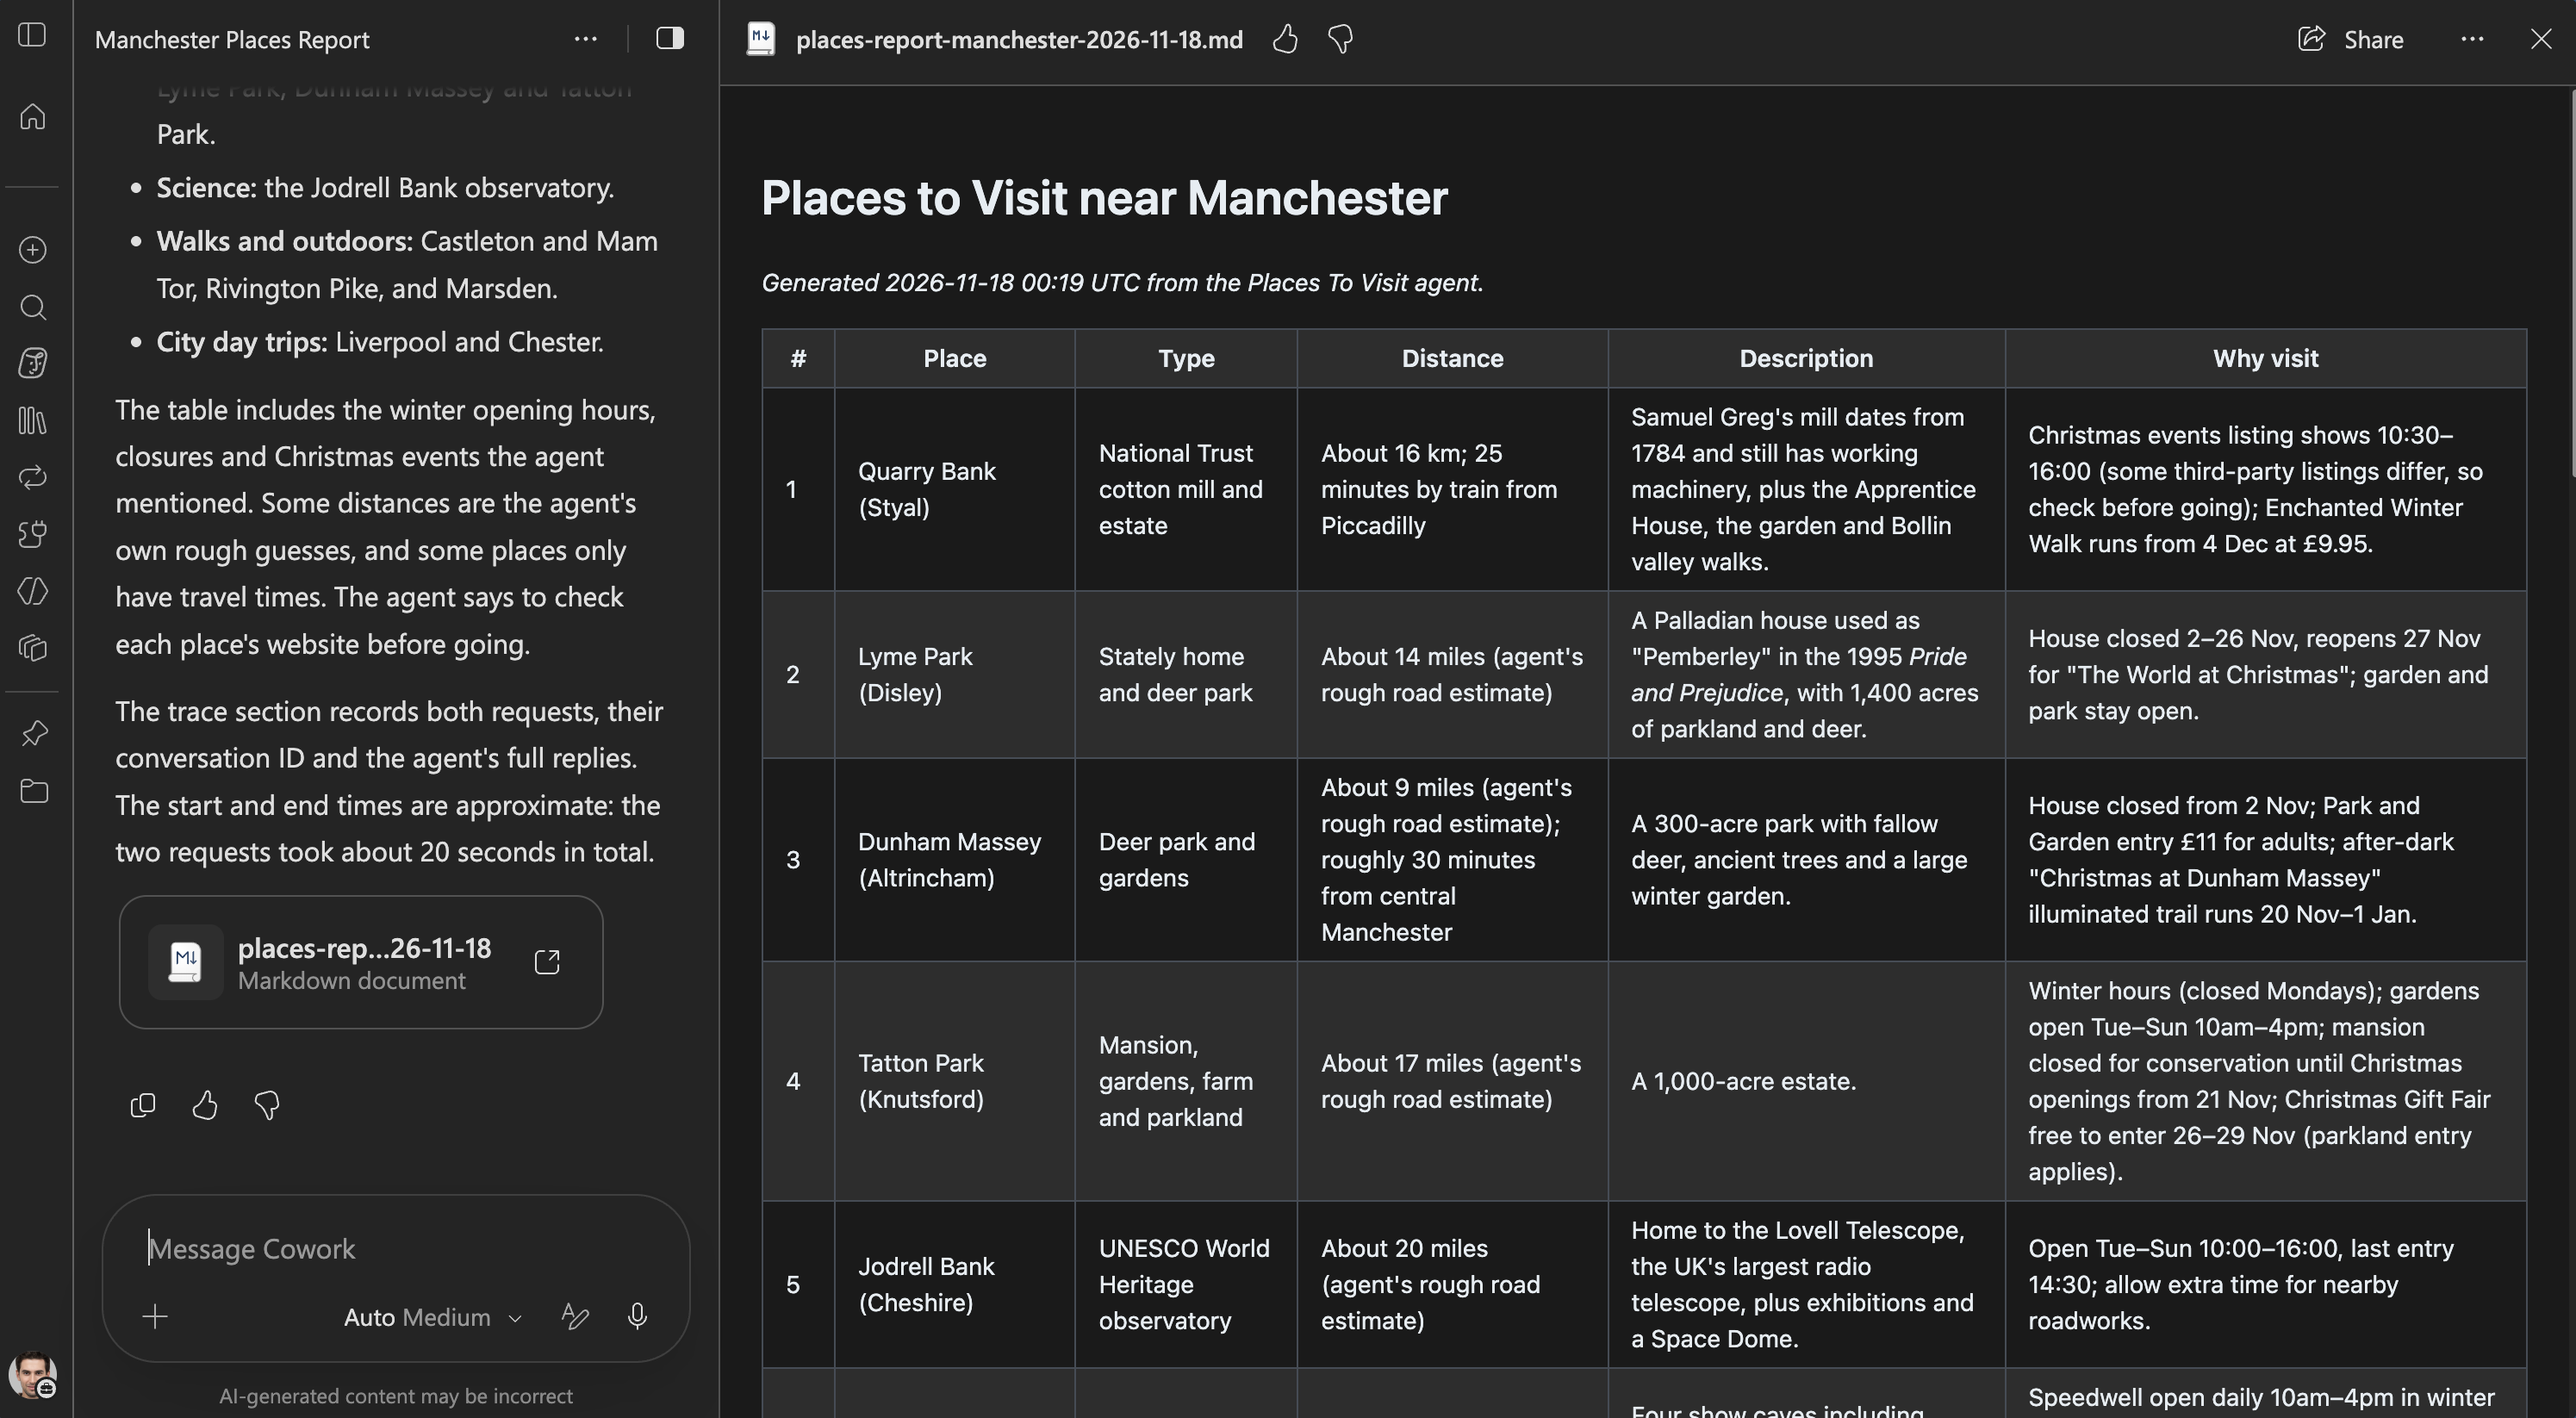
The report also includes a trace of the interaction, with details such as the calls made, timestamps, conversation ID, and outcome.
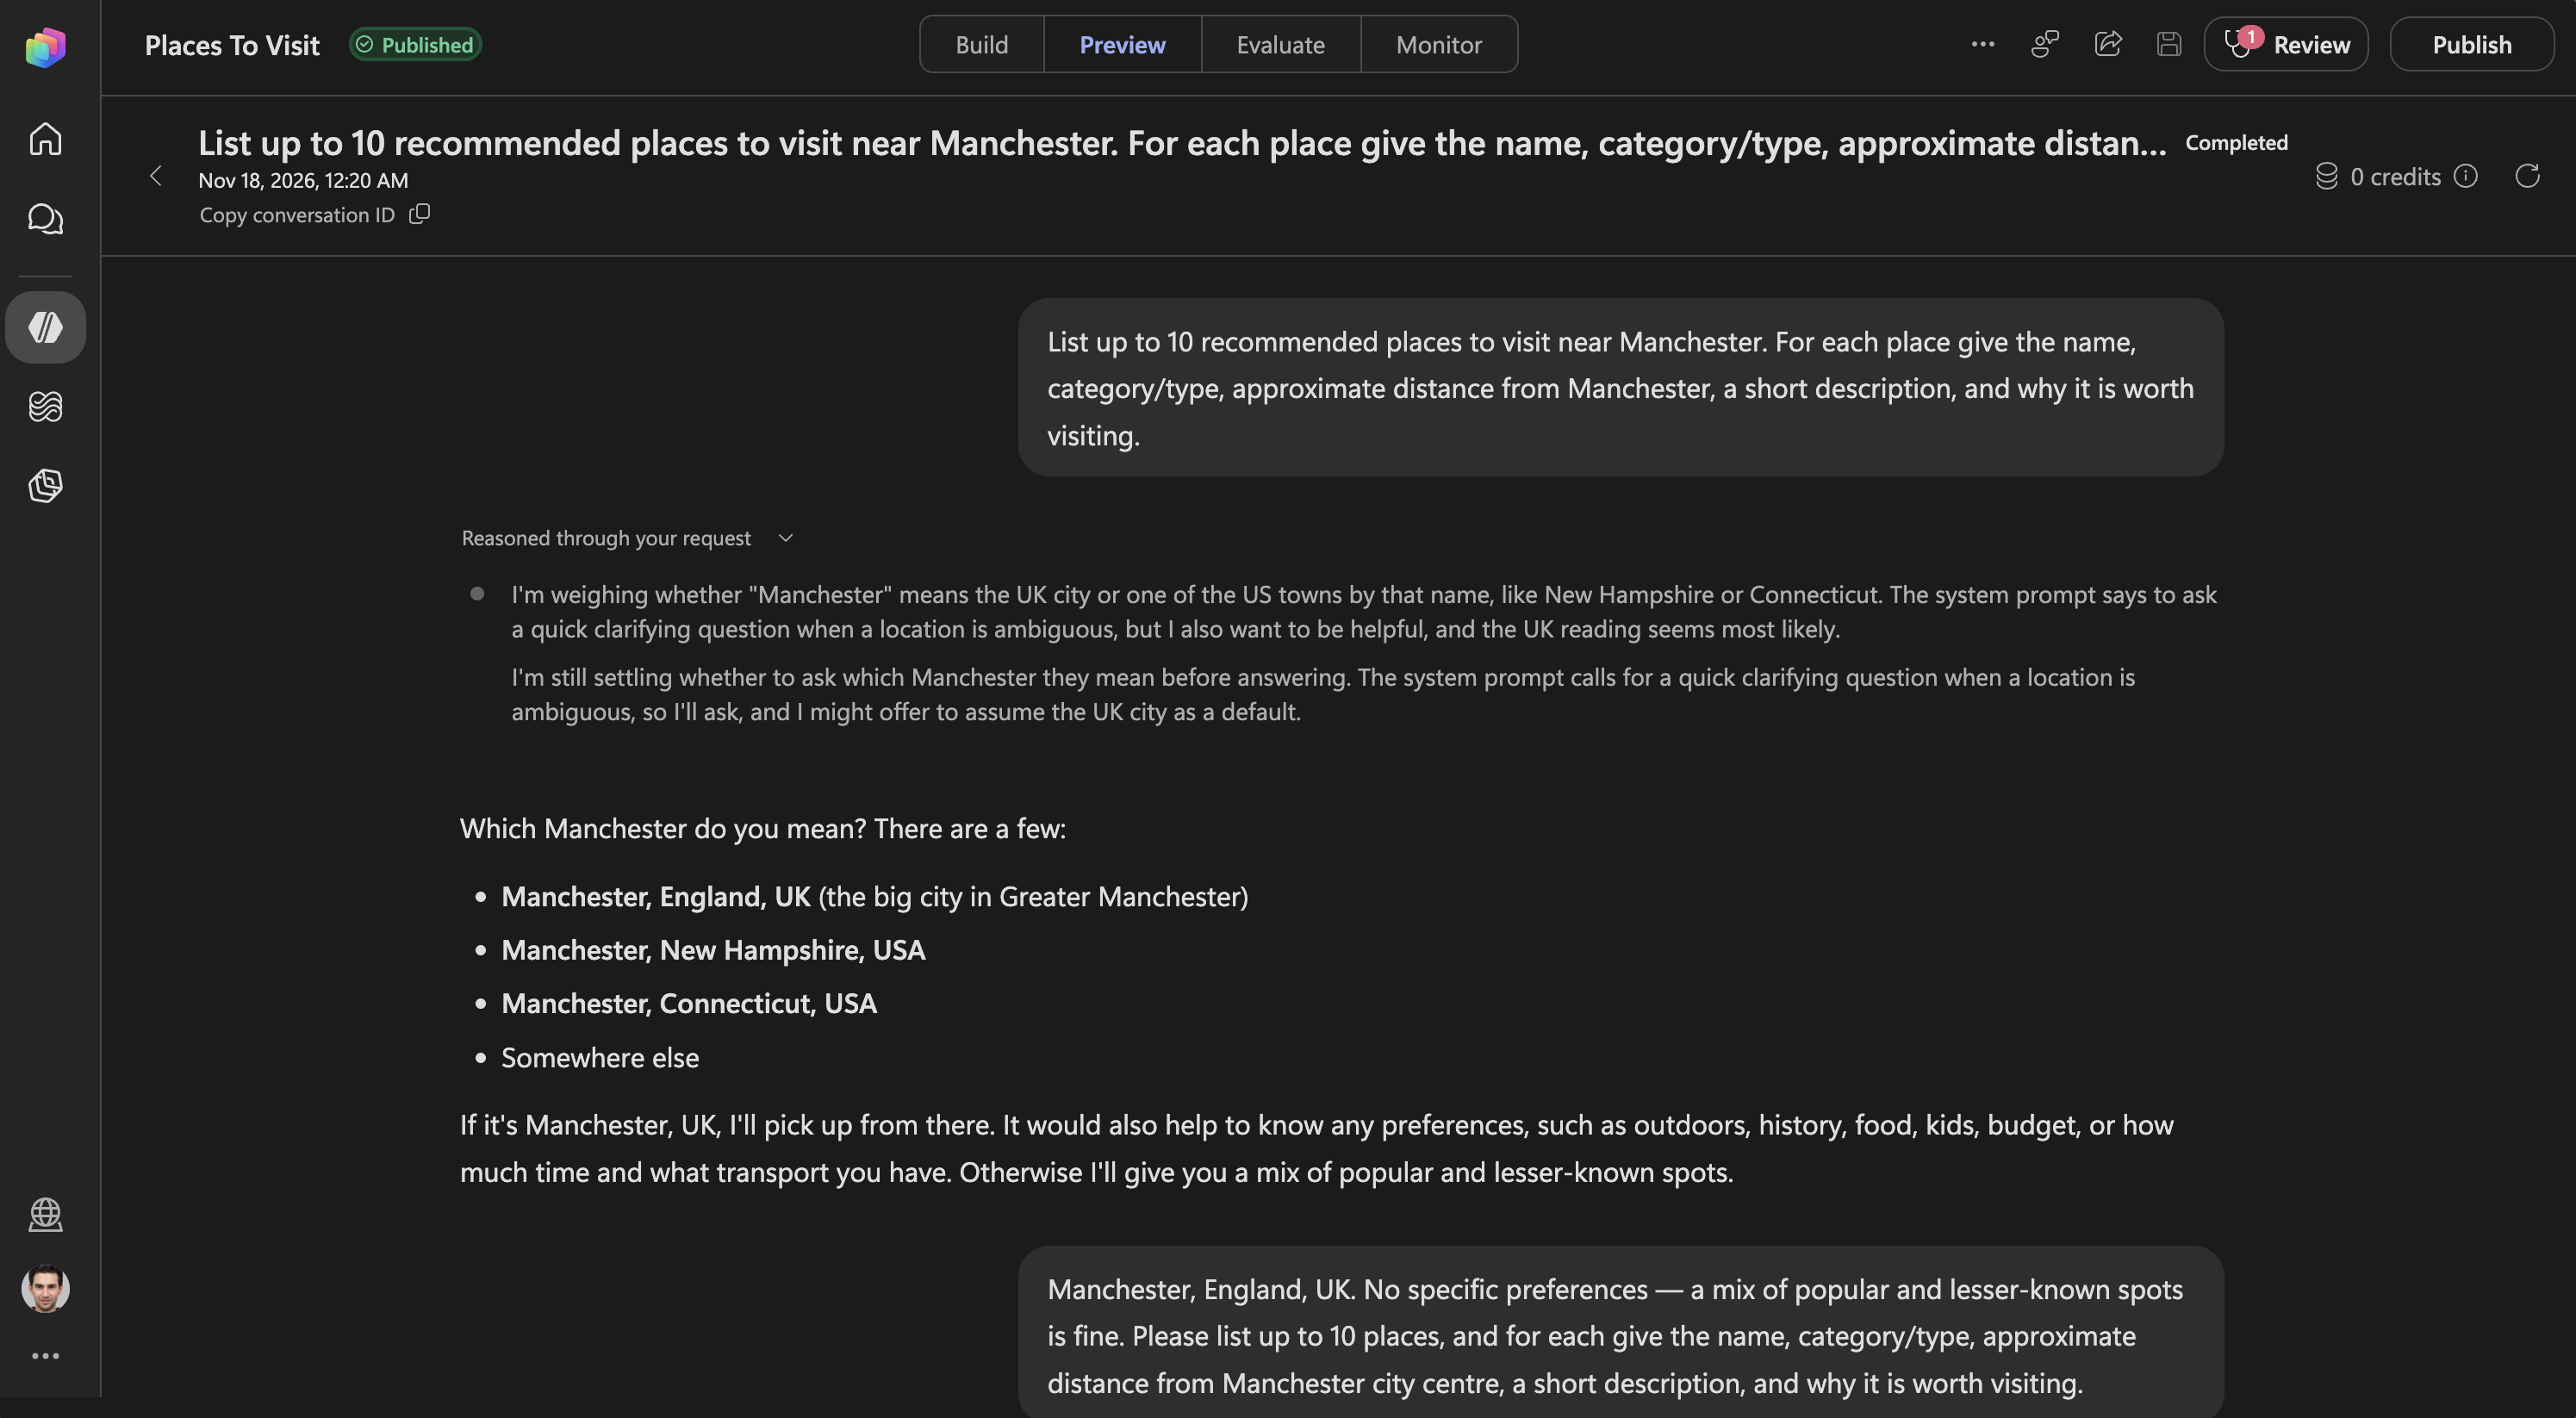
I checked the interaction history to see if Cowork actually called the agent, by looking at the agent directly in Copilot Studio Preview > Preview feature and looing at the history, you can see the Conversation ID in both cases match; and where it asks which Manchester the user is refering to before continuing.
COOL!!!
Conclusion
That’s the end-to-end connection learning I wanted to explore: expose a Copilot Studio agent over MCP, connect it to Cowork with a WIQD plugin, and generate a useful report with interaction details. Interesting, also using a few tools I am learning such as WIQD, which is SUPER cool when combined with GitHub Copilot CLI.
But to note: the pieces worked together, but they’re still in preview and expect either this becomes 1st party without all the wiring or a standard parttern. So expect some setup quirks and review each agent request before approving it.
What do you think? Could there be a better approach? Ping me on LinkedIn.
Resources
-
Copilot Studio MCP and A2A Features in Preview with Microsoft Copilot Harness - Connect clients to your agent with the Model Context Protocol (MCP) and Agent2Agent (A2A) channels (GitHub Copilot) (preview) - Microsoft Copilot Studio | Microsoft Learn
Enjoy!